
Using Your Own SSL Certificate with Chronicall/ACR
You'll need the following: your own domain, the SSL certificate, the private key, and access to your domain's DNS settings.
Steps
-
Enable SSL on the Chronicall/ACR server and restart the service.
- Ensure the auto-generated domain is working before moving on.
-
Navigate to Admin (System) > System Settings > Basic Settings > SSL Proxy Configuration.
-
Change "Configure SSL Proxy Manually" to True.
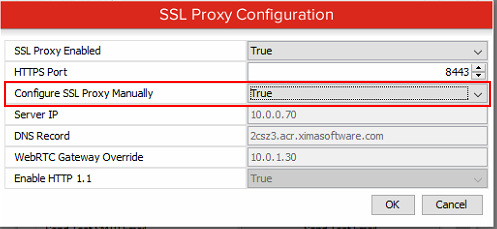
-
Edit the
settings.xmlfile found in the Chronicall/ACR path and change the<dns-record>field to your own domain name.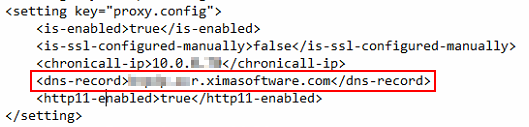
The
settings.xmlfile can usually be found:- Windows:
C:\Program Files (x86)\Xima Software\ChronicallC:\Program Files\ChronicallC:\Program Files\Avaya Call Reporting
- Linux:
/var/lib/Chronicall/var/lib/Avaya Call Reporting
- Windows:
-
In
<path>/Chronicall/nginx/conf, replacefullchain.pemandprivkey.pemwith your own certificate and private key.-
The certificate should be named
fullchain.pem. -
The private key should be named
privkey.pem.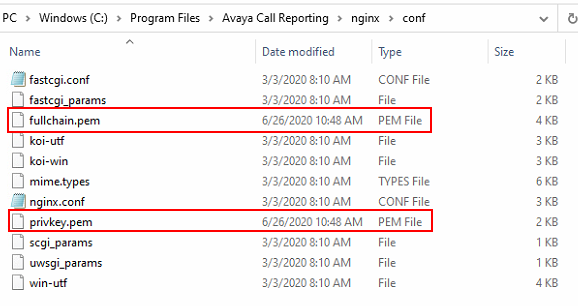
-
-
Edit the file
<path>/Chronicall/nginx/conf.d/chronicall.conf, replacing all references to the auto-generated domain name with your own domain name.-
Ensure the IP addresses in here are correct as well, although they should be correct if it was working in step 1.
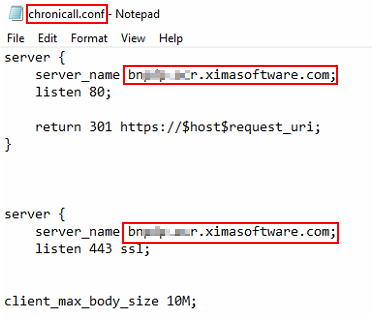
-
-
Update your domain's DNS settings so the domain resolves to the Chronicall IP address.
- For example, in Amazon AWS you'd edit Route 53.
NoteIf there are still problems after these steps, you may need to manually kill and then restart the nginx process. Kill nginx, then start it again in
<path>/Chronicall/nginx/using thenginx.exefile.
- You can test whether nginx is running by navigating in a browser to
http://localhost:80, or by checking your Windows processes.localhost:80will reveal a "Welcome to Nginx!" page.
- You may need to allow some time for DNS to propagate through the network.
- You can do an immediate test by changing your hosts file to resolve the domain name to the IP address.
Updated 3 months ago