Setting Up Chronicall to Use WebRTC
This provides information on how to configure WebRTC.
Overview
For Chronicall/ACR 4.0 we have added WebRTC (Real-Time Communication) support which only works over secure connections. This forces the browser to utilize https for all connections from the Contact Center Agent Client, which means that Chronicall, Multimedia, and Recording Library need to be accessible from the browser over https. The way we have chosen to accomplish this is by automatically deploying a reverse proxy which provides a secure single point of entry for all services of the solution. This initiative will allow us to provide our users with https support and working WebRTC.
Notes
- In order to configure WebRTC, Chronicall requires the use of both ports 80, *443 , and8443**. Please ensure that they are available on the server that Chronicall is installed on.
- If you have an IP 500 you must also have an Application Server in order to utilize Avayas WebRTC Gateway
- In order to make/receive calls through WebRTC, the CCAC URL must be allowed permission to your microphone in your browser's settings.
Configuration Steps
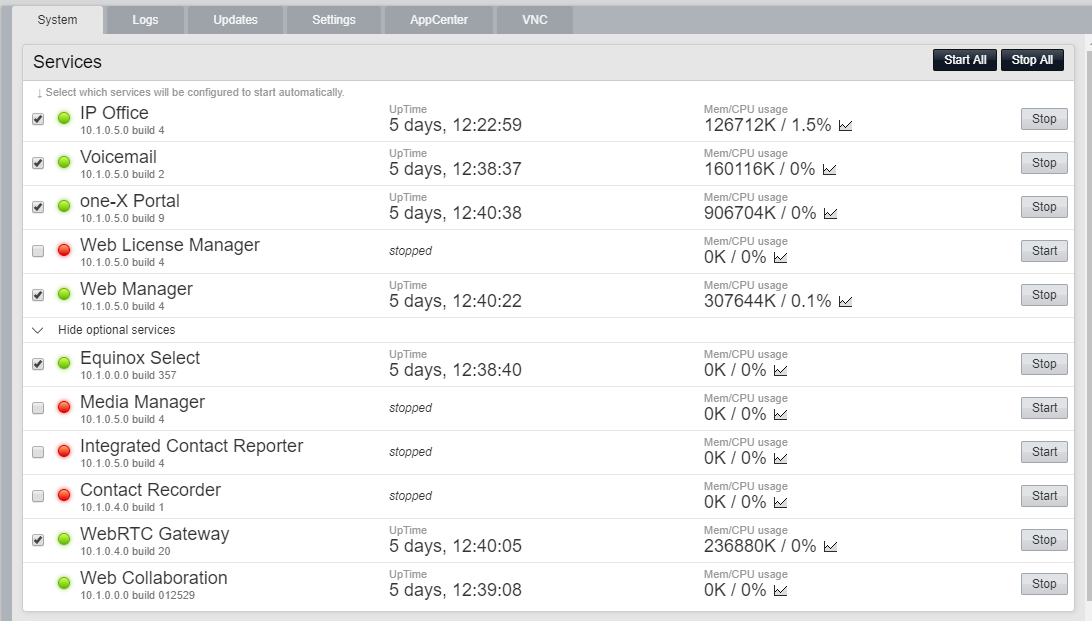
- The first thing you must do is configure your IP Office to be compatible with WebRTC. This only needs to be set up once. For this step, it’s important to know that your IP Office must have a One-X Portal and the agent must be a power agent. Avaya has a test page for WebRTC to verify that it has been enabled.
- Enable WebRTC mode. For this step, you must have Voice Licenses and you must be running Contact Center (Multimedia).
a. Open Chronicall
b. Go to Admin (System) > System Settings > Voice Seat
c. Under “Enable WebRTC,” select either “All agents use WebRTC” or “Agents can enable WebRTC”
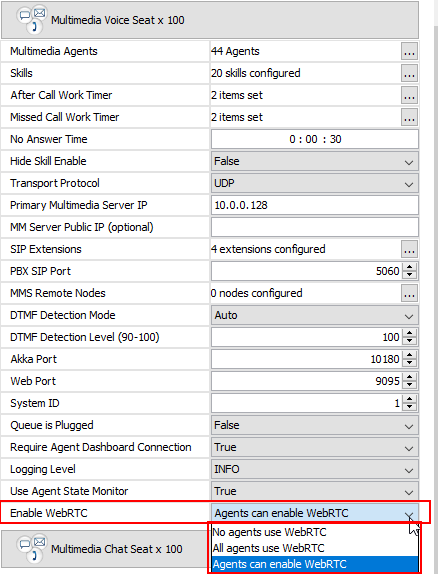
d. Select “Save”
3. Configure the SSL Proxy
a. Go to Admin (System) > System Settings > Basic Settings
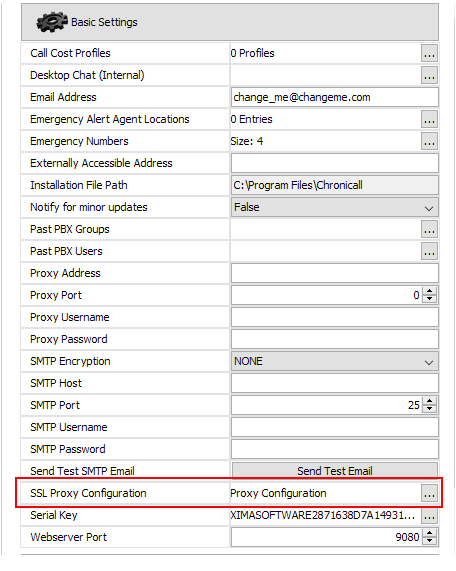
b. Click on the ellipses next to “SSL Proxy Configuration”
c. Switch “SSL Proxy Enabled” to “True”

d. Type in the Chronicall server’s IP address in the blank field

e. Copy the “DNS Record”

f. If you are using an Application Server with an IP 500, you would enter its IP address in the "WebRTC Gateway Override" setting
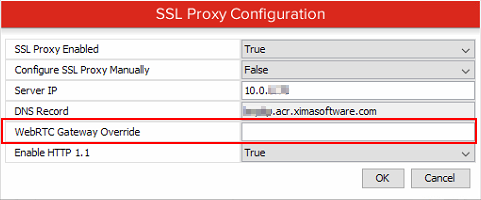
g. NOTE: In version 4.2.3 and above, you will see a new setting "Enable HTTP 1.1"
- If the customer is on IP Office 11.0.4.2 build 58 or higher, set to "True"
- If they are on IP Office 11.0.4.1 build 11 or older, set to "False"
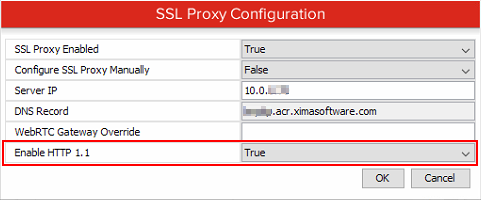
h. Hit “OK”
i. Hit “Save.” This may take up to five minutes to go into effect.
4. Using WebRTC
a. Open a compatible browser, preferably Chrome, though other Chromium browsers should work, i.e., Edge
- If you try to test without a working microphone and speakers, you will be unable to complete calls
b. Paste in the "DNS Record" URL that you copied earlier, followed by “/ccagent” - Example from above: w3zvwfvykfmn1ni124me.acr.ximasoftware.com/ccagent
- Once in effect, the “DNS Record” followed by “/ccagent” will be the new URL you will use to access the Contact Center Agent Client every time
c. When running in WebRTC mode, in order to log into your extension you must enter the phone password created in IP Office Manager User Settings

d. Hit enter, and you will now be taken to the Contact Center Agent Client
Note: Please reference our SSL/TLS troubleshooting guide if you run into issues.
Updated 3 months ago