Reason Codes
This provides information on the different types of reason codes and how to use them. Reason codes provide further visibility and opportunities to make sure that your agents are performing to the best of their abilities. This requires Realtime and Agent Dashboards licenses.
With Chronicall Agent Dashboards, you will be able to track the daily activity of your Agent Dashboards agents based on Reason Codes. This provides further visibility and opportunities to make sure that your agents are performing to the best of their abilities.
There are three styles of Reason Codes.
- Busy Reason Codes - Typically when an agent puts themselves on Do not Disturb, Release, or AUX (Depending on which phone system you are using)
- Group Logout Reason Codes - When an agent logs out of their Hunt/Work/Skill group for any reason
- Extension Logout Reason Codes - When an agent logs out of their extension
How to Use the Reason Codes
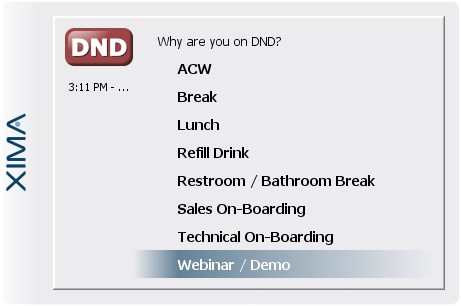
With the Agent Dashboards license, when an agent hits their specific "Busy" button, Group or Extension Logout code on their phone they will be asked to select a reason as to why they are performing this action.
A list will appear on the screen requiring them to make a selection.

They must make a selection from the list in order for the window to go away.
Once they've selected a reason, the manager can now run reports on this information.
Example: Agent Reason Code Trace
This report will show:
Feature Type: DND, Group/Extension Logout
Reason Code
Group
Start Time
End Time
Duration
Busy Codes
Busy Codes represent Do Not Disturb (Avaya IPO and Cisco), Release (ShoreTel), Aux Codes (Avaya CM)
Busy Code reasons can be whatever you would like, but they are typically represented by lesser activities.
These might consist of:
Lunch
Restroom
Coffee/Smoke Break
Refill Drink
To configure the Busy Codes
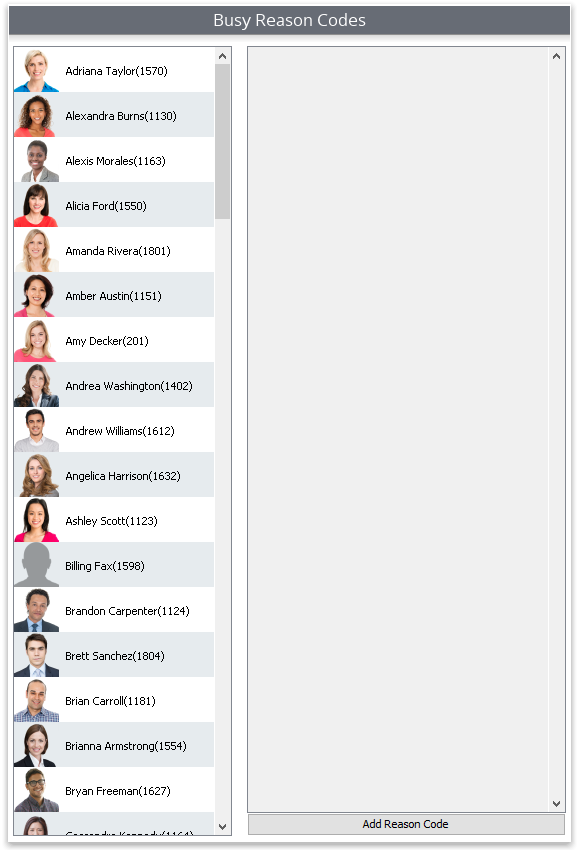
Go to the Agent Dashboards Configuration section on the Chronicall main page.
Select Busy Codes.
A list of agents will appear.

- At the bottom of the page, select the "Add Reason Code"
- Enter a Reason Code
- Hit "OK"
- Repeat for as many Busy Reason Codes as needed
Once you've created a Reason Code, you can now assign it to the desired agents.
Option One:
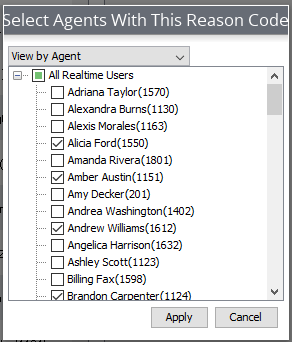
As you finish a Reason, select the "Blue" person image.

You will now see a list of agents' names.
- Check the boxes for those that you would like to assign the Reason Code.

- Hit "Apply."
- Repeat with each Reason Code.
Option Two:
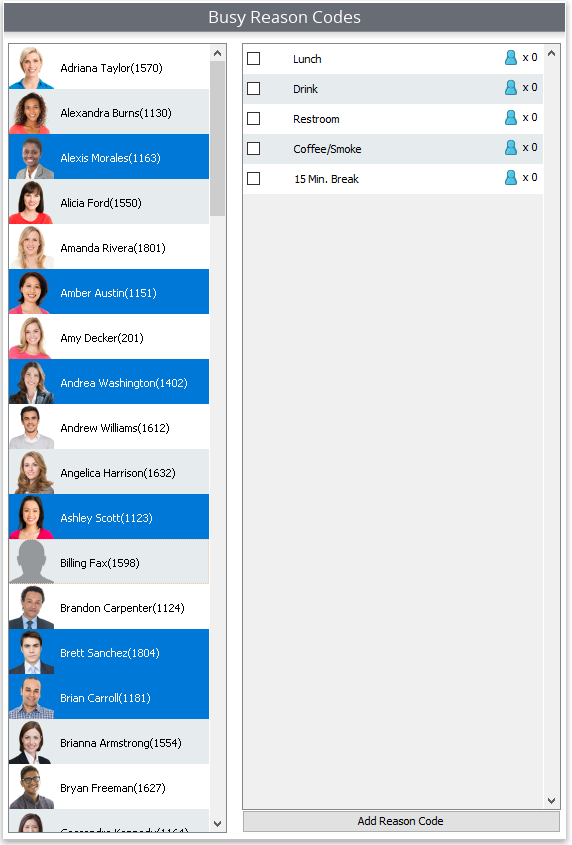
Once you have created your list of Reason Codes, you can now assign them to the desired agents.
On the left hand side of the menu, hold the "Ctrl" button down on your keyboard and select the desired agents.

Once you have them selected, you can now select the individual check boxes for each of the desired Reason Codes to assign.
Updated 3 months ago