Manage Recording Rules
This provides information on how to set up and manage recording rules. This is specific to VRTX, Port Mirrors, DevLink3 Active Recording, DevLink3 Active Recording, and Cisco Built-In Bridge.
When using the Xima VRTX (Voice Recording Technology by Xima), Port Mirror, DevLink3 Active Recording, or Chronicall Recording Library on Cisco, you will have the option to set your recording rules within Chronicall.
- When logged in the Admin UI of the Chronicall main menu, select Admin (System) > System Settings > Recording Library > Recording Rules.
- Click the ellipsis tool associated with the Recording Rules metric.
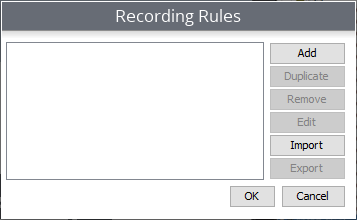
- A new window will appear. Click Add to add a new recording rule.
A new window will appear with different fields of information for you to fill out.
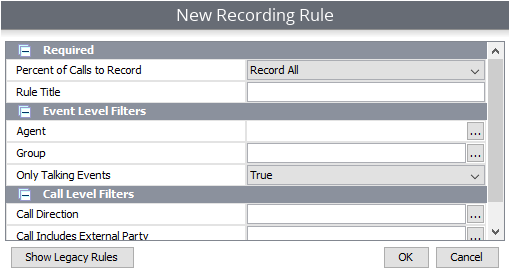
Percent of Calls to Record: This allows you to determine what percentage of the call you would like recorded
Rule Title: This is the name of the Recording Rule you create
Agent: This allows you to determine which agents you would like recorded
Group: This allows you to determine which groups you would like recorded
Only Talking Events: This allows you to determine whether you only want to record talking events or if you want to record other events as well
Call Direction: This allows you to determine if you want all call directions recorded or only certain call directions recorded such as internal, outbound, or inbound
Call Includes External Party: This allows you to determine if the calls you want to record include specific external parties
Dialed Number: This allows you to determine if the calls you want to record include specific dialed numbers
- Once you get to the New Recording Rule window, you have two choices.
a. Fill out the fields of information provided to build your custom Recording Rule. Click OK when done.
b. Click the Show Legacy Rules button located in the bottom left corner to select from our Recording Rule templates.
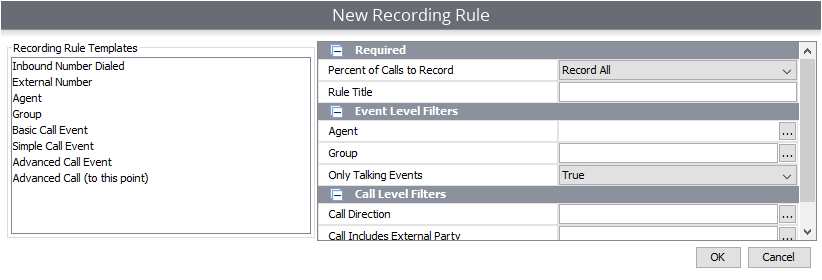
- If you select one of these templates, simply fill out the required information and click OK.
Below is a list of definitions of all the Recording Rules templates we offer:
Inbound Number Dialed: Records the number that a client will dial to get into your phone system
External Number: Records numbers that are not a part of your phone system (Inbound and Outbound Calls)
Agent: Records the desired agents/extensions (Inbound and Outbound Calls)
Group: Records the desired Hunt/Work groups (Inbound and Outbound Calls)
Basic Call Event: Allows you to select Groups/Agents, but also allows you to select call direction
Advanced Call Event: Allows for very specific recording of calls with defined events (Similar to setting Cradle to Grave filters)
Advanced Call (To this point): Allows for very specific recording of calls with events up to a certain point (i.e., record this agent until they transfer the call)
- Once you have filled out the field of information for your new Recording Rule and clicked OK, click Save and feel free to exit or create another Recording Rule until you're satisfied.
Example 1 - Recording Agents/Extensions
For this article, let's choose the Agent option as the first example:
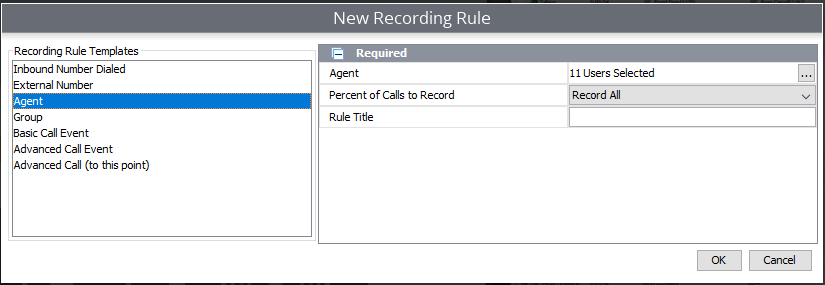
- To the right, select the ellipses, then select the Agents/Extensions that you would like to record.
- From the dropdown, select the percent of calls that you would like recorded.
- Name your Rule, then hit "OK."
Example 2 - Recording Specific External Phone Numbers
It is frequently requested to record specific external numbers. An external number is a phone number that exists outside of the phone system. (i.e., it is a number that does not have an extension in the phone system.)
To record an external number:
- Open the Manage Recording Rules section and select "Add."
- Locate "External Number" and select it.
- Select the ellipses next to "External Number."
- In the new window, select "Include Any" and hit "Add."
- In the drop-down, select the option that best fits your criteria, then type in the number of interest. Please note that when entering specific numbers, the best practice is to select Contains in the drop-down.
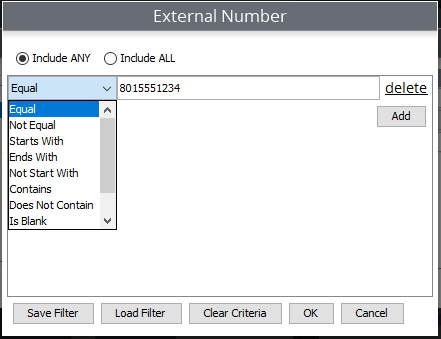
- Repeat for any additional numbers of interest.
Note: When entering the number, for better results omit any spaces, parentheses, and dashes.
Updated 3 months ago