Using Pre-Built Wallboards - Java
Realtime Wallboards allow you to see the activity of your groups and agents in Realtime, without a refresh rate. This is done by a series of widgets that you can customize to reflect your specific needs. The wallboards provide you the option to build your own wallboard from the ground up, or you can use a pre-built wallboard template provided to you upon accessing the wallboards. This requires Realtime licenses. This article provides information on using the wallboard templates in the Java version of Chronicall.
Pre-built Wallboard Templates
Pre-built wallboard templates save you time and effort by providing an existing stylish wallboard with pre-set widgets and values.
To access the Pre-built templates:
Select "Realtime Stats" under the Realtime Displays section on the Chronicall main page
Upon accessing Realtime Stats for the first time, a window will appear with several Realtime Wallboard template options.
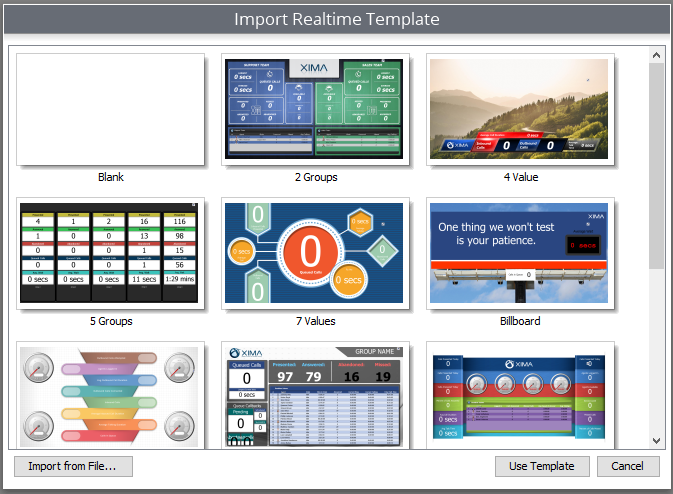
- Once you select the desired wallboard template, hit "Use Template"
- You may then be asked to select Groups and/or Agents. Select the desired Groups/Agents and hit "OK"
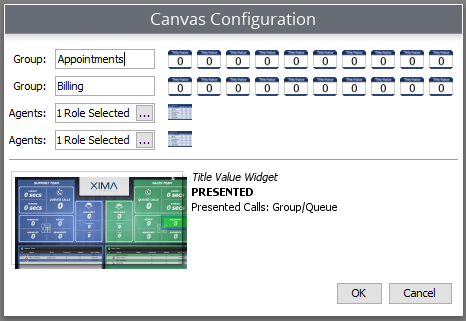
Note: You will be able to see the location and what each of the widgets will be covering by hovering over each one on the Canvas Configuration. (As seen above)
Your completed wallboard will now be displayed.
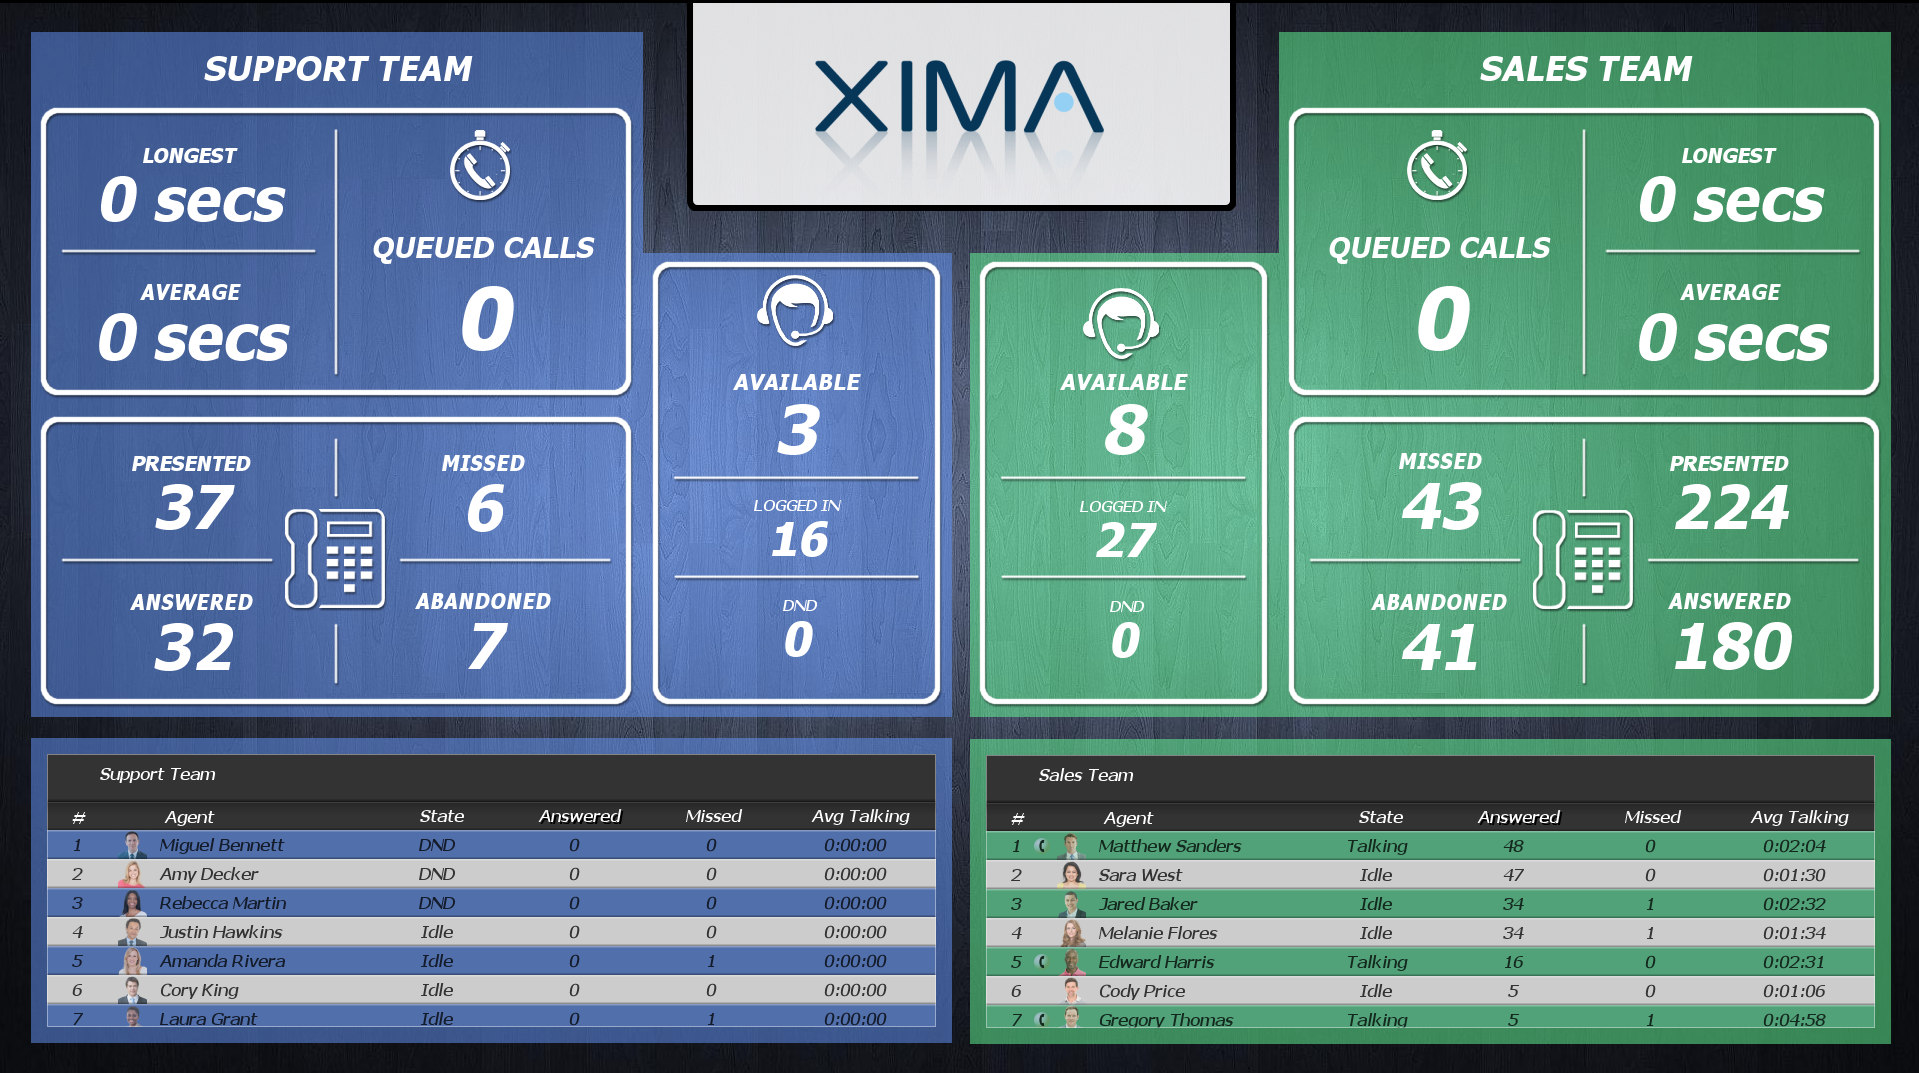
The pre-built template will take the liberty of filling in each pre-built value. If you are satisfied with information, hit the "save" button (floppy disk icon) in the top left hand corner of the screen.
Altering the Pre-built Template
If you are not satisfied with the values/widgets found on the pre-built template you are free to make any changes that you would like. To do so:
- Select the widget that you would like to change
- Double click on the widget and the properties window will appear
- Select the ellipses tool in the "Value - Click to define" window
Realtime Values
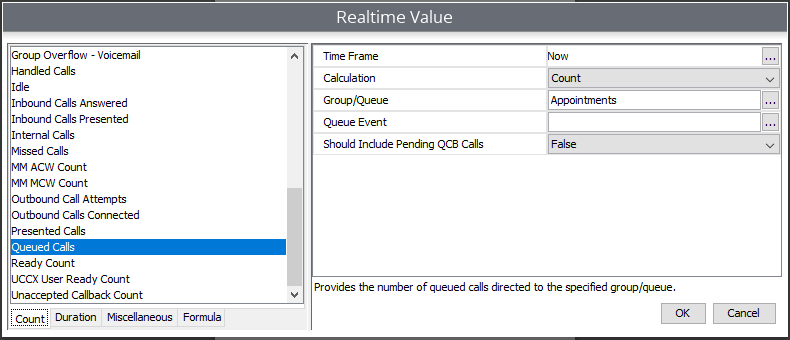
A window will now appear that will provide the Realtime value options. You will have four folders to choose from:
- Count (see Realtime Count Definitions)
- Duration (see Realtime Duration Definitions)
- Miscellaneous (see Realtime Miscellaneous Definitions)
- Formula
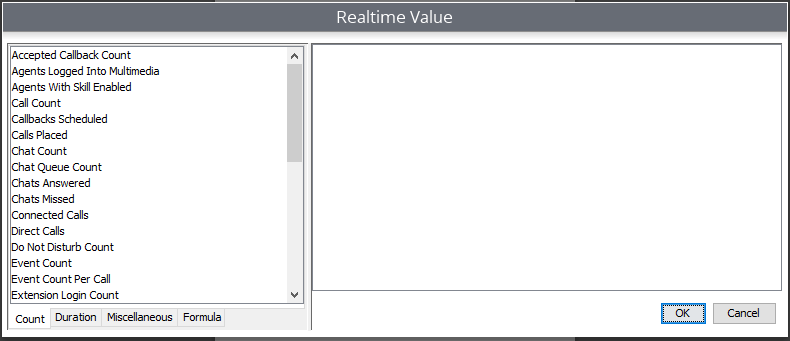
From this window, you can select the Realtime values that best fit your needs. Once you find the value under the list of options, select the value and the value parameters will appear on the left of the window.
- Answer the appropriate parameters, and hit "OK."
- Hit "Apply"
Your changes will then be made. You can now save the wallboard and will be ready to display.
Displaying the Wallboard
Once you have finished your wallboard, you can now display it in your office. If you would like to display the wallboard full-screen through a TV, projector, or monitor, connect the computer displaying Chronicall to your preferred method of display with an HDMI cord.
Once the computer is connected, in the upper right hand corner of the wallboard you will find the "Fullscreen" icon. Select it, and your wallboard will be displayed full-screen.
Updated 3 months ago