System Settings (Avaya IP Office)
This provides information on how to access System Settings and make changes to System Settings as well.
With Administrator access (see Agent Accounts) you will be able make System Settings changes.
To access the System Settings:
Select the Admin (System) section on the Chronicall main menu and hit "System Settings."
The System Settings menu will now appear.
Depending on the licenses purchased, different categories will appear.
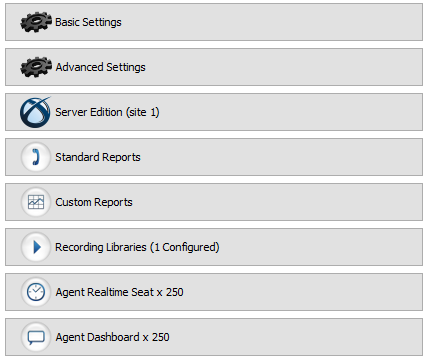
Basic Settings
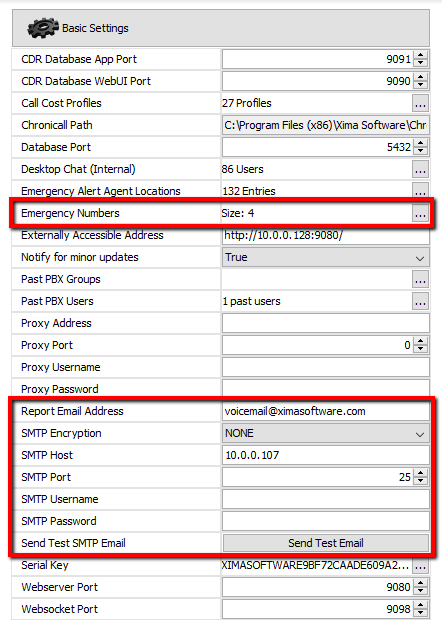
In the Basic Settings section of Chronicall there are two sections of interest.
Emergency Numbers: This section is associated with the Emergency Call Notification. In order for the Emergency Call notification to work, Chronicall needs to know what is considered an "emergency number". There are typically four by default. 311, 911, 9311, and 9911. These, of course, can be deleted if desired.
You can also add any number that you consider to be an alert number.
SMTP Settings: One of the many great features of Chronicall provides the option to have reports emailed directly to selected individuals. (See Schedule Report)
In order for this to function properly, it will be necessary to set up the SMTP settings. (See SMTP Setup)
Server Edition (Avaya IP Office)

Within the Server Edition section you will be able to configure your Avaya IP Office connections.
Licensed Agents: Within Licensed Agents, you can select or deselect the desired agents to be reported on within Chronicall. (All agents are selected by default)
Note: If you deselect agents, they will still show up in Cradle to Grave as "Unlicensed". This means their calls will still be reported on, but you will not know which "Unlicensed" agents are involved with which calls.
Site Name: This provides the option to name the main site where Chronicall is installed. This is in particular beneficial if the organization has multiple sites/locations. Other sites will be named in the IP Office Connections section (discussed below).
Simultaneous Ringing Groups: If a Hunt Group has been set as a Simultaneous Ringing Group (Collective Ringing Group) in the IP Office Manager, then it will be necessary to set that group as a Simultaneous Ringing Group within Chronicall as well.
If a call goes to a group that has been added to the Simultaneous Ringing Groups, a Ringing event will be assigned to the group rather than an agent. This will provide consistency with reporting.
IP Office Connections (v. 10 and newer)
To configure the IP Office connections:
Under System Settings, select "Server Edition" tab

Select "IP Office Connections"
A window will appear. Select the ellipses tool to the right next to the first line.
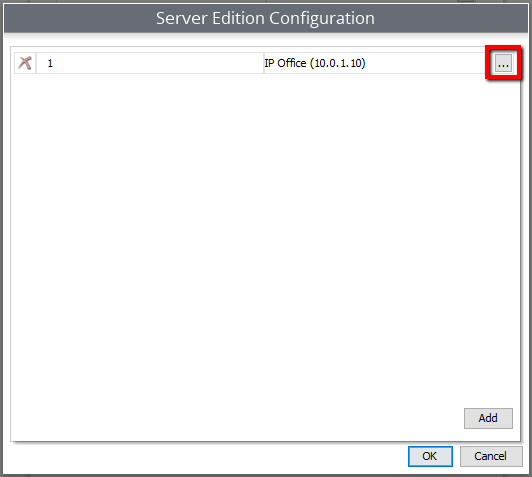
This will open the IP Office Connection properties.
Fill in the required criteria.
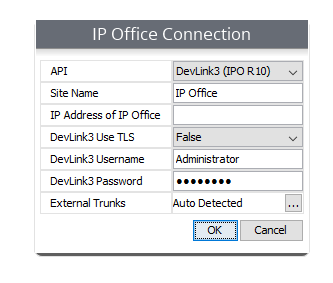
- API: For versions of IP Office 10.0 and newer, switch to DevLink3 (IP0 R10)
- Site Name: It is recommended that site name be changed, in particular if installed on a Small Community Network, or Server Edition. When an alert (seeAlerts and Triggers) is sent for logging issues, disk space issues, etc, it will be able to state at which site the issue took place.
- IP Address of IP Office: Enter the IP Address of the IP Office in question
- DevLink3 Use TLS: If using TLS, set to "True". (This requires a certificate of at least medium security loaded into IP Office.) Otherwise, leave as "False"
- DevLink3 Username: Enter the Service Agent with DevLink3 rights.
- DevLink3 Password: Enter the password of the Service Agent.
- External Trunks: Chronicall should auto detect your trunks by default. If trunks are not pulling up automatically, they can be added manually here.
Standard Reports

The Standard Reports section is usually set as default, however, changes may be made if desired.
- Paper Size: Default size is 8.5 x 11, but other options are available and may be selected
- First Day of Week: Can be set as either Sunday or Monday
- Timestamp Format: The timestamp is found at the bottom of the report when it is run. Hour of Day is default, but can be changed to reflect preferred timestamp
Recording Libraries
Recording Library can be configured under the Recording Libraries section.
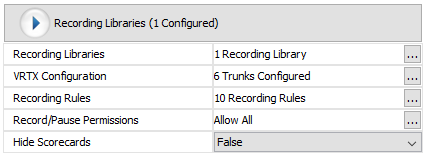
Recording Libraries: Within this section, you can configure the recording library.
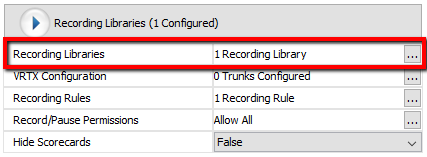
There are two main areas that will need to be configured in the "Recording Libraries" section.
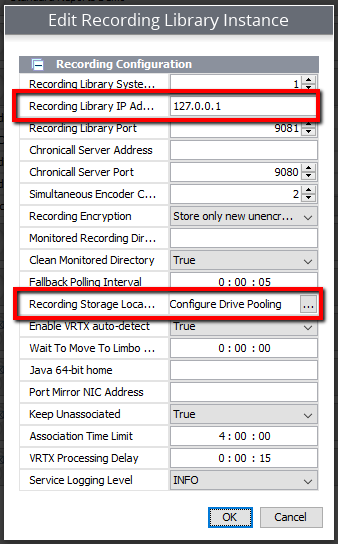
Recording Library IP Address: Chronicall Recording Library does not have to be installed on the same server as Chronicall. If it has been installed on a separate server, then it will be necessary to change the Recording Library IP Address. By default, it will be "Local Host" (127.0.0.1), but the correct IP Address can be entered here.
Recording Storage Location: Here, the Drive Pooling can be configured.
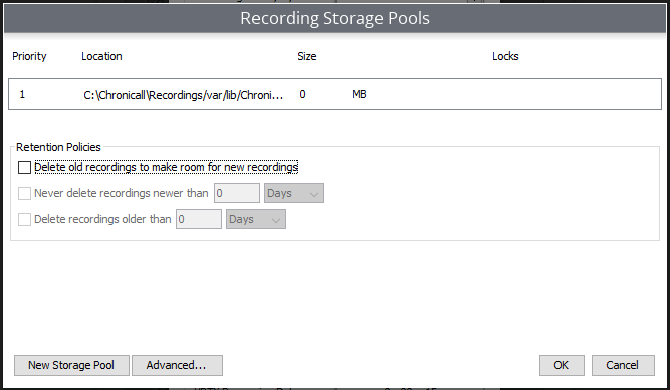

The installation of Recording Library will have taken place during the installation of Chronicall. In the Recording Storage Pools window, the following items may be configured:
Change Storage Location: By default, the recording storage will be in the "C" drive. This can be changed to any desired network drive.
Retention Policies:

By default Chronicall will store all recording indefinitely, or until the server runs out of space. The best practice then, is to set the Retention Policies.
By checking the "Delete old recordings to make room for new recordings" box, you can now set your retention policies.
By checking the "Never Delete..." box, you can select how many days/months/years you would like Chronicall to hold onto the recordings.
Note: This will vary based upon company policy and industry/state standards
By checking the "Delete recordings..." box, Chronicall will purge all recordings older than the defined days/months/years.
Trunk Configuration: This is where the VRTX (Voice Recording Technology by Xima) is configured. (see VRTX Configuration)
Recording Rules: If using the VRTX to perform call recording, the recording rules can be configured here. (See Manage Recording Rules)
Record/Pause Permissions: If using the VRTX to perform call recording, recording rules may be set up to record calls automatically. However, if preferred, calls can also be recorded manually using the Recording Library Dashboard tool.

Record/Pause Permissions provides the option to assign the manual record dashboard tool to the desired agents. (See Manage Pause Permissions)
Hide Scorecards: Scorecards comes with Recording Library automatically. If Scorecards are not being used, they can be hidden from the main menu by setting "Hide Scorecards" at "False".
Realtime
There are only two options within Agent Realtime Seat settings.
Enabled Agents: Provides another option to assign the Agent Realtime Seat licenses
Hide Listen Events: If you are using a "Live Listen" option through your phone system, by setting "Hide Listen Events" at "False", those "Live Listen" events will present on the Agent Timeline.
Agent Dashboards
There are several areas to take into consideration when configuring Agent Dashboards.
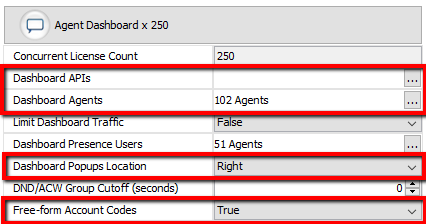
Desktop APIs: If using any URL based CRM (i.e., Salesforce, SugarCRM, Infusionsoft, Microsoft Dynamics, etc.) Chronicall Agent Dashboards can be configured to work in conjunction with the CRM. (See Agent Dashboards API
Desktop Agents: Provides another option to assign the Agent Dashboards licenses
Desktop Popups Location: By default the desktop notifications will appear on the right side of the desktop. However, this can be changed to appear on the left side of the desktop by switching the "Desktop Popups Location" to "Left."
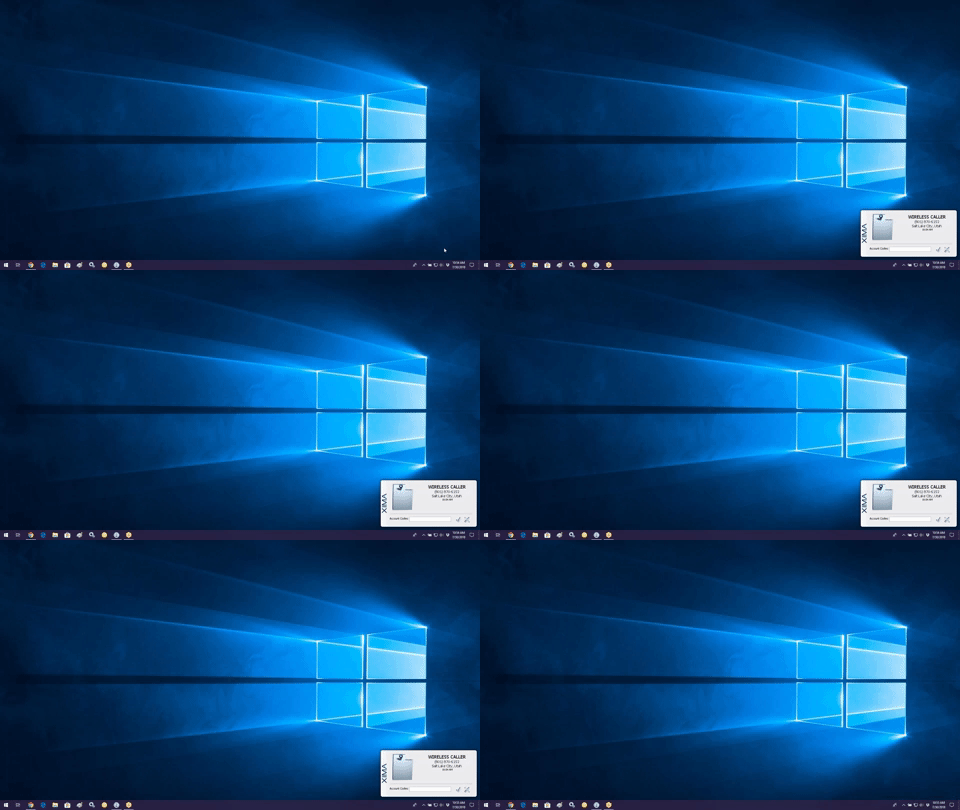
Free-Form Account Codes: When adding account codes the notification the agent may only use Account Codes assigned to their extension. However, by switching "Free-Form Account Codes" to "True" the agent will then be able to add "Free-Form" account codes. Meaning they can add anything they type into the account code section as an account code for that specific call.
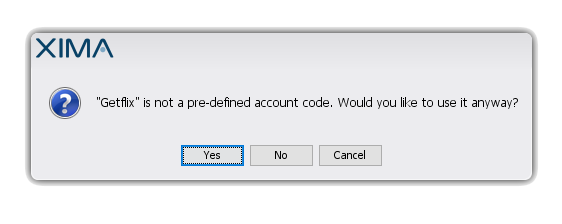
Note: If a "Free-Form" account code is added to a call, it does not add that account code as a permanent option to the existing list of account codes.
Updated 3 months ago