Editing an Existing Report in HTML
This article provides step-by-step instructions on how to edit an existing report in the HTML version of Chronicall.
When working with the Custom Reports module, you will be provided two options. This article addresses one of those options, which is to edit an existing standard report.
To begin, follow the steps below:
- On the Chronicall main page, click the Reports icon (document icon).
- Select "My Reports."
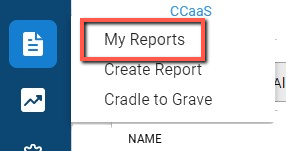
You will then be taken to the list of the existing reports. Navigate to the report which you would like to edit and select the vertical ellipses to the right of the desired report, then select "Edit."
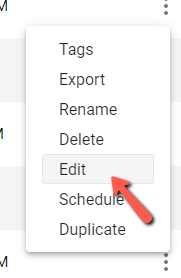
The report will then load and you will have several options.
Editing Existing Values
The first option is to edit the existing values found on the report.
To edit an existing column on the report, you will hover over the desired column header then click on the ellipses next the name of the value header found on the existing report. Then select "Edit."
On the left hand side of the screen, you will now be able to either reselect a predefined value, or customize the existing value with your desired filters.
Note: If desired, you can remove or "delete" existing columns from the report as well. To delete a column, hover over the desired column header then click on the ellipses next the name of the value header found on the existing report. Then select "Delete."
Adding New Columns
The second option is to add new columns to the report.
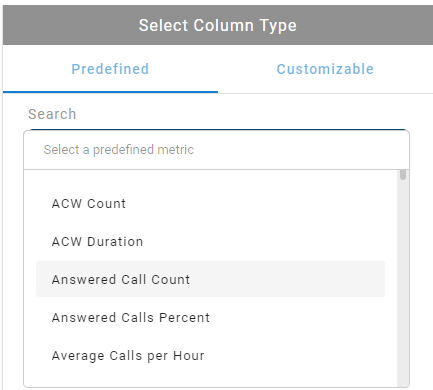
To add a new column to your report, there will be two tabs that you can click into. The first is the predefined tab. Here, you can edit prebuilt metrics associated with your report. For example, if you would like to add a column to your report, you would click the search dropdown, change the header if needed, and then select the Add Column button.
The second tab is the Customizable tab, which is specific to Custom Reports. Here, you can edit customizable metrics associated with your report. For example, if you would like to add a column, you would click the plus button next to the criteria option, select the criteria you would like to add, fill out the associated information, and then select the Add Column button.
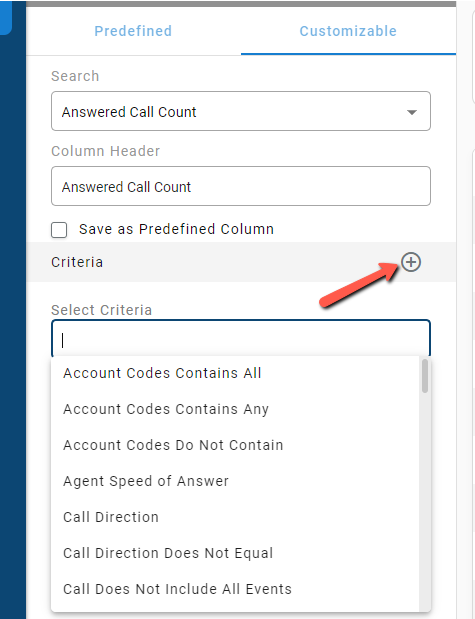
Note: You can also check the “Save as Predefined Column” if you would like to save a customized column and use it for other reports later on.
When you are done editing, click "Next" and your changes will be saved.
Overall Report Summary
On the next screen you will be given the option to define the report summary. This provides the option to display an overall summary found at the top of the report.
On the left side of the screen, you will be presented with a list containing the metrics that exist on the report.
You can now go through, if desired, and add the metric summaries that you would like to display at the top of your report.
Once you've added the desired metrics to the overall summary, select "Next."
Finalizing the Report
On this final screen you will now be presented several options.
- Saving Options - You can select if you desired to save the report as a copy (recommended) or to overwrite the original report.
- Report Title - Give the report the desired new name
- Sorting - In some report styles, you will be given the option to choose how the report is sorted. For example, in an agent report, by default it will be sorted by agent name, ascending (A-Z). However, you can select to sort the report by any desired column found on the report. For example, if the report has an "Total Answered Calls" column, you may select to sort the report by Answered Call Count: Descending. This would then sort the report starting with the agent that had answered the highest number of calls.
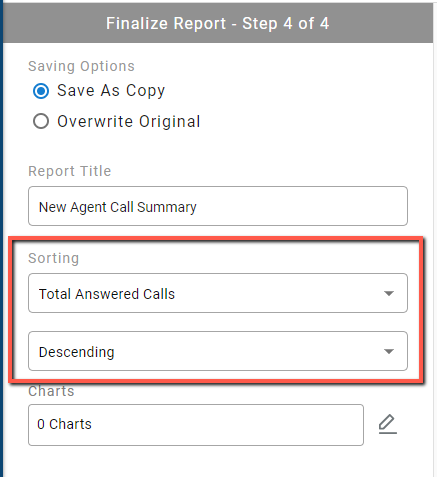
- Charts - This provides to add the desired charts to the report. Charts are a graphical representation of the columns found on the report. Charts are not mandatory, but entirely optional.
Upon finalizing your report, select "Save Report." Your report has now been saved and will be available in the list of standard reports and can be run and scheduled as if it were a standard report.
Updated 3 months ago