Realtime Data
After creating a Service User within the Chronicall UI, you will be given an authentication key. Anytime a request is made to the API, an authentication key must be present.
Add the following header to your API request:
Authorization : Bearer {authentication_key}By having the authorization key present, you will be able to access everything that the Service User is set up in Chronicall to have access to.
Note: For this feature, you must be updated to version 4.0.9 or newer.
Use Cases
- Show Realtime metrics on a 3rd party dashboard with a periodic refresh
- Monitor Realtime metrics with a periodic refresh within a 3rd party web service
- Periodically refresh and show metrics like “Current Wait Time” and “Calls in Queue” on a customer’s web site
- To see an example, click here.
Obtaining a List of API-Enabled Metrics
GET /rest/api/v1/realtime/metrics
An endpoint to obtain a list of all API-enabled metrics.
Response
If a successful request is made, then a json result is returned.
Response Breakdown
- "metricId": An ID to uniquely identify the metric. Not a UUID.
- "metricName": The name of the metric.
- "categoryType": The category type of the metric. Possible values are AGENT, GROUP, CALL_DIRECTION, ACCOUNT_CODE, and NONE.
- "categorySelection": A list of category values that have been selected for the metric.
[
   {
      "metricId":"101",
      "metricName":"metricA",
      "categoryType":"AGENT",
      "categorySelection":[
         "Alice",
         "Bob",
         "Carol"
      ]
   },
   {
      "metricId":"102",
      "metricName":"metricB",
      "categoryType":"AGENT",
      "categorySelection":[
         "Dave",
         "Eve",
         "Frank"
      ]
   }
]
Potential Errors
Status Code | Failure |
|---|---|
|
|
Obtaining a List of API-Enabled Metric Values
GET /rest/api/v1/realtime/metrics/values?id={ids…}
An endpoint to obtain a list of values for specified API-enabled metrics. This returns values for metrics that are ready to return values (“results”), and provides a list of metrics not ready at the moment to return values (“initializing”). Values that are not initialized begin to initialize when requested so that they will be available for future requests. Values that are not requested for a long period of time will need to be reinitialized (automatically on the first request) before they are available again.
Arguments | |
|---|---|
|
|
Response
If a successful request is made, then a json result is returned.
Response Breakdown
- "results": Latest calculated values for the metrics. There are several different types of values that can be returned. See the examples of each type.
- "initializing": A list of metric IDs of metrics that are not yet initialized. For metrics with category selection, this will be a combination of the metric ID and the category value that is not yet available. The uninitialized values will begin initializing when requested for the first time or for the first time after not being used for a long time. When this list is populated, the HTTP status should be 206 to indicate partial content.
{
  "results": [
    {
      "key": {
        "metricId": "K13CJXHV",
        "categoryValue": "John Doe(481)"
      },
      "value": {
        "lastUpdateTime": "2019-10-01T10:13:12.244-06:00",
        "value": false,
        "type": "BOOLEAN"
      }
    },
    {
      "key": {
        "metricId": "K0FLAEB6"
      },
      "value": {
        "lastUpdateTime": "2019-10-01T10:17:56.496-06:00",
        "count": 206,
        "type": "COUNT"
      }
    }
  ],
  "initializing": [
    {
      "metricId": "K08ZIKVN",
      "categoryValue": "Abraham Lincoln(871)"
    },
    {
      "metricId": "K08ZIKVN",
      "categoryValue": "Elvis Presley(121)"
    },
    {
      "metricId": "K1RNV2OQ"
    }
  ]
}
Metric Values
{
    "key": {
        "metricId": "K0FLAEB6"
    },
    "value": {
        "lastUpdateTime": "2019-10-01T10:17:56.496-06:00",
        "count": 206,
        "type": "COUNT"
    }
}{
"key": {
"metricId": "K08ZIKVN",
"categoryValue": "John Doe(831)"
},
"value": {
"lastUpdateTime": "2019-10-01T10:13:12.244-06:00",
"value": false,
"type": "BOOLEAN"
}
}{
"key": {
"metricId": "K08ZIKVN",
"categoryValue": "John Doe(831)"
},
"value": {
"lastUpdateTime": "2019-10-01T10:13:12.244-06:00"
}
}{
"key": {
"metricId": "K0FLAEB6"
},
"value": {
"type": "STRING",
"lastUpdateTime": "2019-10-01T10:13:12.244-06:00",
"value": "string value"
}
}{
"key": {
"metricId": "K08ZIKVN",
"categoryValue": "John Doe(831)"
},
"value": {
"type": "DURATION",
"lastUpdateTime": "2018-09-24T13:17:35.661-06:00",
"finishedDuration": 20521,
"numCountingUp": 2,
"numCountingDown": 1
}
}The duration in milliseconds is calculated using the following formula:
finishedDuration + (numCountingUp - numCountingDown) (atTime - lastUpdateTime)
where atTime is the time (in milliseconds) you want to calculate the duration to.
{
    "key": {
        "metricId": "K08ZIKVN",
        "categoryValue": "John Doe(831)"
    },
    "value": {
        "type": "AVERAGE_DURATION",
        "lastUpdateTime": "2018-09-24T13:17:35.661-06:00",
        "durationSum": 20521,
        "count": 5,
        "numCountingUp": 2,
        "numCountingDown": 1
    }
}
The average duration in milliseconds is calculated using the following formula, provided that count is not zero:

where atTime is the time (in milliseconds) you want to calculate the duration to.
Creating a Realtime Metric
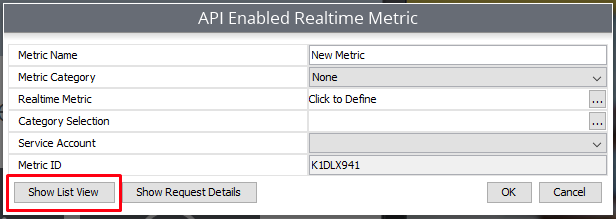
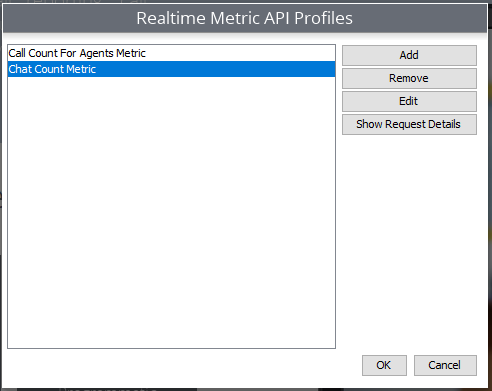
In order to poll a metric value, we’ll need to first create it for API use. To do so, navigate to the Chronicall main page. On the left sidebar, select API Enablement > Realtime Metric Access. If no Realtime metrics exist, then a pop up window will appear called "API Enabled Realtime Metric." Click "Show List View," which is located in the bottom left corner. This will allow us to see all of the reports that are currently enabled for API use. (If Realtime metrics do not exist, then you will instead open up to a pop up called “Realtime Metric API Profiles.” Clicking “Add” in the top right corner will allow you to create a new metric value.)

A new pop up window called "API Enabled Report Profiles" will appear. Select the report you would like to see request details for. If the report that you want to run does not exist, click the "Add" button, which is located in the top right corner of the window. Fill out the information that the "Add" window asks, which includes:
- Metric Name: The title of the metric. This is what’s displayed in the list view of all of the created Realtime metrics.
- Metric Category: Determines which category selections will be available.
- Realtime Metric: Select which Realtime value that you’d like to get results for.
- Category Selection: Choose which items to obtain values for based on the metric category selection. E.g., when we select “Agent” for the metric category, then the category selection will allow us to select which agents we want to obtain Realtime values for.
- Service Account: Select which service user has access to this metric.
- Metric ID: The ID associated with the metric. This is used in our API requests.
Once the information has been entered, click "OK." You should be redirected to the list view below. If not, then click API Enablement > Realtime Metric Access from the Chronicall main menu and click “Show List View.”

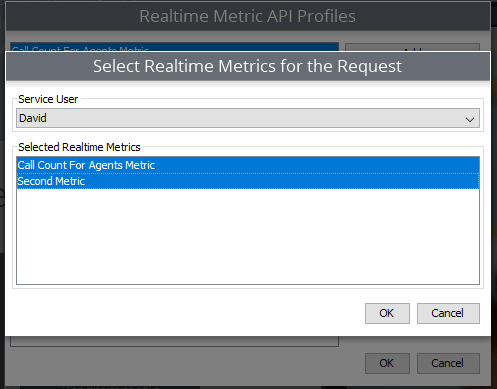
Once you've added metrics, click the "Show Request Details" button, which is located near the top right corner of the window. You’ll then be prompted to select your service user and metrics.

Select the Realtime metric(s) you want and click "OK."
A new window will appear that provides you will all necessary information. It’s also important to note that this window has two tabs. The “Metric Polling” tab will give you a list of API-enabled metric values. The “Metric Subscription” tab will give you Realtime data over a websocket connection.

Potential Errors
Status Code | Failure |
|---|---|
|
|
401 Unauthorized | The authorization header wasn’t valid. |
403 Forbidden | The requested metrics are not assigned to the authenticated user. |
404 Not Found\ | The requested metrics do not exist.\ |
Updated 3 months ago