Dashboard Values
Agent Dashboards is an extension to the Realtime module, which was created to provide more visibility to the management team and the individual agents on a daily basis. This provides information on the features Agent Dashboards offers. This requires Realtime and Agent Dashboards licenses.
Note: Before configuring Dashboard Values, make sure that Agent Dashboards agents have access to the Chronicall Desktop. (see Chronicall Desktop for Windows - Installation / Configuration) If the agent does not have access to or are not logged in to Chronicall, the Agent Dashboards features will not function.
Agent Dashboards provides the ability to allow the agents to see directly on their personal desktop what is taking place in their Hunt/Work groups as well as directly on their own personal extension.
This is done through a series of widgets that can appear directly on their screen.
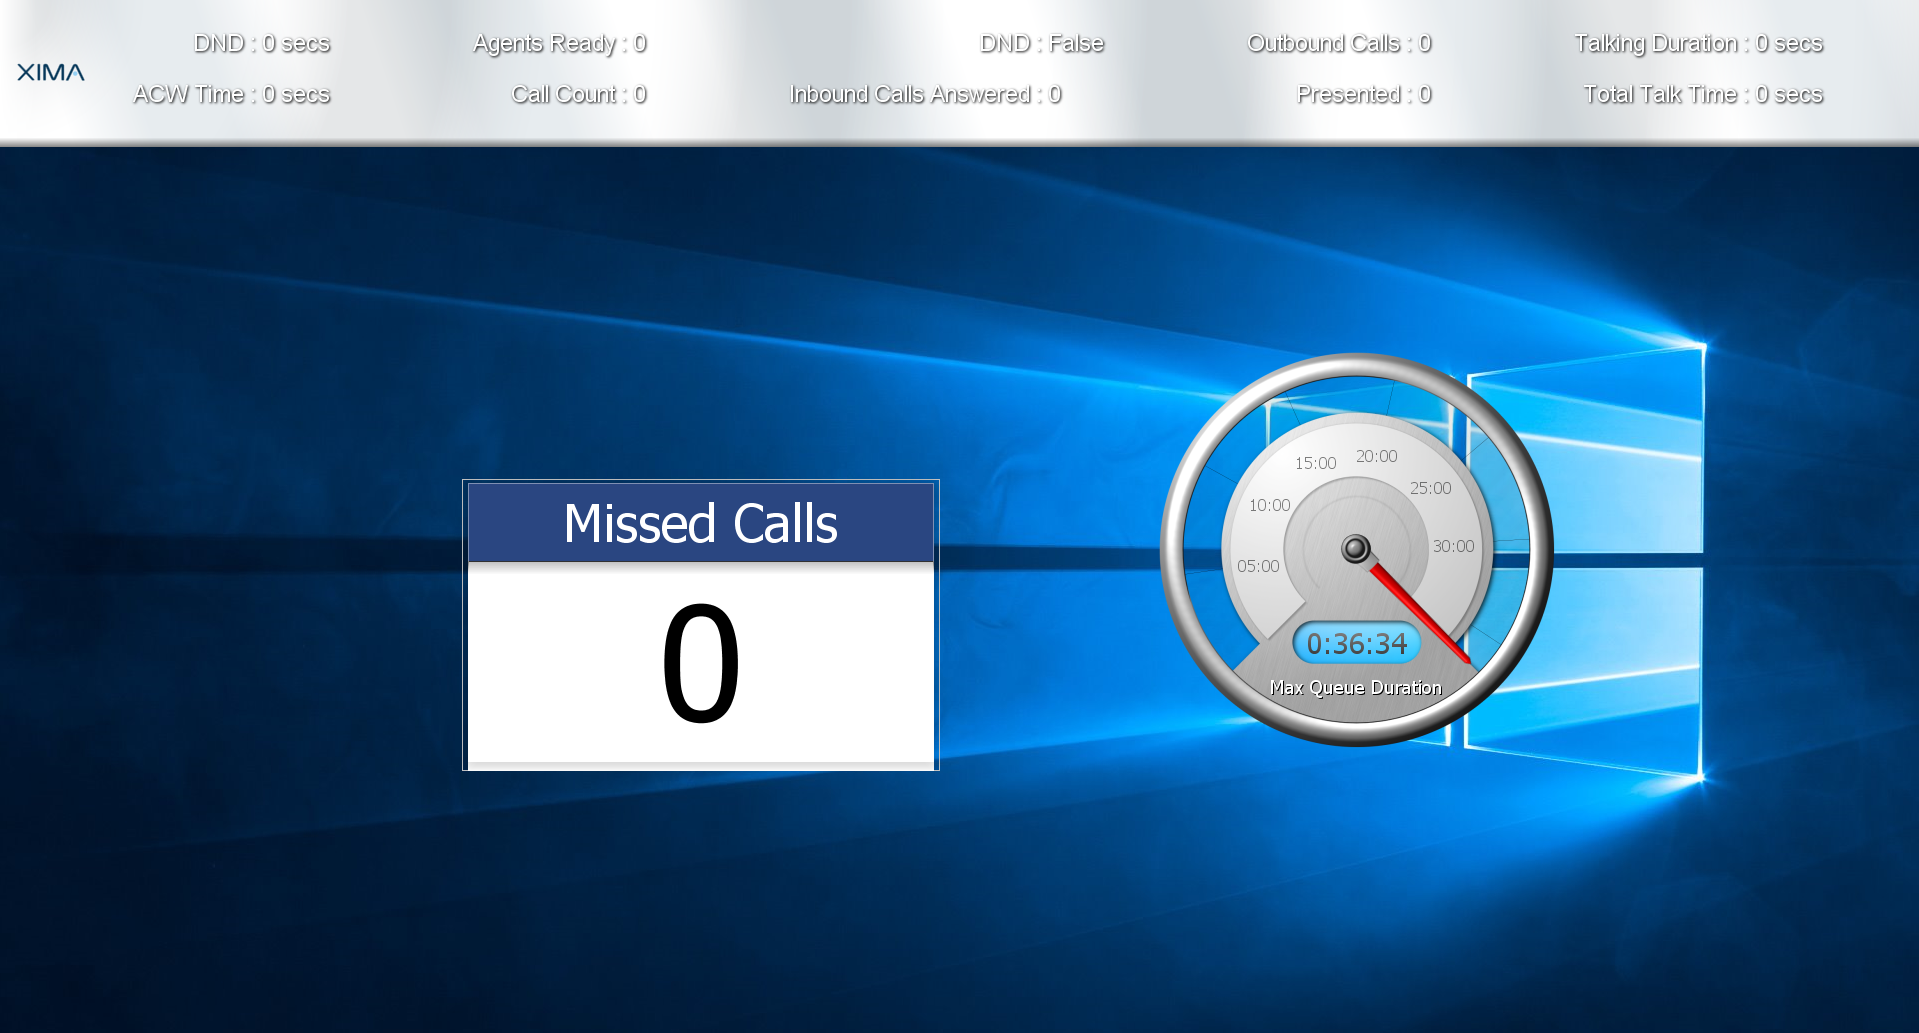
If an agent has an Agent Dashboards license assigned to them, when they login to their Chronicall Desktop, they will be able to see the widgets that are assigned to them.
There are two different kinds of widgets:
- Wallboard Widgets
- Agent Dashboards Widget
Wallboard Widgets
The first type of widget available are the Wallboard style widgets. These widgets are similar to the widgets found on the Realtime wallboards, even containing the same same configuration process.
To configure Agent Dashboards Wallboard widgets do the following:
- Go to the Agent Dashboards Configuration section on the Chronicall main menu and select "Dashboard Values."
- A window will appear featuring the Agent Dashboards agents on the left.
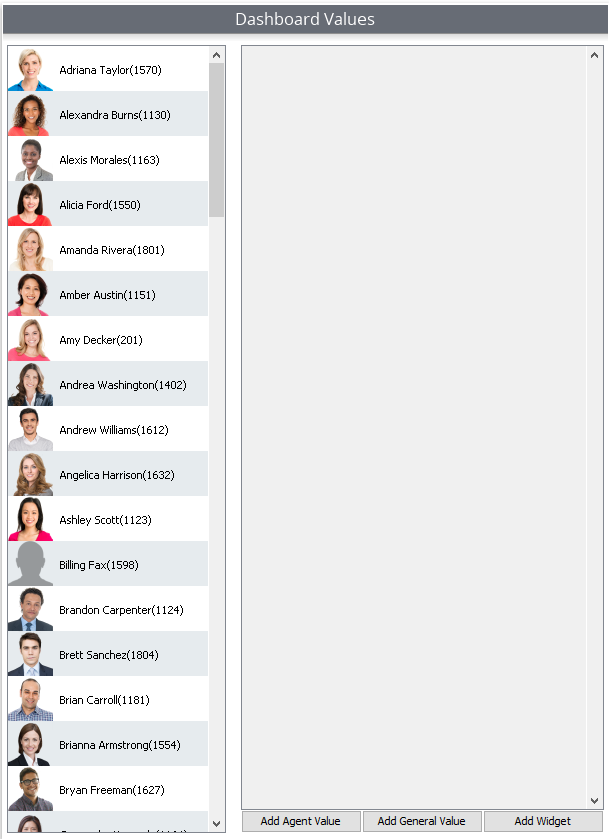
Across the bottom you will see three options
- Add Agent Value
- Add General Value
- Add Widget
- Use the "Add Widget" option to create the Wallboard style widgets.
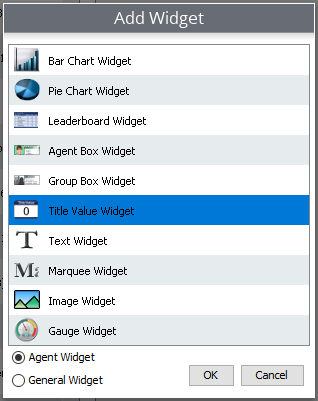
- You may now select the specific wallboard style widget that you prefer to use in the "Add Widget" window that appears.
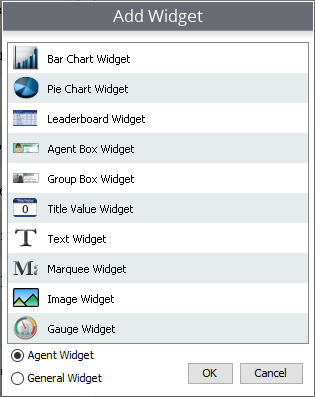
- After the style of widget has been selected, you will be given to option to select between:
a. Agent Widget
b. General Widget
Agent Widgets are extension specific. Meaning, when each agent logs in to their personal Chronicall Desktop, the widget will be featuring their personal totals only.
General Widgets are group collective totals. This means that when the agents login to their Chronicall Desktop the widget will feature totals for the group collectively.
- Hit "OK" once you've selected the style of widget and Agent/General Widget.
- You will now be able to select your desired value(s)in the properties window that has appeared.
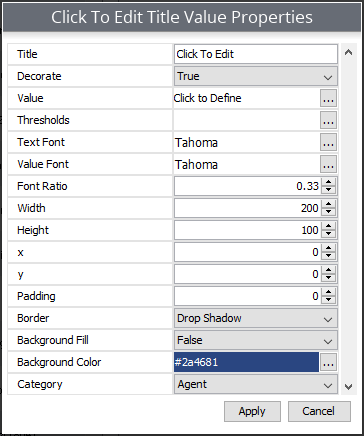
- Click on ellipses next to "Value - Click to define," and your value options will appear.
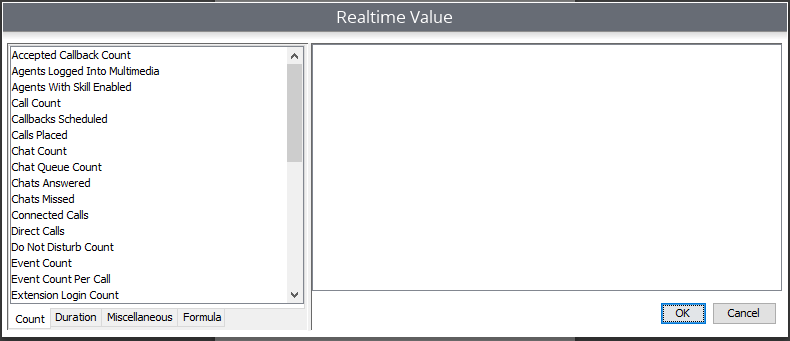
- You will have four folders to choose from:
- Count
- Duration
- Miscellaneous
- Formula
- Select the Realtime values that best fit your needs.
- After you find the value under the list of options, select the value and the "value parameters" will appear on the right of the window.
- Answer the appropriate parameters, and click "OK."
- Click "Apply."
Creating Wallboard Widget Example
- Select the "Title Value Widget."
- In the properties window, select the ellipses tool next to "Value - Click to Define."
- The values window will now display.
- Select the value option "Missed Calls" In the count folder.
- Fill in the four parameters found on the right: Time Frame, Calculation, Group/Queue, and Call Direction.
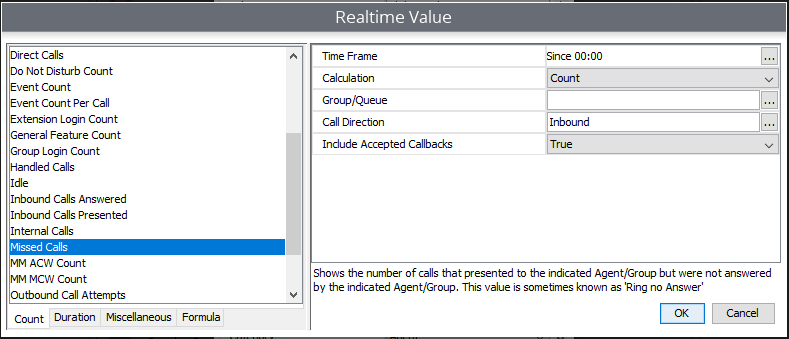
Time Frame: Time Frame allows you to select from three different options in order to see how many calls have been/are in queue:
- Since : Shows how many calls have been in the queue since a specific time time of day. It will reset every twenty four hours.
- Last : Displays how many calls have been in the queue in the last specified amount of time, i.e., two hours, thirty minutes, four hours and twenty seven minutes, etc.
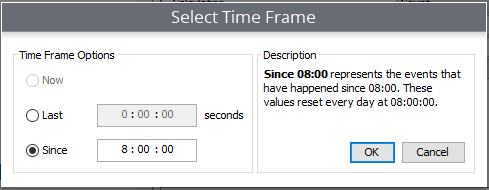
a. Select your Time Frame, and hit "OK."Calculation: The calculation option will vary based upon the value that is being used, the time frame in question, and upon the value folder. (Counts, durations, etc.)
  b. For Missed Calls, you'll have two options:
      * Count: Shows the actual number of Missed Calls during the given time frame.
      * True/False: True = Calls missed. False = No calls missed

  c. For this scenario, select "Count."
  d. Click "OK."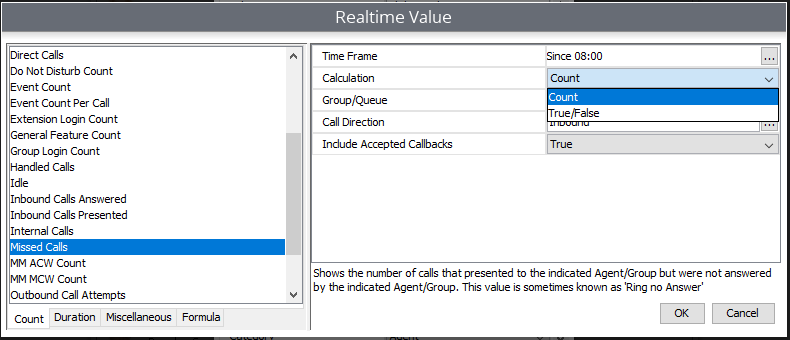
Group/Queue: This parameter is used to select the specific Hunt/Work groups you'd like to monitor. You can select one group, which will show you calculations for that group only or you can select multiple groups, which will give you a collective total of those groups.
a. For this scenario, select the desired Hunt/Work groups that you would like to monitor, and hit "OK."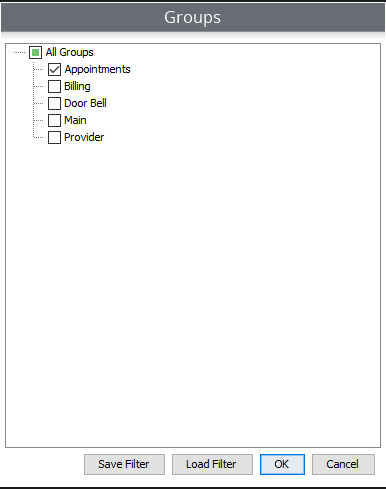
Call Direction: By default, the Missed Calls value only monitors Inbound calls,however you can select other call directions that you want monitored as well.
a. For this example, leave it at Inbound only.
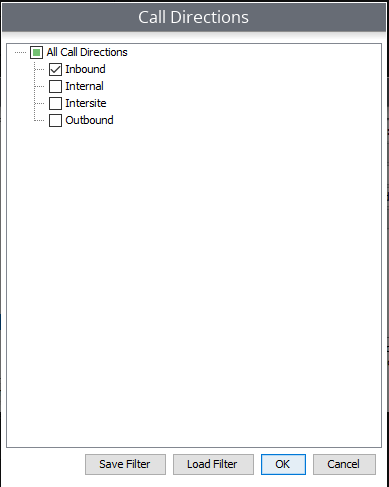
b. Hit "OK," then hit "Apply."
Agent Dashboards Widget
The second style of widget available with the Agent Dashboards is the Agent Dashboards Widget.
This widget differs from the Wallboard widget because it provides categories of information found below:
_Agent Values: Agent Values are exclusive to the agent signed into the Desktop, meaning that it will
only display information exclusive to the agent logged in.
_General Values: General Values are group collective totals. This means that when the agent is
logged into the Desktop, General Values will show group totals collectively.
To create the Agent Dashboards Widget do the following :
- Select "Agent Dashboards Configuration" on the Chronicall main page.
- Select "Dashboard Values."
- You will now see a window displaying your Agent Dashboards agents.
- For these widgets, you will use the Agent Values and General Values buttons at the bottom of the page.

The Agent Dashboards widget is exclusive to the Agent Dashboards module, and be seen in three different ways: Single Widget, Floating Widget, and Docked Widget.
Single Widget: This widget will cycle through values selected to be displayed by the manager. It shows each value one at a time through each cycle and can be freely moved by the agent.

Floating Widget: This widget displays the same information as the Single widget and can also be moved around the screen freely. However, instead of cycling through the values one at a time, it displays all the values at once.
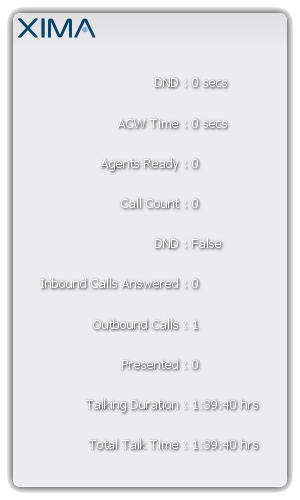
Docked Widget: This widget will display the same information as the Single and Floating widgets. However, the difference between this widget and the two previous is that, as its name describes it will be docked to the screen. It can be docked to the top, bottom, right-side, or left-side of the screen. As it is docked, it will shift all applications and programs as to not prohibit the agent from performing their tasks.
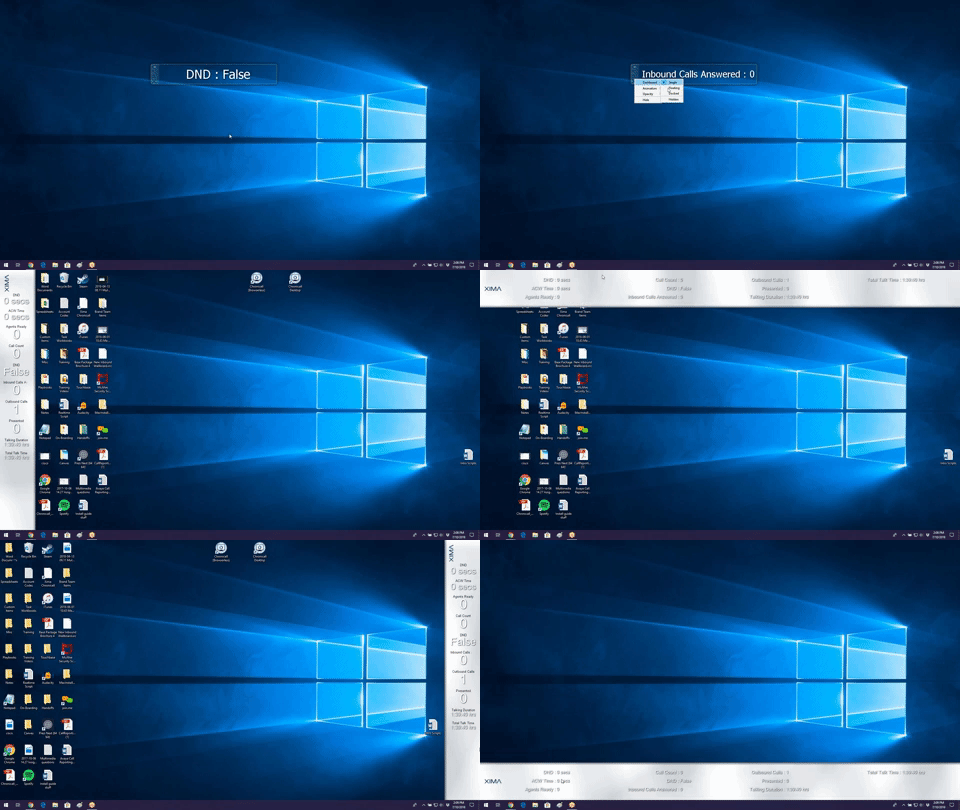
By right-clicking on the Desktop widget, you can adjust the style, opacity, and animation (single only) of the transitions.
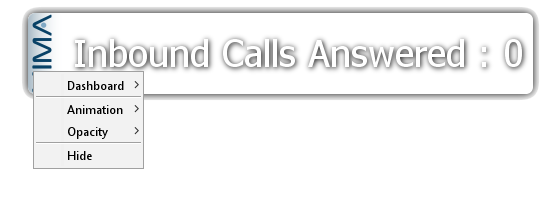
To configure the Agent Dashboards widget do the following:
- Select "Dashboard Values" under Agent Dashboards Configuration on the Chronicall main menu.
- A window will now appear featuring the Agent Dashboards agents on the left.
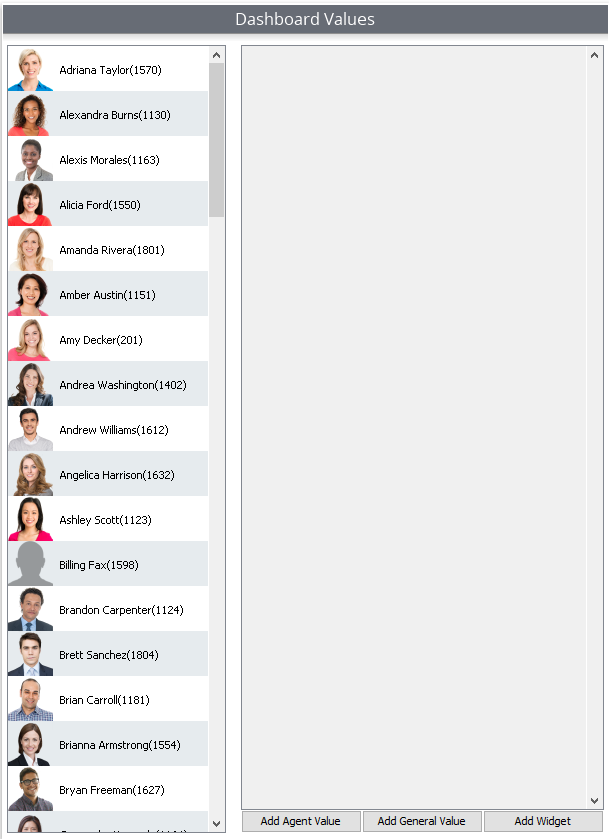
- Across the bottom you will see three options:
- Add Agent Value
- Add General Value
- Add Widget
To create the Desktop widget do the following:
- Use the "Add Agent Value" and "Add General Value" buttons.
- Select your option of choice.
- A window will now appear displaying the available Realtime values.
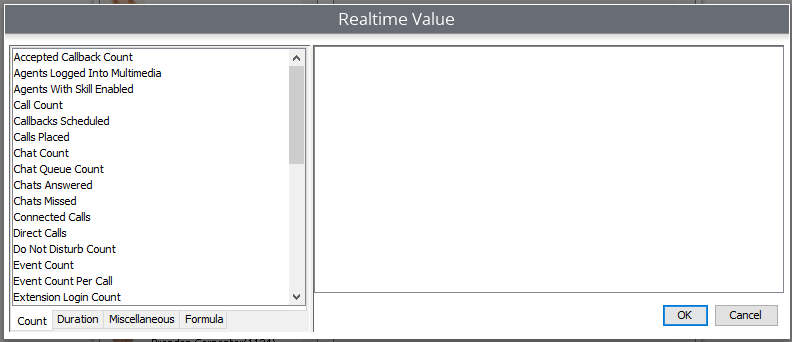
- Select your value of choice and fill in the parameters to the right.
- Hit "OK."
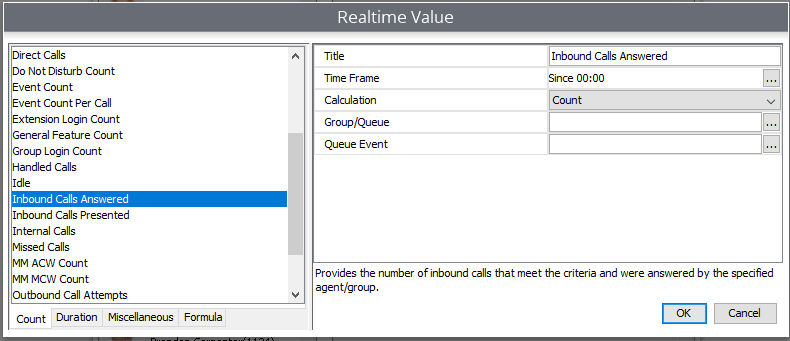
- Repeat using either "Add Agent Value" or "Add General Value" until you are finished.
- Once you have finished creating the values for your Desktop widget, you can now assign the values to the agents.
Assigning the Widgets and Values
To assign the widgets that you previously created to the desired agents you have two options:
Option One:
- Select the "blue person" image as you finish a widget or value.

- You will now see a list of agent's names.
- Check the boxes for those that you would like to assign the widget/value.
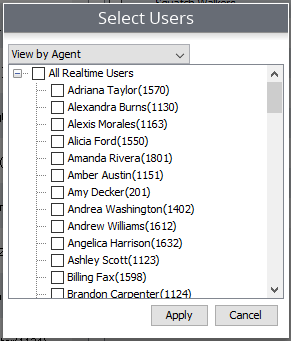
- Hit "Apply."
- Repeat with each widget and or Desktop value.
Option Two:
- On the left hand side of the Agent Dashboards menu, hold the "Ctrl" button down on your keyboard and select the desired agents.
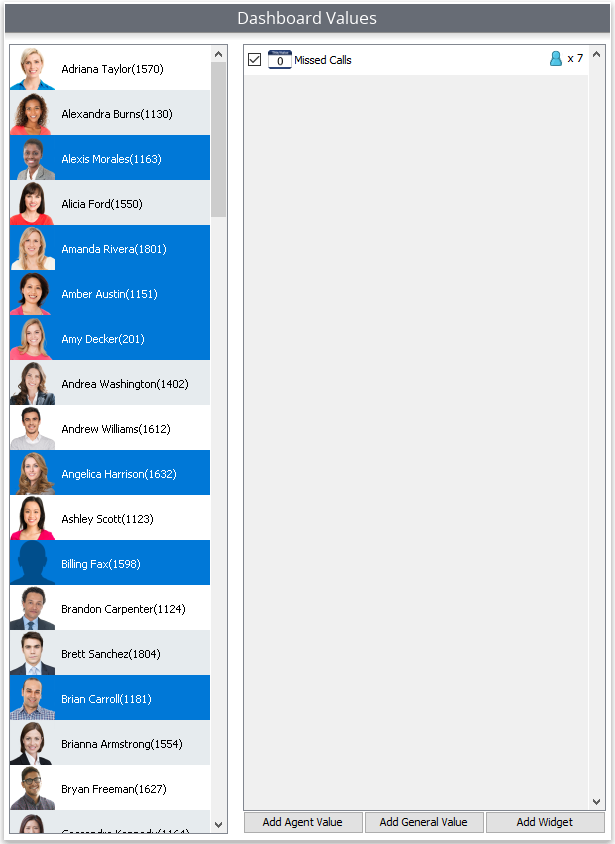
- Once you have the agents selected, you can now select the individual check box for each of the desired widgets and Dashboard Values to assign.
- Hit "Save."
- The widgets will now be assigned to the selected agents.
Updated 3 months ago