Manage Call Cost Profiles
A Call Cost Profile is used in a Call Cost Report. Typically, call cost reports are used in scenarios where a client/agent will be charged for their time on a call. These reports are either based on the duration of the call or the duration of an event (e.g., Talking Duration).
Call cost profiles allow you to set criteria for calls that hit specific events, or that fit phone number criteria that will be tied to a monetary amount. A report can then be run to provide total amounts owed/earned based upon call criteria and cost profiles.
Setting Up a Call Cost Profile
- Select "Reports" from the Chronicall main menu.
- Select "Manage Call Cost Profiles."
The Call Cost Profile window will now appear.
- Select "Add"
The "New Call Cost Profile" window will now appear. From here you will need to do fill in the following information.
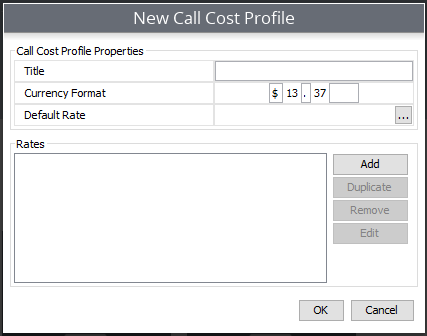
- Title: Name your Call Cost Profile
- Currency Format: Default is dollars and cents, however, this can be changed to your currency of choice.
- Default Rate: See the section below to cover "Default Rate."
Rates
When creating a call cost profile, you will need to set up at least one Rate Label. A Rate represents call cost criteria.
(I.e., Any call that starts with Area Code "123" should cost $1 a minute.)
To set up Rates:
- In the Rates section, select "Add"
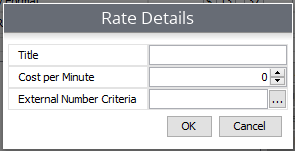
- Title: Name the rate: (I.e., if the rate is going to exclude local area codes, you might name it "Long Distance.")
- Cost Per Minute: Define your cost per minute
- External Number Criteria: Here, you will have the opportunity to set the call criteria that will associate with the Rate Label.
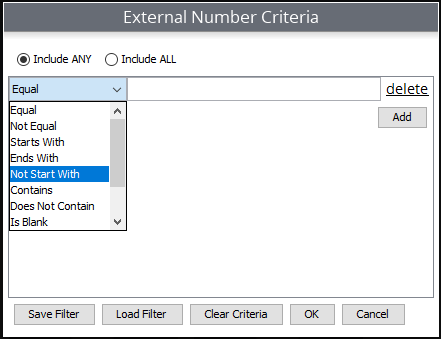
When working with the External Number Criteria, please note the following:
- Include ANY - This signifies that when running a Call Cost report it will display ANY call that contains at least one of the numbers included in the rate. (This is the recommended option)
- Include ALL - This signifies that when running a Call Cost report it will only display calls that have ALL numbers involved in the call.
Example: If the call criteria is set to display calls that "Start With" the local area codes 801, 435, and 385 then if the rate is set to "Include ALL", it will only display calls if each individual is associated with all three area codes. This means that it will only show a call if it has all three area codes found simultaneously in each individual call.
When selecting your external number criteria you will have several options to define the criteria:
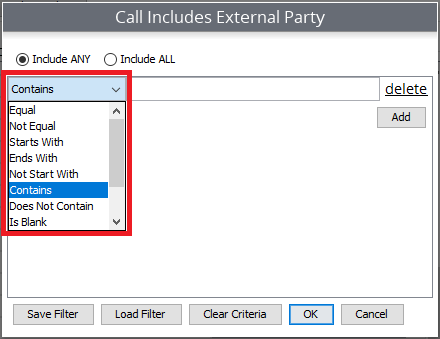
- Equal: This is used when you want to report on a very specific phone number. It must be entered in exactly how the number appears in order for the report to pull the information.
- Not Equal: This is used when you want to report on any number except the number(s) that you enter here for "Not Equal".
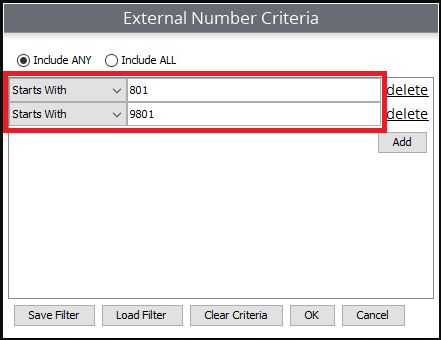
- Starts With: One of the easiest options to use is "Starts With". Often times, you will run a for numbers starting with a specific number (such as an area code). In this scenario, it is recommended that you add the area code(s) as they are. Then, if your phone system requires a "dial out number" (i.e., dial 9 to call out) then add an extra line where the area code starts with "9" as well.
Example:
- Ends With: This option looks for calls that End With the number(s) that you've entered in this criteria.
- Not Start With: This is the opposite of "Starts With", and is also very popular. This will report on calls that don't start with a specific number. Using the area code example, this is a great way to run report on Long-Distance Calls. For example, set the criteria to "Not Start With" local area codes. This way, any call not starting with local area codes will be reported on as a Long Distance call.
- Contains: Contains is a catch all option. This is used when you want report on numbers that may contain a specific sequence of numbers.
- Does Not Contain: This is used when you want to report on numbers that does not contain a specific sequence of numbers.
- Is Blank: Reports on calls where there was no dialing party, and no receiving party.
(I.e., - Not Blank: Excludes calls that are not left blank. Meaning it will only display calls that contain a calling party and/or a receiving party.
- RegEx: "Regular Expressions" are a set of instructions that tell Chronicall to look for certain patterns in text or a phone number. For more information on RegEx see this article.
- Emergency Number: Displays calls that fit the Emergency Number criteria. Emergency Numbers are configured within the System Settings ->Basic Settings ->Emergency Numbers. For further information on setting up Emergency Numbers click here.
Once you've established which criteria option you'd like to use, simply select it from the drop down menu and enter the desired number(s).
Note: More than one layer of criteria can be added, as long as they are not conflicting criteria.
Rate Example
For this example, we are going to use the "Not Start With" option. This is going to be a Call Cost Report, reporting on Long-Distance calls. In this scenario, Long-distance calls are considered to be any call that does not start with the local area code(s).
- From the drop-down, select "Not Start With"
- Enter the desired number criteria. In this case, it would be a local area code.
- From there, hit "Add" and select "Not Start With" again. This time, enter the area code starting with the dial out number.
Repeat this process until all desired criteria is entered.
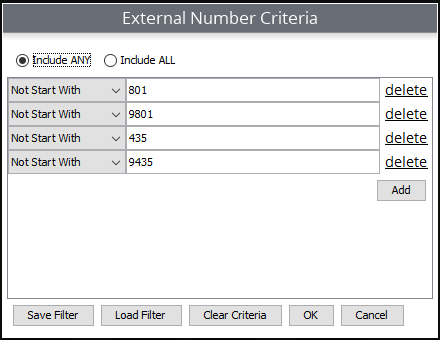
Once you have finished entering your criteria hit "OK", then "OK" again.
Default Rate
Note: Default Rates are not required when configuring Rate Labels. They are in fact optional.
A "Default Rate" is in essence an "everything else" setting. This means that a default rate can be configured for the Rate label to catch any number that doesn't fit the Rate Label criteria.
Example: As in the example above, you may set up your main rate label for all "Long Distance" calls to be charged a certain amount. In addition, you can set up the default rate to catch any other number that does not fit the Rate Label criteria. Any number that fits the default rate criteria can then be charged as a separate rate.
To set the default rate:
In the Rate Label window, select "Default Rate:"
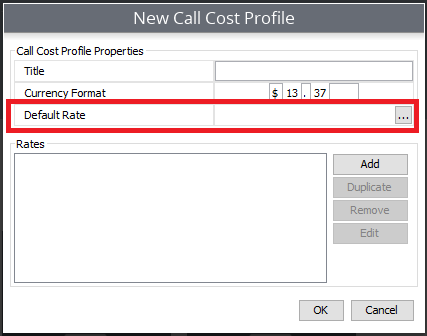
Once open, there are two required fields:
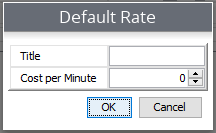
- Name the Default rate.
- Establish the cost per minute.
Once you've entered your default rate, you will hit OK three times, then you'll be finished.
Updated 3 months ago