
IP Addresses to Check Post Migration or Server IP Address Change
Overview
This article covers what IP addresses to check after migrating your IP Office or Chronicall/ACR server, or after changing any of the IP addresses those servers use.
Steps
Verify the PBX IP Address
-
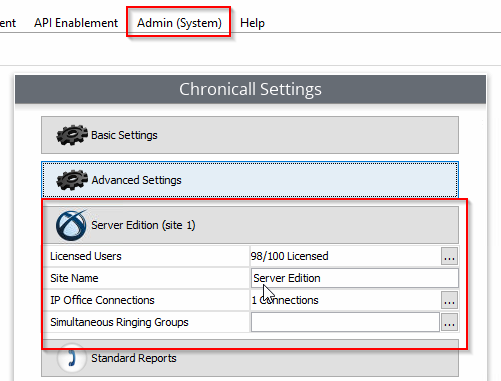
Navigate to Admin (System) > Server Edition > IP Office Connections.
-
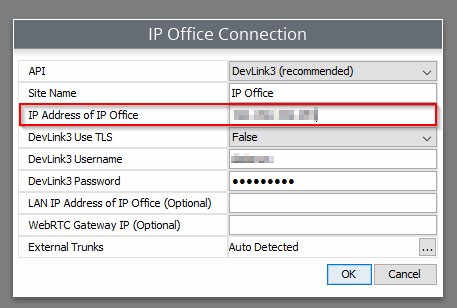
Verify the IP address of your PBX is correct for all related sites.
-
If you have more than one site, ensure the IP is correct for all of them.
-
Verify Multimedia/Contact Center's IP Address
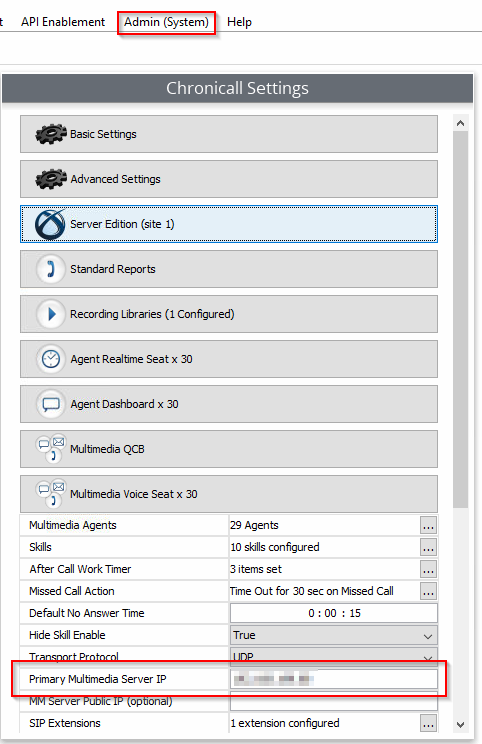
- If you are a Multimedia or Contact Center customer, ensure that you update your new MM server IP address.
-
Navigate to Admin (System) > System Settings > Multimedia Voice Seat > Primary Multimedia Server IP.
-
Update the IP address to the correct one if necessary.
-
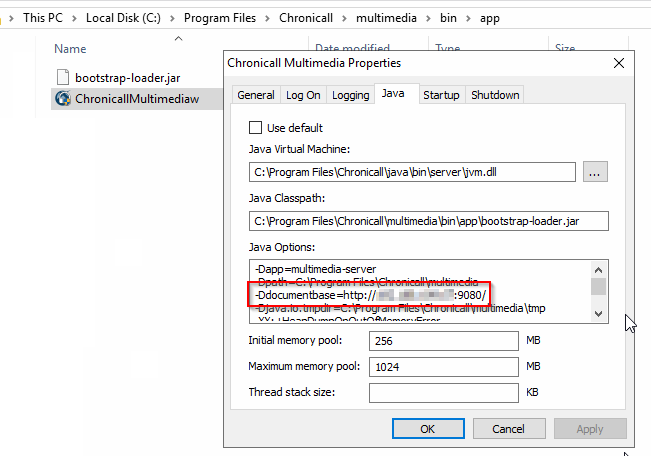
You should also check the ChronicallMultimediaw file, by going to the
multimedia\bin\appfile path on the Multimedia server and running it as an Administrator.- The Java options here include the Ddocumentbase setting, which is where the Multimedia server looks for the Chronicall server.
- This will need to be updated to the new Chronicall server IP address.
-
This should have already been updated when you updated the Chronicall settings, but it's always good to verify.
-
-
Verify Recording Library's IP Address
- If you are a Recording Library (RL) customer, ensure that you update your new RL server IP address.
-
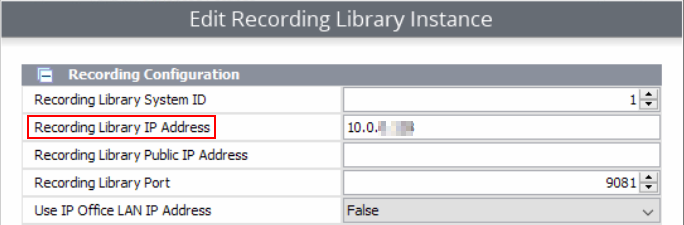
Navigate to Admin (System) > System Settings > Recording Libraries > Recording Libraries.
-
Click on the ellipsis next to Recording Libraries.
-
Select the correct RL and Edit.
-
Update the "Recording Library IP Address" to the correct one if necessary.
-
You should also check your Recording Library
settings.txtfile to ensure you have the correct IP address for the Chronicall Recording Library.
-
Verify Chronicall/ACR's File Path
-
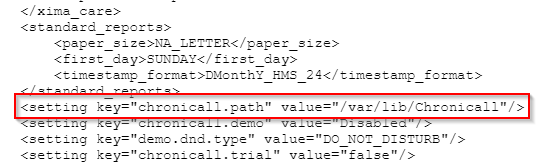
Ensure that the
chronicall.pathis correct in the main Chronicall/ACRsettings.xmlfile, located in the main Chronicall/ACR directory.- The following are default installation paths, but your installation path may differ depending on when and where you installed Chronicall/ACR:
- Windows:
C:\Program Files\Avaya Call Reporting\C:\Program Files\Chronicall\C:\Program Files\Xima Software\Chronicall\
- Linux:
-
/var/lib/avaya_call_reporting/ -
/var/lib/Chronicall/ -
/var/lib/Xima Software/Chronicall/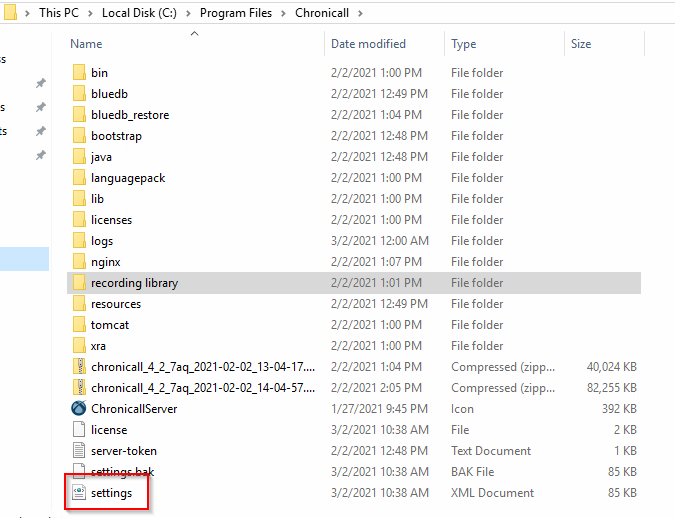
-
- Windows:
- The following are default installation paths, but your installation path may differ depending on when and where you installed Chronicall/ACR:
-
Open the
settings.xmlfile in a text editor. -
Make sure the file path between the quotes is the correct file path for your new Chronicall installation post-migration.
Verify the SSL Proxy Configuration
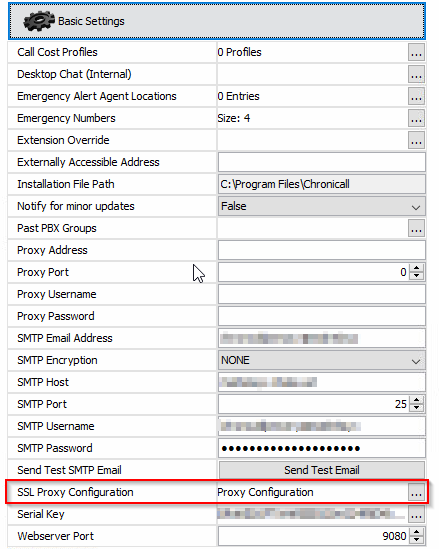
- Check to see if the previous server was using an SSL Proxy Configuration.
-
Go to Admin (System) > Basic Settings > SSL Proxy Configuration.
-
If SSL Proxy is set to True, ensure you have the correct, updated IP address for this as well.
-
- If all services' IP addresses appear to be correct, you can go ahead and restart all related services.
- Remember, if you have a Multimedia or Contact Center running, follow this guide instead.
- You can restart any other related services afterward, such as Recording Library, if needed.
Updated 3 months ago