
SMTP Setup
Overview
This article covers setting up SMTP settings for Chronicall, so you can set up scheduled reports and alerts via email. To check if your SMTP settings are updated and working, follow these steps to verify and send a test email.
Steps
-
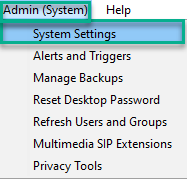
Log into Chronicall and go to Admin (System) > System Settings.
-
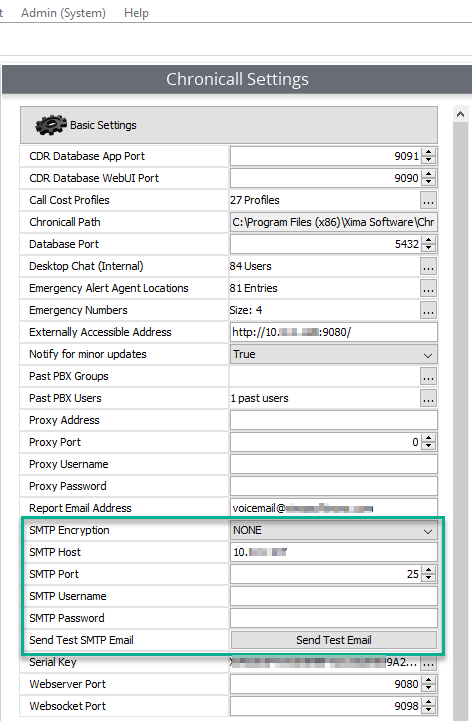
Select Basic Settings to see the SMTP settings shown below.
-
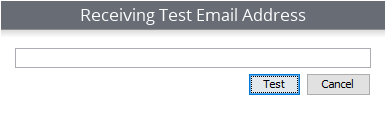
Select Send Test Email as shown in the screen above, and enter your email address to see if the SMTP settings are working.
Example Third-Party SMTP Relays
Gmail
- Report Email Address: [email protected]
- SMTP Encryption: SSL
- SMTP Host: smtp.gmail.com
- SMTP Port: 465
- SMTP Username: [email protected]
- SMTP Password: your_password
Google no longer supports signing in to a Google Account with only a username and password for third-party apps (like Chronicall). You'll need to set up a 16-digit app password instead:
- Follow the steps at https://support.google.com/accounts/answer/185833 to create an app password.
- Once you have the 16-digit password, enter it as the SMTP Password within Chronicall and save the settings.
Outlook, Hotmail, or Live
- Report Email Address: [email protected]
- SMTP Encryption: TLS
- SMTP Host: smtp.live.com
- SMTP Port: 587
- SMTP Username: [email protected]
- SMTP Password: your_password
Microsoft Exchange
You'll want your local email administrator to fill in the settings for Chronicall, as every server is configured and managed differently.
NoteMicrosoft Exchange doesn't play well with the way Chronicall's test email button works. Instead, try using settings known to work elsewhere, then schedule a report to run and be emailed. If that email comes through, your SMTP settings are correct.
Using Telnet to Send a Test Email
To send a test email from the Chronicall server using your SMTP server, you can use the Windows Telnet client. Windows XP and Server 2003 have the Telnet client enabled by default.
-
To enable it in Windows Vista, 7, and Server 2008:
- Open Programs in your Control Panel and select Turn Windows features on or off in the left sidebar.
- Find and check the Telnet client box, then click OK.
-
Open a command prompt and establish a connection from the Chronicall server to the mail server.
-
Do this by typing
telnet mail.domain.ext 25, inserting your own mail server and domain. -
After a moment, you should receive a message that you're connected to the server.
-
Declare where you're sending the email from by entering
HELO local.domain.name. -
If your SMTP server uses SSL authentication, enter
AUTH LOGINat this point. This will show you a string of Base64 code requesting login information.- Enter the requested information in Base64 code to proceed.
- If your server doesn't use SSL authentication, you can skip this step.
-
Specify the email address you're sending from by typing
MAIL FROM: <[email protected]>. -
Do the same for the recipient with
RCPT TO: <[email protected]>. -
To begin composing an email, enter
DATA. -
Enter a subject by typing
Subject: <Subject Text Here>.- Each line you enter after that will be a new line in the email. When you're finished, enter a single period (
.) by itself on a line.
- Each line you enter after that will be a new line in the email. When you're finished, enter a single period (
-
This finishes and sends the email. If it arrives in the specified recipient's inbox, the test was successful, and Chronicall should be able to send emails using the server.
-
Be sure to enter the SMTP server information in the Basic Settings section of Chronicall's System Settings.
Updated 3 months ago