
Missing Users
This article covers how to license users inside Chronicall, and steps for individual PBX telephone system troubleshooting.
Causes
- The user may not exist in the phone system for Chronicall to pull.
- The user may be unlicensed inside Chronicall.
- You may need to refresh the users and groups inside Chronicall for it to see the new user.
Resolution
Follow the steps below to diagnose and resolve missing users based on your phone system.
Verify User Licenses
-
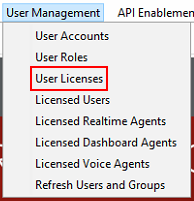
Navigate to User Management > User Licenses.
-
Verify the user in question is licensed.
-
If they're unchecked and you have a license available, select the appropriate licenses and click OK.
Is the User In The PBX?
If the user still doesn't show up inside Chronicall, or doesn't show up as someone you can apply a Chronicall license to, verify the user exists in the PBX (phone system).
Reach out to the person who manages your phone system to verify the user exists on the PBX side.
Continue troubleshooting below based on your specific PBX (phone system).
Avaya IPO
Enable TFTP Directory Read (for legacy installs of IPO, 9.1 and earlier)
-
Log into Avaya Manager.
-
Select File > Advanced Settings > Security Settings.
-
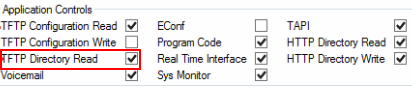
Select System, then navigate to Unsecured Interface and verify that TFTP Directory Read is enabled, as shown below, so that we get user data from the phone system.
Disable Ex-Directory
-
Navigate to the user in question that is now showing up in Chronicall after following the steps above.
-
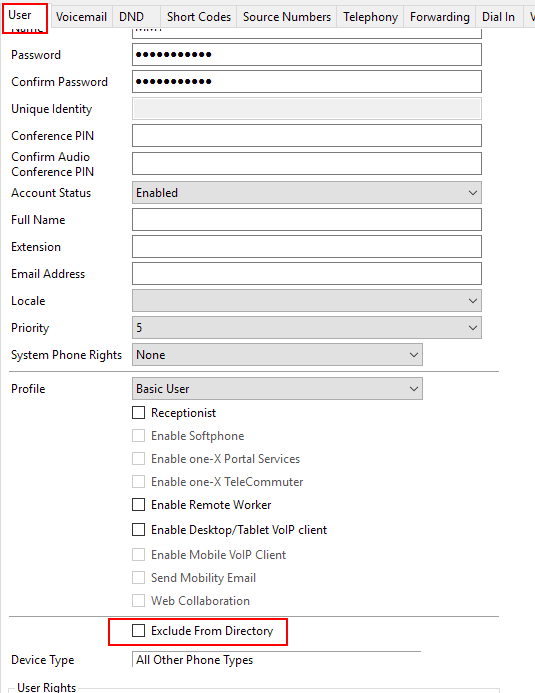
Go to the User tab and ensure Ex-Directory is not enabled for that user, as it will exclude them from the directory Chronicall pulls from.
-
If it's checked, uncheck it, then save the settings.
-
Navigate to Chronicall, refresh users and groups, then license the user and refresh users and groups once more.
Remove Special Characters
- Check the username inside Avaya Monitor to ensure it doesn't have any special characters, as this will cause errors with Chronicall logging.
- If it does, remove the special characters, then save the settings.
- Navigate to Chronicall, refresh users and groups, then license the user and refresh users and groups once more.
Check that UDP Port 69 is open on the IP Office
- Using a TFTP command, request the User List from the IP Office.
- Windows:
Example:tftp {IPOADDRESS} get nasystem/user_list2
Note: You may need to enable the TFTP function within Windows, or use a program like WinSCP to run this test.tftp 192.168.1.1 get nasystem/user_list2 - Linux:
Example:tftp -v {IPOADDRESS} -c get nasystem/user_list2tftp -v 192.168.1.1 -c get nasystem/user_list2
- Windows:
- If you receive a "Connect request failed" message, UDP Port 69 needs to be opened by the System Admin or equivalent.
Shoretel
Verify Setup
First, verify your Chronicall setup via our setup guide here.
ECC Agents and Groups
ECC has some advanced routing options — including services, auto-attendants, etc. — that can cause problems for Chronicall's historical logging if they're not configured correctly.
- All ECC groups must have their own IRN extension.
For Chronicall to see calls going to the ECC group, the call must be sent from ShoreTel directly to the IRN extension.
- If an auto-attendant has been set up for ECC, the call cannot be sent from that AA directly to the group or to the IRN.
A common workaround is to create an extension in ShoreTel that automatically forwards the call to the IRN, and transfer the call from the ECC auto-attendant to that ShoreTel extension.
- If your auto-attendant is set up in the ShoreTel system, that auto-attendant can forward the call directly to the IRN.
If you can't see the Agents or Groups inside the Chronicall licensed users (User Management > Licensed Users), check your ECC IP Address and Route Point Configuration inside the Chronicall server settings if you're using ECC.
Shoretel Missing Users
-
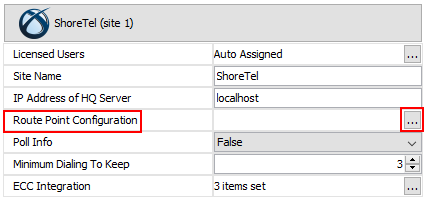
Navigate to Admin (System) > System Settings > ShoreTel.
-
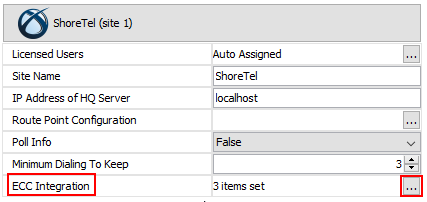
Verify the Route Point Configuration by clicking the (...) next to this line.
-
The default is Route Point, but it may need to be adjusted based on your local setup.
-
-
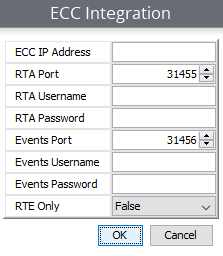
Select OK, then navigate to ECC Integration.
-
Verify the ECC, TRA, and Events settings here as applicable to your local setup.
-
If you want to review the Shoretel setup process, refer to the Shoretel setup guide here.
-
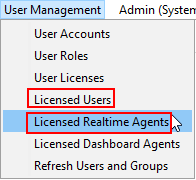
Check to see if you can see the users in Basic Licenses under User Management > Licensed Users, and Licensed Realtime Agents.
-
Apply a standard license to the user, select OK, then refresh users and groups again.
-
Navigate to Licensed Realtime Agents, and apply a Realtime license to that user.
-
Ensure the user's extension within Shoretel Director matches the user's Agent ID within Shoretel Contact Center.
-
Once all that looks good, restart Chronicall services.
Avaya CM
Station or Agent ID?
-
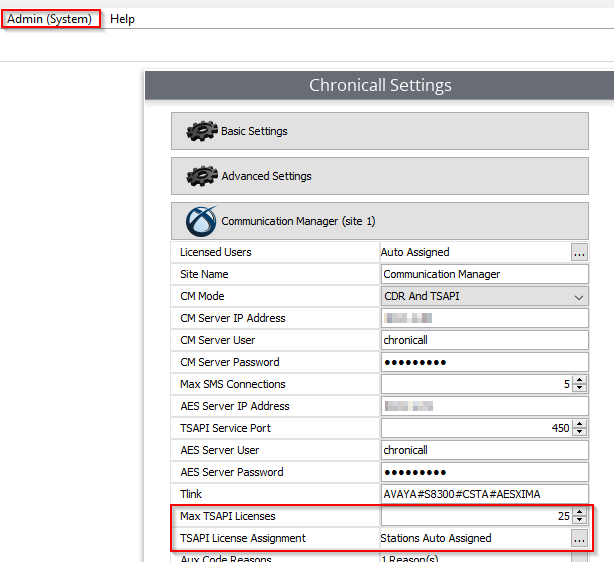
If Station or TSAPI is missing, ensure the station has a TSAPI license inside Chronicall. Go to Admin (System) > System Settings > Communication Manager. Ensure users that should be getting TSAPI data are selected. You don't need to assign a license to the groups here to get Agent Realtime data.
-
If an Agent ID is missing, check for users with special characters in their name, such as @. Ensure all Agent IDs don't have any special characters.
Attendant Console
This is a legacy step, as newer versions of Avaya CM don't use the Attendant Console. Is the user an attendant console?
- Chronicall will not report on the user if they're using an Attendant Console.
Cisco
User Permissions
-
Ensure the application user has permissions to the controlled device(s).
-
If not, apply the permissions needed.
-
Pull up Chronicall and apply the proper licenses as shown above, then refresh users and groups.
-
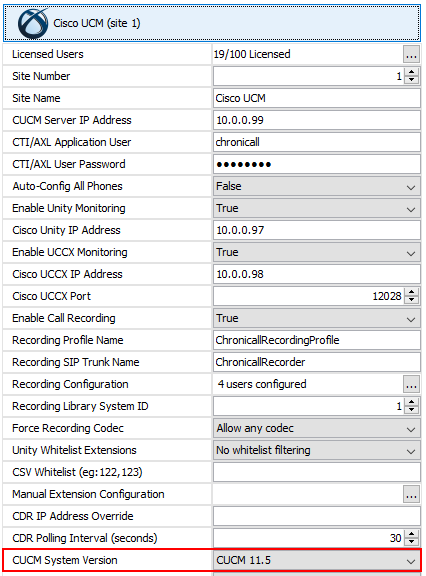
If the CUCM version in Chronicall is listed incorrectly, it will be unable to connect and retrieve data/users. Verify the CUCM System Version is correct by navigating to Admin (System) > System Settings > Cisco UCM > CUCM System Version.
Updated 3 months ago