
How to Offload Realtime Accumulators from Chronicall onto the Realtime Node?
Reasoning
Whether due to a JRE crash or simply wanting to be less taxing on the Chronicall server, some clients will want to offload some (or all) of their Realtime accumulators onto a separate node.
Steps
-
Update
- Update Chronicall to 3.12.0 or later.
-
Configure Chronicall
-
Open up Chronicall and configure the new Realtime Node.
-
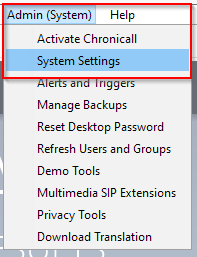
Go to Admin (System) > System Settings.
-
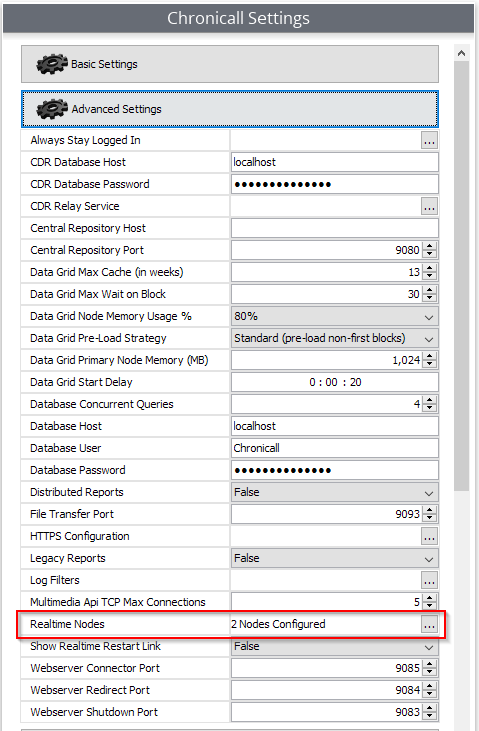
Open Advanced Settings and go to the ellipses for Realtime Nodes.
-
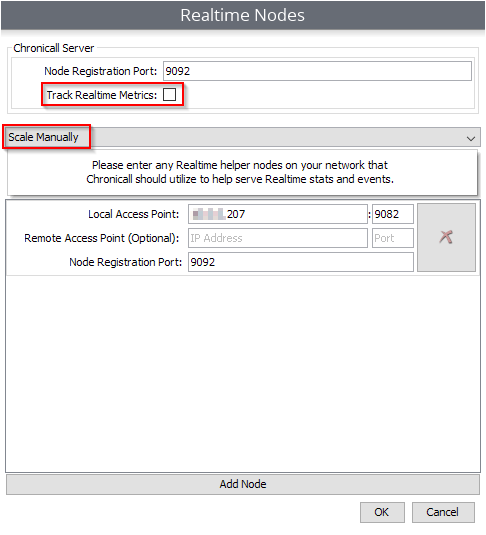
With Realtime Nodes opened, if you want to completely offload all accumulators from the ChronicallServer service onto the Realtime node, you can go ahead and un-check the Track Realtime Metrics box. This is found in the Chronicall Server section at the top. (If this box is left checked, Realtime accumulators will be shared between Chronicall and the Realtime Node.)
-
Whether offloading completely or not, go ahead and change Do Not Scale to Scale Manually.
-
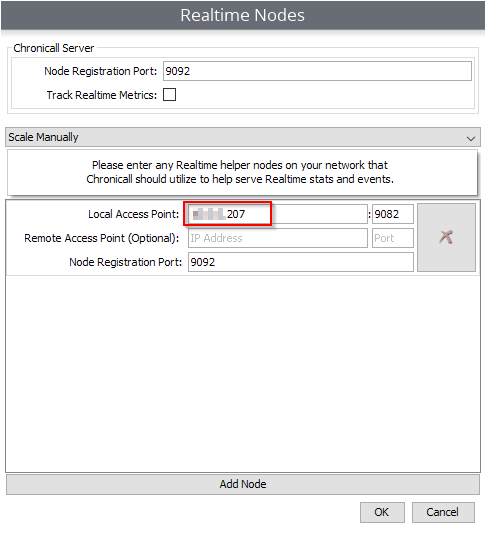
Next, input the IP Address of where the Realtime Node is going to be located into the Local Access Point line (do NOT use 127.0.0.1 even if it will be on the same server as Chronicall).
-
As long as the Realtime Node is being installed on a separate server than the Chronicall server, you should be able to leave the Node Registration Port alone.
-
If the node will be installed on the same server as Chronicall, then you will need to change the Node Registration Port to a different one to avoid port conflicts (typically 9094 will work, as it is no longer being used by Multimedia; do NOT use 9093, as that is the default File Transfer Port).
-
At this point, it is a good idea to ensure that all configured ports are open on both servers, as anyone opening a Realtime or Desktop interface will need access to the Chronicall Server and the Realtime nodes.
-
Take a screenshot of the Realtime Node configuration or make note of it, as you will need this information for the installation of the Realtime Node.
-
After configuration, go ahead and save your changes in Chronicall, but do not restart the ChronicallServer service just yet.
-
Lastly, while you can install as many Realtime Nodes as you like, you can only install one Realtime Node per server (including one on the Chronicall Server).
-
-
Setup
-
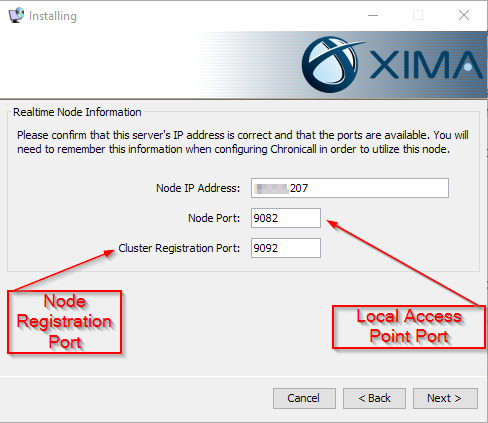
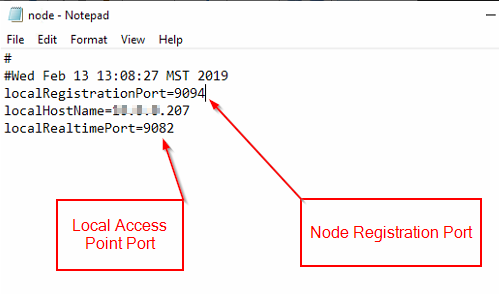
During installation, input the same information from the Realtime Node configuration (Node Registration Port = Cluster Registration Port, Node Port = Local Access Point Port).
-
This configuration is important, as the Realtime Node does not pull any settings from Chronicall — the settings in Chronicall just tell it where to find the Realtime Node.
-
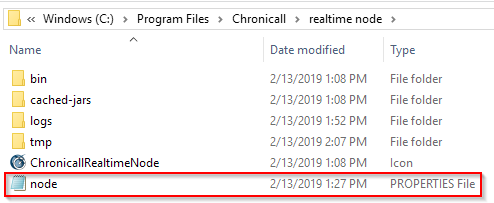
Ideally, you would set the port you want the Realtime Node to use during installation, but you can always change it in the node properties file later. This is typically found in the C:\Program Files\Chronicall\realtime node folder. (You can also reference the note at the bottom of this guide if you need to change the IP Address.)
-
-
Finalization
-
Once the installation is complete, go ahead and restart the ChronicallServer service.
-
After the service restart, you can verify that the accumulators are offloading properly by navigating to
http://localhost:9080/diagon the server and opening up the Realtime Debug.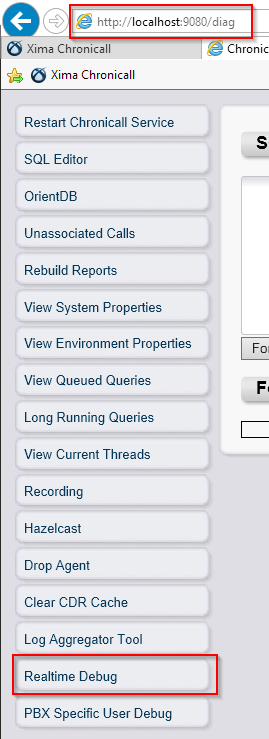
-
With that open, you should see both of your Realtime nodes at the top: Node 0 (Chronicall) and Node 1 (Realtime Node).
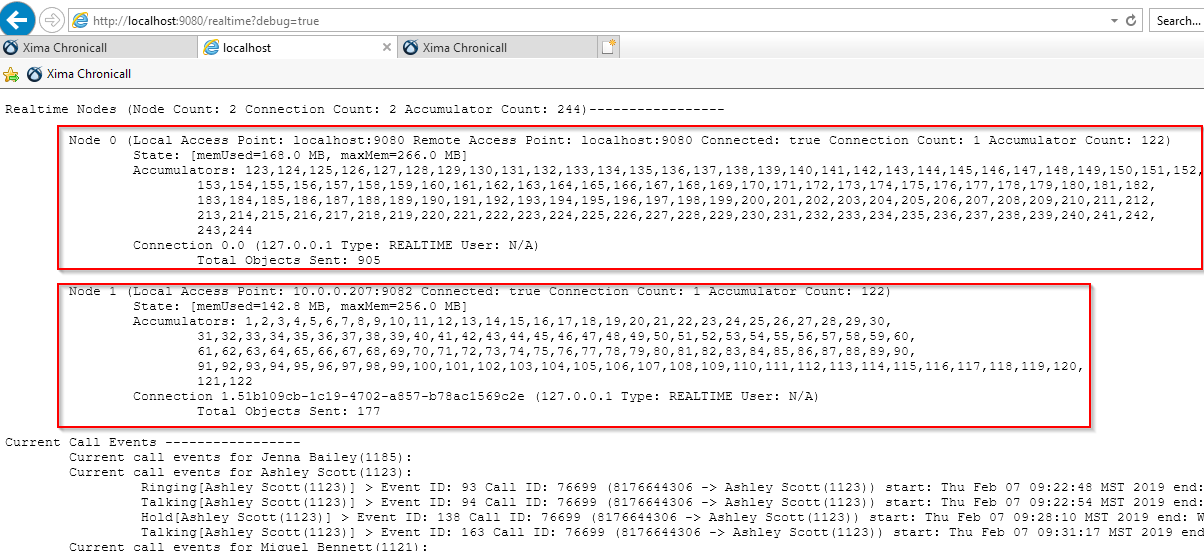
-
If you elected to completely offload the accumulators, then your Realtime Diag should look like this instead:
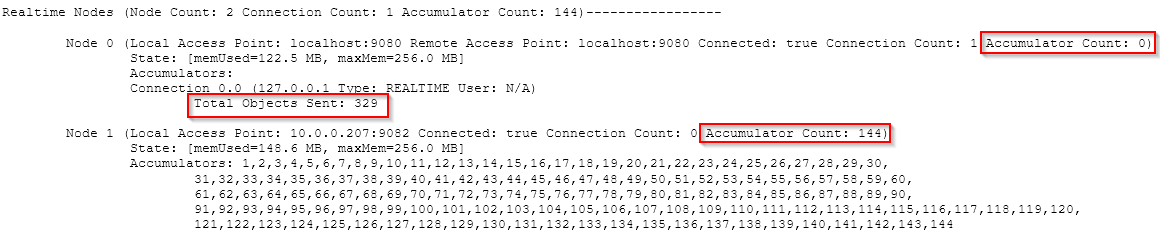
(You will notice that there are still Objects Sent to Node 0, but that the Accumulators are gone from it and completely onto Node 1.)
-
If your Realtime Debug does not look like either of these screens, then you will want to double-check your ports are configured and opened, the Realtime Node properties file matches your settings, and check the tomcat/node logs for any errors.
-
Note: Changing the IP Address for the Node
-
If you have to change your IP address for the Realtime Node for any reason, adjust it in the Realtime Nodes menu, and the Node Properties file (as outlined above).
-
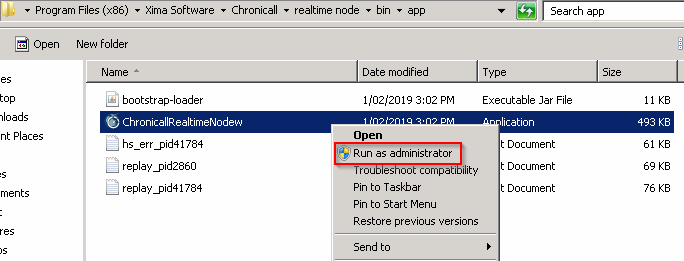
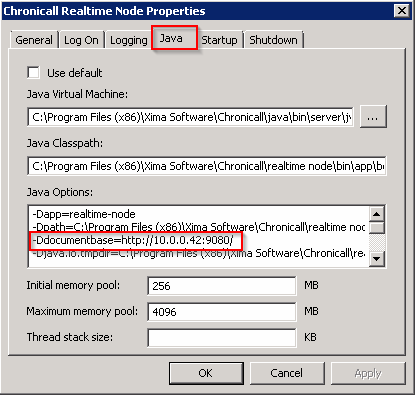
After that, you will also need to adjust the Ddocumentbase setting in the ChronicallRealtimeNodeW Java menu.
-
This can be found in the Chronicall\realtime node\bin\app folder. Make sure to run the application as an Administrator.
-
Go to the Java menu and adjust the IP Address that the Ddocumentbase is pointed towards.
Updated 3 months ago