Account Codes
Requires Realtime and Agent Dashboard Licenses
Note: Before configuring Account Codes, make sure that Agent Dashboard users have access to the Chronicall Desktop. (see Chronicall Desktop for Windows - Installation / Configuration) If the user does not have access to the desktop application, or if they're not logged into it, the Agent Dashboard features will not function.
Account Codes allow you to report on who your users are speaking to, and for which reasons.
With the Agent Dashboard licenses in place, anytime that an Agent Dashboard user receives or makes a call, a caller ID screenpop will now appear on their screen.
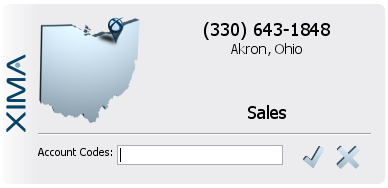
This screenpop will typically provide call information
- Caller ID/Number
- Location
- Date/Time
- If inbound, Group the caller selected from Auto Attendant
There are two items that I can add to this call
- Account Codes
- Call Notes (see Adding Notes to Calls)
Using Account Codes
When logged into the Chronicall Desktop and when a user is assigned an Agent Dashboard license, a screenpop will appear anytime a user is involved with a call. When that user has Account Codes assigned to them, they can then associate that call with the Account Codes.
Account Codes can be anything that you decide. The main idea is to allow you to report on who the users are speaking to, and for what reasons.
When a user receives/makes a call, they can assign Account Code to the call by simply typing in the Account Code.
If it is an Account Code that has been assigned to them, a drop box of options will appear. They can then select from the options that are provided. Once they select their option, they can hit the check mark symbol to the right. This will associate the call with the assigned Account Code, and the screen pop will close.
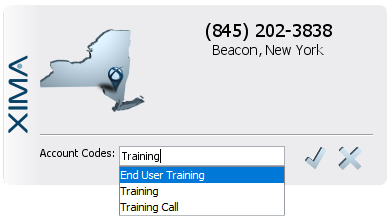
Note: If the user accidentally closes the screenpop without entering an Account Code, they can still add an Account Code to the call.
To do so:
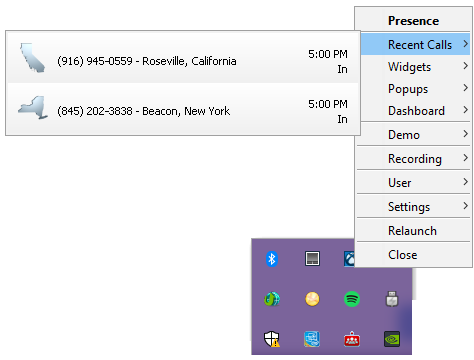
- In the system tool tray (very bottom right hand corner of the screen where you typically see the date and time on the computer), click on the arrow pointing up and a menu of applications will appear.
- If they are logged into the Chronicall Desktop, you will find a small "Xima Software" logo.
- Right click on it, and a list of options will appear.
- Go to "Recent Calls" and hover over it.
- The most recent calls will appear, and they can select the call in question
- The call screenpop will appear again, and they can now enter the Account Code
Adding Sub-Account Codes
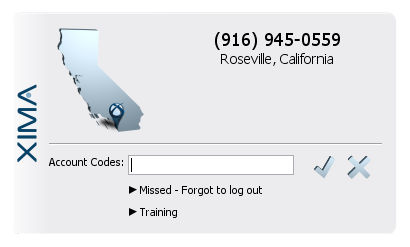
It is possible to add more than one Account Code to a call
When adding the Account Code to the call, select your first Account Code and hit enter.
If a Sub-Account Code is needed, start typing the second Account Code, and the dropdown will appear again.
Once the second Account Code is found, select it and hit enter again.
You will see the multiple Account Codes assigned to the call.
Using Free-Form Account Codes
When using Account Codes, if an Account Code is not assigned to a user, when they enter it into the Account Code field, they will get an error notification.
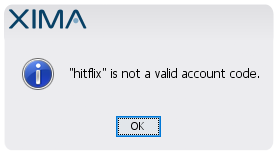
It is possible to allow users to add unassigned Account Codes. Meaning, if I speak to a client and they are not one of my assigned Account Codes, Chronicall can be configured to allow me to add an "ad hoc" Account Code. Meaning, the Account Code can be used just for one time for that particular call.

It will not be a permanent Account Code in your list of Account Codes, of course, unless you add it to your list of Account Codes.
To configure the Free-form Account Codes:
- Access the System Settings section found under Admin (System) on the Chronicall main menu
- Under System Settings, select the "Agent Dashboards" section
- Where it says "Free-form Account Codes" switch that to say "True"
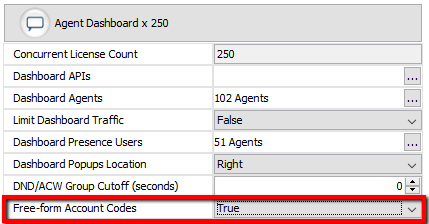
- Hit "Save"
Configuring Account Codes
To create Account Codes:
- Select "Agent Dashboard Configuration" on the Chronicall main page
- Select "Account Codes"
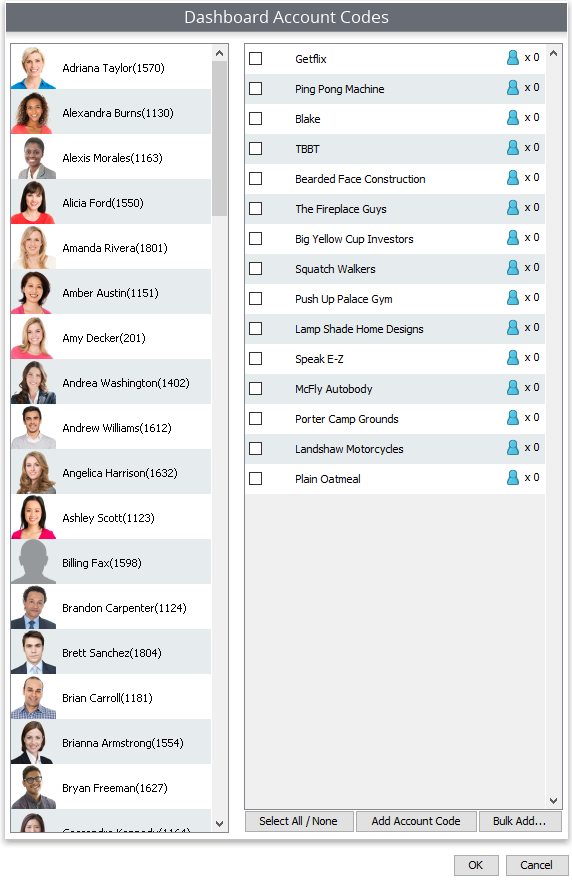
- You will now see a window displaying your Agent Dashboard users
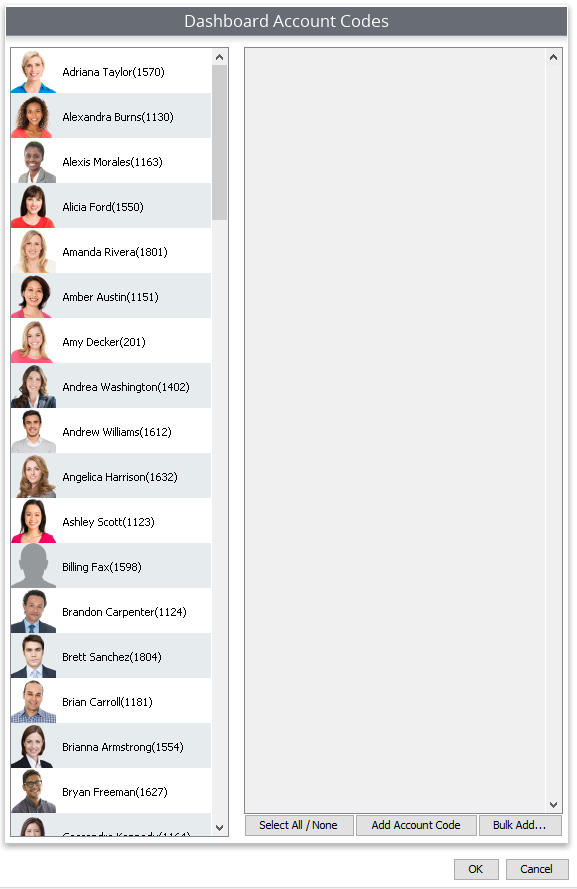
There are two ways to add Account Codes:
Individually:
Select "Add Account Code"
Enter in an Account Code
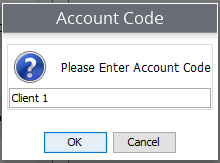
Hit "OK"
Repeat for each individual Account Code
Bulk Add
- Open a Notepad Text File
- List each Account Code, each on it's own line
Example: - Client 1
- Client 2
- Client 3
Save the Notepad Text File
Once the Notepad Text file is saved, hit "Bulk Add" in the bottom right-hand corner of the Account Code menu.
- A window's file will now appear, and you can select your Account Code Notepad Text File.
- Hit "Open"
You will now see the list of all of your Account Codes.
Assigning Account Codes
Once you have finished creating your Account Codes, you can now assign them to the Agent Dashboard users.
There are two ways to assign the Account Codes:
Option One:
Once you've created an Account Code, you can now assign it to the desired users.
As you finish an account code, select the "Blue Person" image.

You will now see a list of user's names
- Check the boxes for those that you would like to assign the Account Code
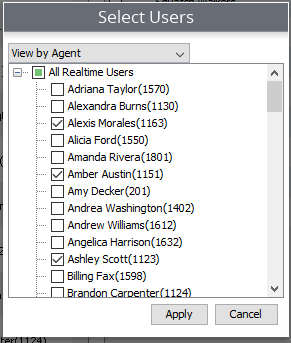
- Hit "Apply"
- Repeat with each Account Code
Option Two:
Once you have created your list of Account Codes, you can now assign them to the desired users.
On the left hand side of the menu, hold the "Ctrl" button down on your keyboard and select the desired users
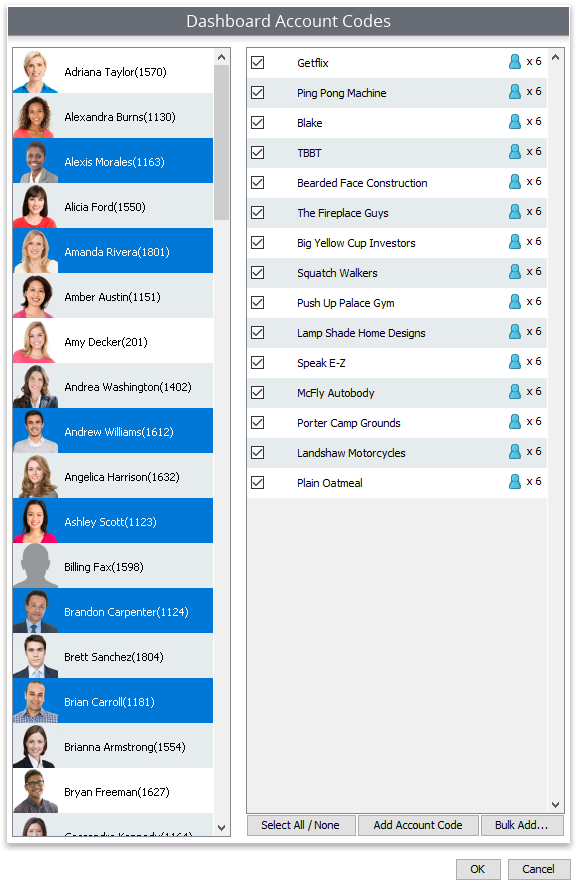
Once you have them selected, you can now select the individual check boxes for each of the desired Account Codes to assign.
Note: If you want to assign all Account Codes to the desired users, you can select the "Select All/None" button at the bottom of the screen.
Once you select the desired users/Account Codes, hit "OK"
Updated 3 months ago