Configuring Recording Library
To configure the Recording Library, you must first have purchased the Chronicall Recording Library module. In addition, the Chronicall Recording Library must also have been installed. To gather more information on installing the Recording Library, see section 3.0 of this article.
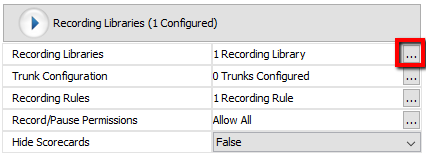
Once Recording Library is installed, open Chronicall and go into System Settings > Recording Libraries > then click on the ellipses button ("...").

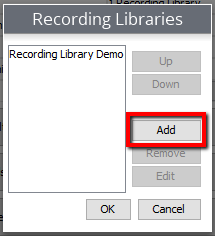
Click "Add."

Note: As seen in the example above, a Recording Library may have already been created by default, however, it can be edited. To edit the existing default Recording Library, select it, then hit "Edit."
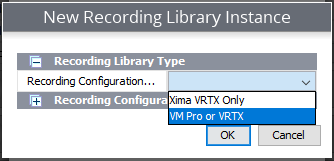
Select the Recording Library Type that applies, either "Xima VRTX Only" or "VM Pro or VRTX."

Once the Recording Library Type has been selected, hit "OK."
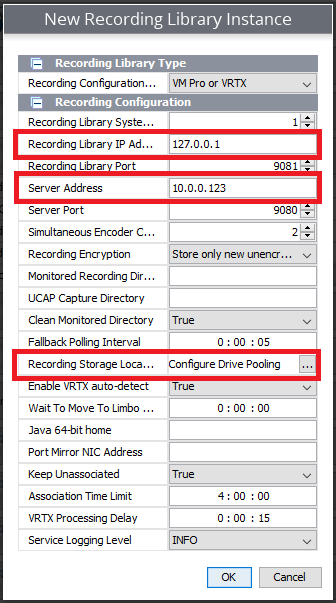
The New Recording Library Instance properties will now appear. You will now need to edit the following fields:
- Recording Library IP Address: Enter the IP Address of the server where the Recording Library was installed.
- Chronicall Server IP Address: Enter the IP Address of the server where Chronicall was installed.
- Recording Storage Location (optional): Configure where the Recordings will be stored. This defaults to be in the Recording Library directory.

Once configured, hit "OK" and make sure to hit "Save" to save the changes.
Note: For more information on Storage Pools, seethis article.
Furthermore, if your hard drive is not very large then you should configure a storage pool that stores recordings onto another drive or another server. To see recommended storage seethis article.
Updated about 2 months ago