Creating a Report in HTML
This article provides step-by-step instructions on how to create a custom report in the HTML version of Chronicall.
When working with the Custom Reports module, you will be provided two options. This article addresses one of those options, which is to create your own report from the ground up.
To begin, follow the steps below:
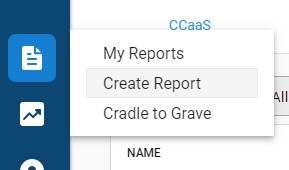
- On the Chronicall main page, click the Reports icon (document icon).
- Select "Create Report."
- Select the desired row type.
Note: Some row types, depending on the row, will give you the option to add further criteria to specify the desired parameters for your row type.
For example, if you select “Call” for your row type, you will then be presented a window, wherein you can select further criteria such as “Event Type” or “Call Duration” to specify your row filter. By adding "row" criteria, the report that you create will always use the selected filters when running the report. In addition to the example, if you select "Call Duration", and set the call duration to "greater than (>) three minutes", the report will only present calls that had a call duration greater than three minutes.
For creating this report, let's select "Agent" as our row type. Then hit "Select Row."
Predefined Columns
A window with two tabs will appear. In the Predefined tab, which should be the tab automatically selected, select a column type. In this example, we will select “Answered Call Count.”
Note: The Predefined tab is used to quickly select metrics that don't need much adjusting.
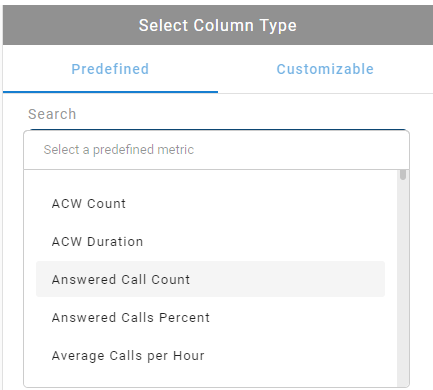
- Enter in your column header. The column header will be the name of the column on the report. You can either leave it at the default header title, or adjust to your desired column header title.
Note: Other minimal criteria filter options may appear below the column header depending on the column type. This allows you to further customize the value to your preferences/needs.
-
Select "Add Column" and your column will now be found on your report.
-
Repeat for any other desired column.
Customizable Columns
You can also click over to the Customizable tab. The Customizable tab provides the same metric options as the Predefined tab, but with the flexibility of customizing the metric to reflect your needs.
To customize the metric, click the plus button next to Criteria. You will then be able to search and add criteria you want for the selected metric.
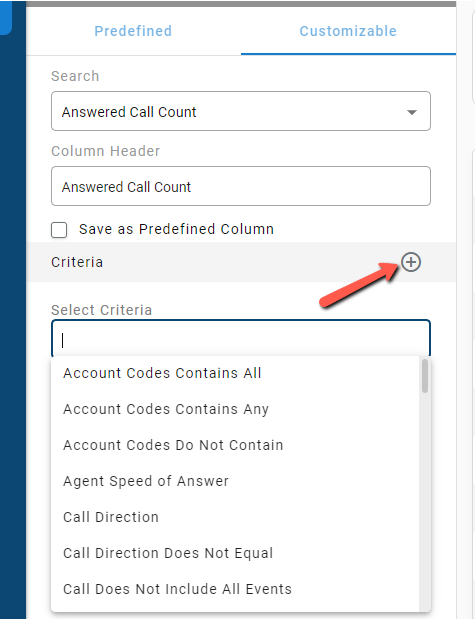
For example, if you wanted to see a count of answered calls that had a call duration greater than three minutes, you would the following:
- Hit the "+" symbol next to "Criteria"
- Locate "Call Duration"
- Select the Call Duration Criteria
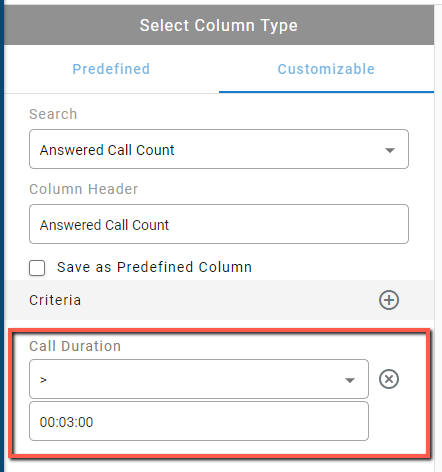
Note: In the Customizable tab, you can also check the box next to "Save as Predefined Column" if you would like to use this column in other reports as well.
Once you have filled in all the necessary information, you can click the Add Column button to add another column to your report.
When you have finished adding columns to your report, select "Finish."
Overall Report Summary
On the next screen you will be given the option to define the report summary. This provides the option to display an overall summary found at the top of the report.
On the left side of the screen, you will be presented with a list containing the metrics that have been added to the report.
You can go through the list of the metric summaries that you would like to display at the top of your report.
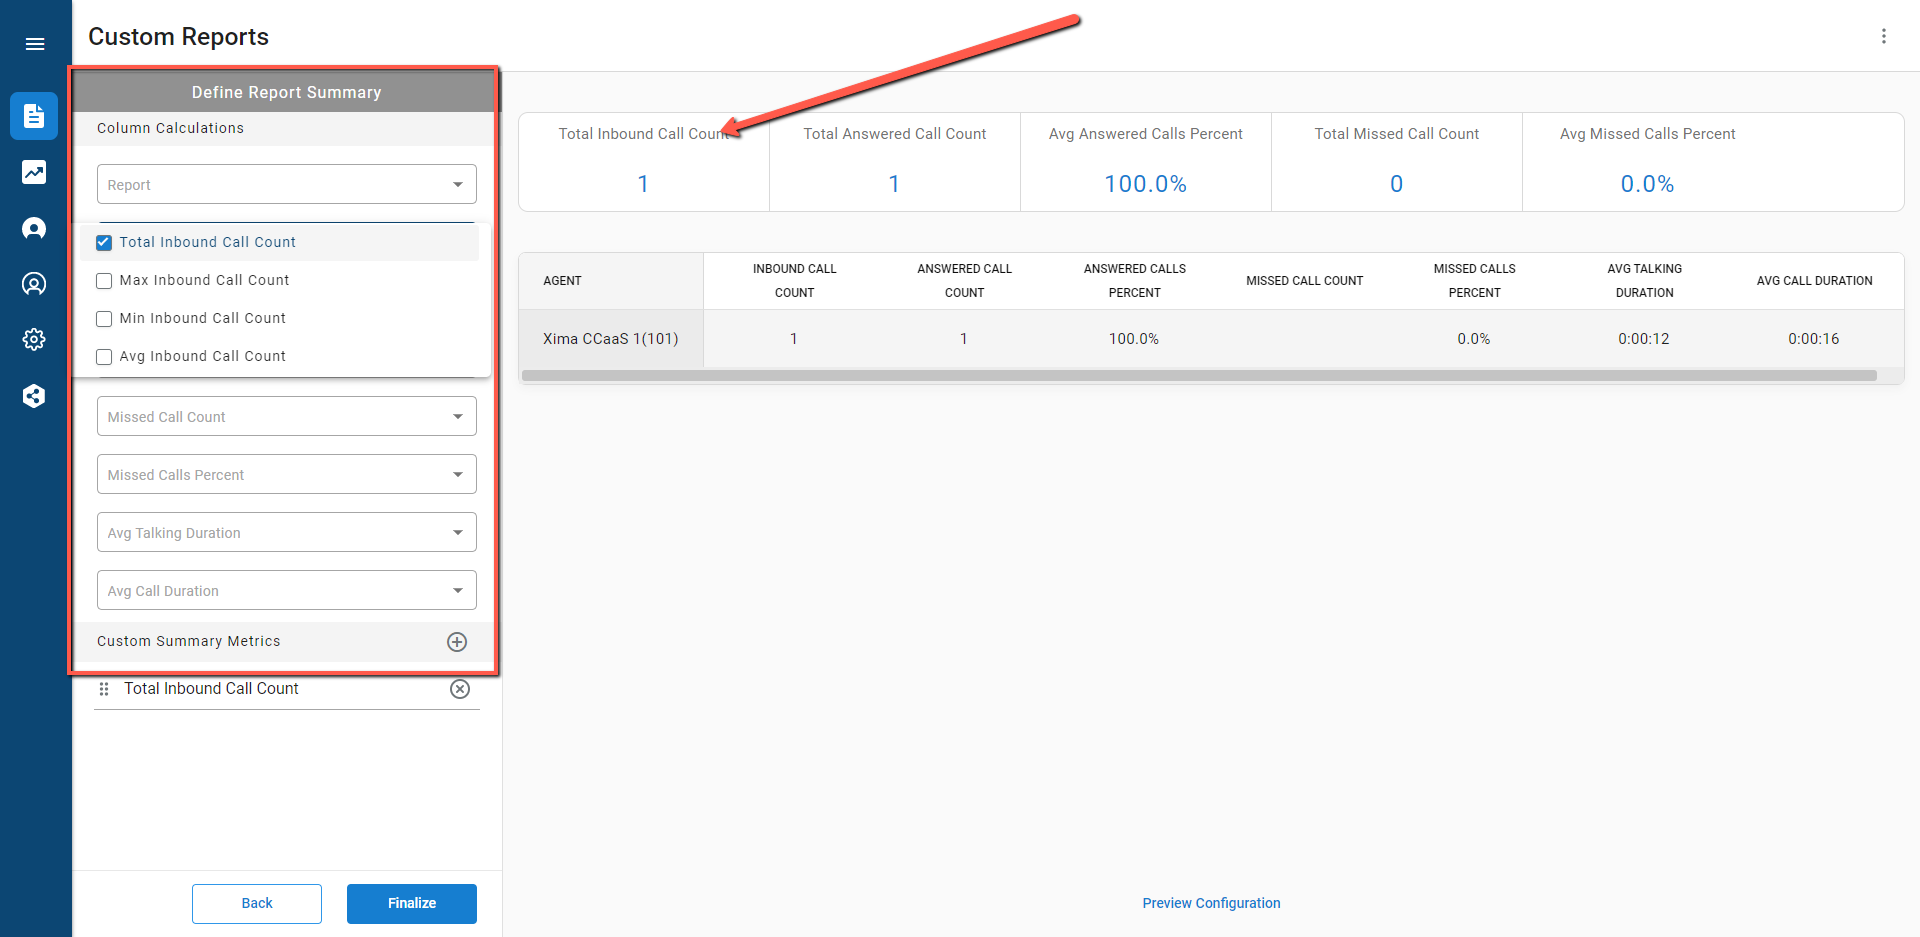
Note: It is not required to add the overall summary.
Upon adding the overall summary, select "Finalize."
Finalize the Report
The last step is to finalize the report. The next window will present to you the final steps to finish your custom report. This will vary depending on the style of report you have created. In this example we have created an agent report.
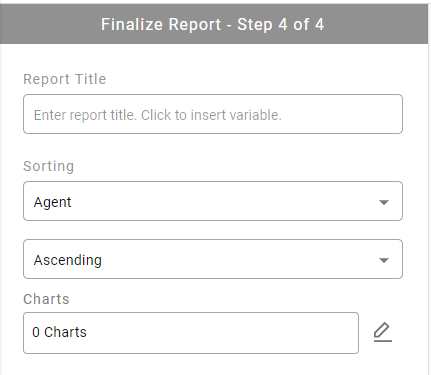
In this scenario, there are four options:
- Report Title - This provides the ability to give the new report the desired name.
- Sorting - In some report styles, you will be given the option to choose how the report is sorted. In an agent report, by default it will be sorted by agent name, ascending (A-Z). However, you can select to sort the report by any desired column found on the report. For example, if the report has an "Answered Call Count" column, you may select to sort the report by Answered Call Count: Descending. This would then sort the report starting with the agent that had answered the highest number of calls.
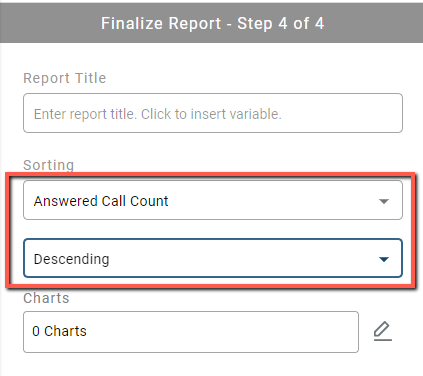
- Charts - This provides to add the desired charts to the report. Charts are a graphical representation of the columns found on the report. Charts are not mandatory, but entirely optional.
Upon finalizing your report, select "Save Report." Your report has now been saved and will be available in the list of standard reports and can be run and scheduled as if it were a standard report.
Updated about 2 months ago