Configuring SSL/TLS
This article addresses the configuration steps for SSL/TLS within Chronicall when Chronicall version 4.0 is in use.
- Open Chronicall and navigate to the Chronicall System Settings found under the Admin (System) section on the Chronicall main page. Select "System Settings".
- Select "Basic Settings"
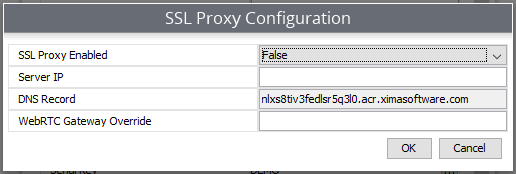
- Select the ellipsis (...) to the right of "SSL Proxy Configuration".
A configuration window will now appear.

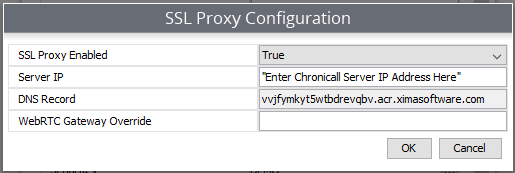
- Set the "SSL Proxy Enabled" as "True"
- Enter the Chronicall Server IP Address in the "Server IP" section

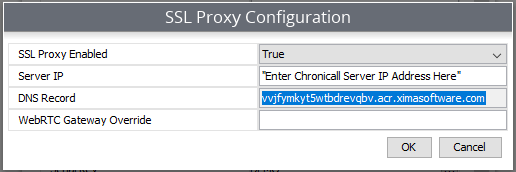
- Copy the unique "DNS Record" and paste somewhere for future use.

- Select "OK", then "Save".
- Restart the Chronicall services
Note: At this point, the server will need to create a new nginx task in the Task Manager. This may take up to 5 minutes.
You can monitor the Chronicall folder for the new nginx folder to be created
To access the Chronicall folder navigate to the following:
- Windows
- C:\Program Files (x86)\Xima Software\Chronicall
or - C:\Program Files\Chronicall
- C:\Program Files (x86)\Xima Software\Chronicall
- Linux
- /var/lib/Chronicall
- Once the nginx task is available, take the DNS Record what was copied earlier and paste it in the address bar of either Google Chrome or Internet Explorer
Note: If using Chrome, add '/web' to the end of the DNS Record URL
Example: vvjfymky5wtbdrevqbv.acr.ximasoftware.com/web
- This will now present the new SSL enabled Chronicall.
Updated about 2 months ago