Manage Recording Rules
This provides information on how to set up and manage recording rules. This is specific to VRTX, Port Mirrors and Cisco Built-In Bridge.
When using the Xima VRTX (Voice Recording Technology by Xima), Port Mirror, or Chronicall Recording Library on Cisco, you will have the option to set your recording rules within Chronicall.
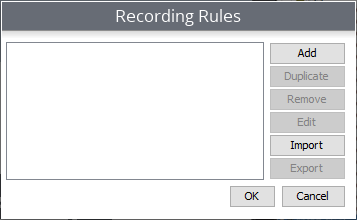
- Under the Recording section on the Chronicall main menu, locate "Manage Recording Rules."
- Once the Recording Rules appear, select "Add."

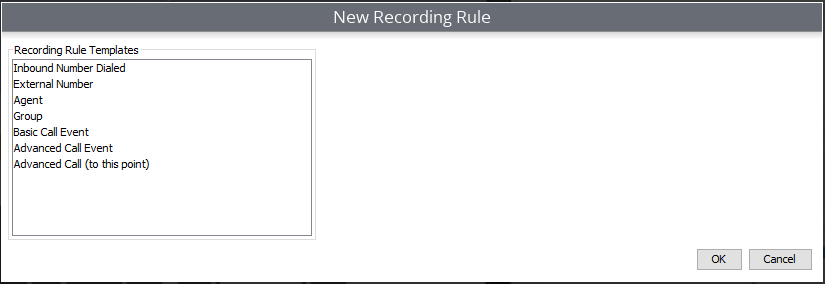
- You will now be shown a window with a list of Recording Rule options.

Inbound Number Dialed: Records the number that a client will dial to get into your phone system
External Number: Records numbers that is not part of your phone system (Inbound and Outbound Calls)
Agent: Records the desired agents/extensions (Inbound and Outbound Calls)
Group: Records the desired Hunt/Work groups (Inbound and Outbound Calls)
Basic Call Event: Allows you to select Groups/Agents, but also allows you to select call direction
Advanced Call Event: Allows for very specific recording of calls with defined events (Similar to setting Cradle to Grave filters
Advanced Call (To this point): Allows for very specific recording of calls with events up to a certain point (i.e., record this agent until they transfer the call)
Example 1 - Recording Agents/Extensions
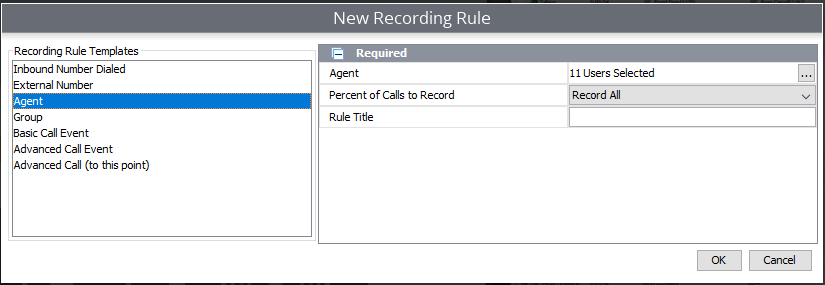
For this article, let's choose the Agent option as the first example:

- To the right, select the ellipses, then select the Agents/Extensions that you would like to record.
- From the dropdown, select the percent of calls that you would like recorded.
- Name your Rule, then hit "OK."
Example 2 - Recording Specific External Phone Numbers
It is frequently requested to record specific external numbers. An external number is a phone number that exists outside of the phone system. (i.e., it is a number that does not have an extension in the phone system.)
To record an external number:
- Open the Manage Recording Rules section and select "Add."
- Locate "External Number" and select it.
- Select the ellipses next to "External Number."
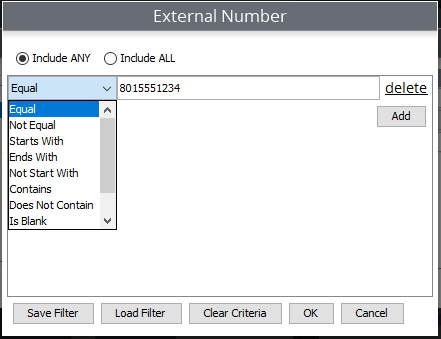
- In the new window, select "Include Any" and hit "Add."
- In the drop-down, select the option that best fits your criteria, then type in the number of interest.

- Repeat for any additional numbers of interest.
Note: When entering the number, for better results omit any spaces, parentheses, and dashes.
Updated about 2 months ago