Manage Backups
This provides information on how to schedule and manage backups. Scheduled backups are recommended to avoid the risk of losing all Chronicall data due to a server crash or other event.
To avoid the risk of losing all Chronicall data due to a server crash or other event, it is recommended to set up a scheduled backup.
Note: Although it is possible to run a backup during business hours, it is recommended to perform backups after hours or during lower traffic times.
To schedule a backup:
Under the Admin (System) section on the Chronicall main menu, select "Manage Backups."
Select "Schedule Backups."
A window will appear.

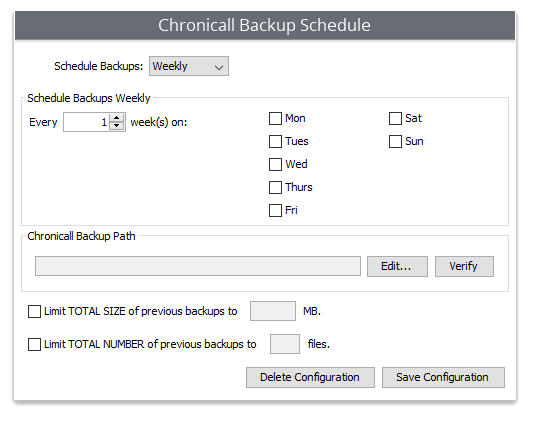
Schedule Backups: Select how frequently the backup should run:
- Hourly: Select to backup to run every 1, 2, 3, etc. hours

- Daily: Select the backup to run every 1, 2, 3, etc. days

- Weekly: Select the backup to run every week, every other week, etc. Additionally, select the desired day of the week to run.

- Monthly: Select the backup to run every month. Select to have it done by day of the month, or by the day of a specific week (e.g., The Second Tuesday of the month.)

Once the time frame for the backup is set, the destination of the backup can now be established. By default the backup will be stored on the "C:" drive but can be stored on any network drive.
Note: A shared network path is highly recommended. If the Chronicall Server fails, you will likely lose any local backups on the server.
Select "Edit..."

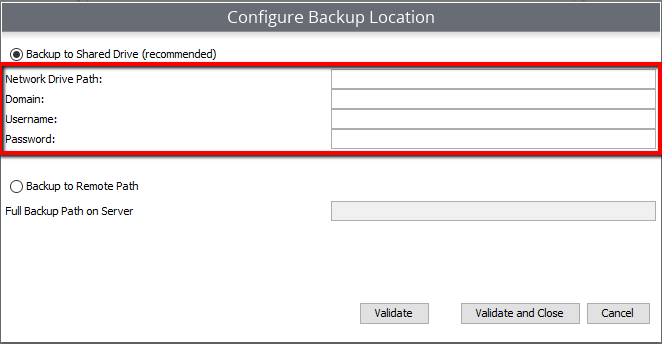
You will have two options:
- Backup to Shared Drive (recommended)
- Backup to Remote Path
Backup to Shared Drive:

- Enter the Network Drive Path
- Enter the Domain
- Enter the Shared Drive Username
- Enter the Shared Drive Password
- Hit either "Validate" or "Validate and Close"
Backup to Remote Path: If you'd like to save the back up to a local network drive:
- Enter the full backup path on server
- Hit either "Validate" or "Validate and Close"

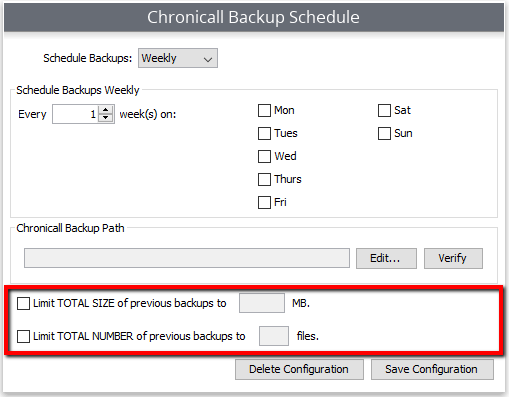
Once you've selected the backup location, you may now also select the TOTAL SIZE of the previous backups. You can do this by either Megabytes or by Files.

Once all required information is entered, select "Save Configuration."
Upon saving the backup, you should receive a message indicating the success of the created backup.

Updated about 2 months ago