Cisco - Server Installation
This provides information for the Cisco server installation process.
Chronicall Call Reporting Specs
Format
Downloadable setup file
Database
OrientDB
Web Server
Apache Tomcat
User Interface
Web Interface and Chronicall Desktop Application
Server Requirements
- Windows 7 or higher, Windows 2003 and higher, 32/64 bit Linux
- 250 GB Hard Drive (Minimum)
- 4 GB RAM (Minimum, see below for recommended RAM based off of call volume.)
- Quad Core CPU
Ram Requirements
Increase Memory by 2 GB for every 10,000 calls a day.
Example: 10,000 Calls a Day = 6 GB of RAM
- 20,000 Calls a Day = 8 GB of RAM
- 30,000 Calls a Day = 10 GB of RAM
- 50,000 Calls a Day = 14 GB of RAM
Cisco Call Manager
Release 7, 8, 9, 10, 11, and 6K
Cisco Call Manager Connection
JTAPI, AXL, and CDR
Unity Monitoring
Monitor Output
Virtual Machine
VM Ware
User PC Requirements
- Windows 7 or higher; 32/64-bit Linux
- Internet Explorer
- Java 7 or above
- Javascript Enabled
Increasing Server Requirements
You may need to increase the hard drive and CPU depending on the number of Realtime Agent Licenses you have, and if you are recording calls.
The chart below shows the amount of RAM required per Realtime Agent Seat.

Recording Storage
The following chart details the number of days until the disk drive is filled up from recording. Use this information to determine your company’s needs.

*Assume 8 hours per agent, per day
Section 1 - Cisco Configuration
1.1 Configure Cisco Unified Application Users
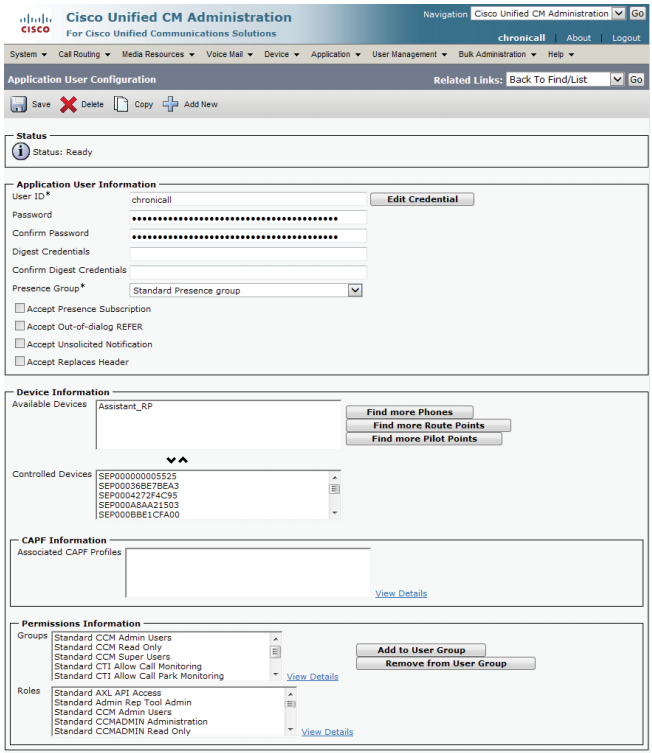
An application user must be created and configured inside of the Cisco Unified CM Administration tool to allow Chronicall to connect to the system. Chronicall also requires user access to the administrative XML (AXL) API to query for users, groups, voice-mail information, call park timeouts, and to automatically configure devices to be monitored (if requested within Chronicall).
To create an application users:
- Sign in as, and with administrator rights to Cisco Unified CM Administration.
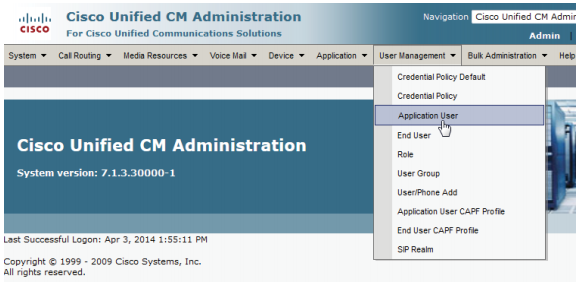
- Select User Management > Application User.
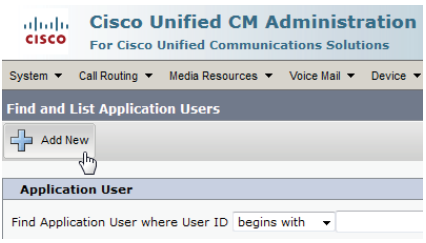
- Select "Add New"
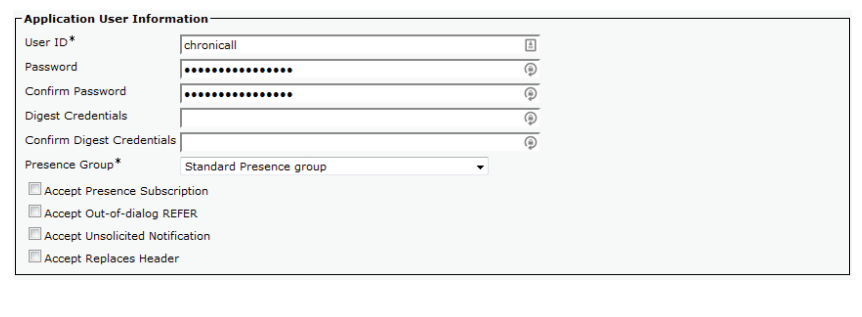
- Enter a User ID and Password for Chronicall to use in the application user
- In the Permissions Information section click the "Add to User Group" button
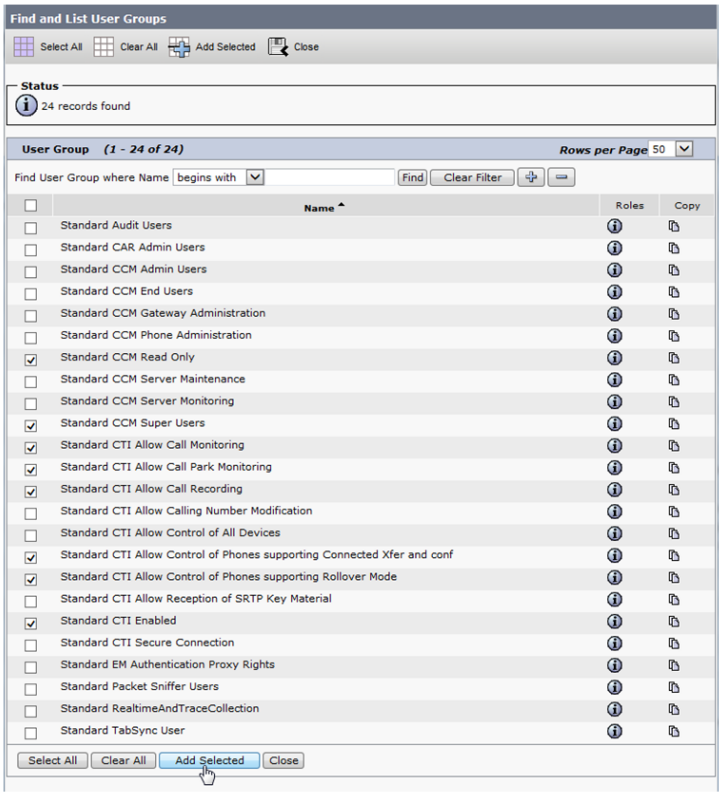
- Then click "Find" and select the following groups:
- Standard CCM Read Only
- Standard CCM Super Users
- Standard CTI Allow Call Monitoring
- Standard CTI Allow Call Park Monitoring
- Standard CTI Allow Control of Phones supporting Connected Xfer and conf
- Standard CTI Allow Control of Phones supporting Rollover Mode
- Standard CTI Allow Call Recording
- Standard CTI Enabled
Then click the "Add Selected" button.
- Click "Save". The user should now look like the image below. Please ensure you move all available devices to Controlled Devices. If they are not under Controlled Devices they will not appear in Chronicall.
Note: All devices need to be added to the Chronicall user. This ensures that the logging is accurate and the recordings associate to the correct device. Within Chronicall you can leave users unlicensed so their details don't show the reports, but the Chronicall user needs to be able pull data from all device types.
Section 1.2 - Configure Cisco Unity Connection Monitoring
In order for Chronicall to know what happens to a call while it is inside the Unity system (voice-mail or auto-attendant), remote port status monitoring must be enabled for the Chronicall server.
Please do the following:
- Sign-in as an administrative user to Cisco Unity Connection Administration.
- Then from the menu on the left, select System Settings > Advanced > Conversations.
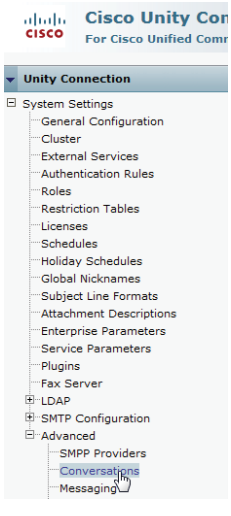
- Make sure the "Enable Remote Port Status Monitor Output" option is selected and the IP address of the Chronicall server is added to the field "IP Addresses Allowed to Connect For Port Status Monitor Output (comma-separated).
The example below has the output going to two different PC's: 10.0.0.216 and 10.0.0.233

- After entering the IP Address(es), click "Save" button.
Section 1.3 - Cisco UCM | User Configuration for Successful Chronicall Logging
Before attempting this, please coordinate with a CUCM certified technician to ensure all steps are performed correctly. Xima will not assist in the configuration of the PBX in this manner.
When building users within CUCM that are to be logged by Chronicall, there are a few key best practices that are recommended to be followed for success. Deviations from this recommendation will not result in Ideal logging and will not be privy to custom builds from Xima to resolve the behavior. Follow the steps below for best logging.
Users
- After logging into your Cisco UCM Web Console, navigate to Call Routing > Directory Number (DN).
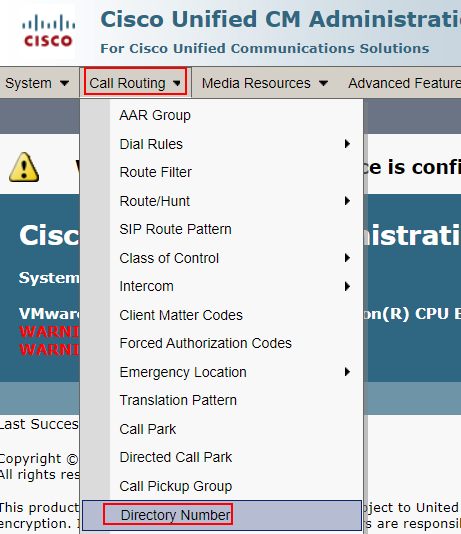
- Once you have navigated to Find and List Directory Numbers, either select Find or Add New to modify a current user or add a new DN.
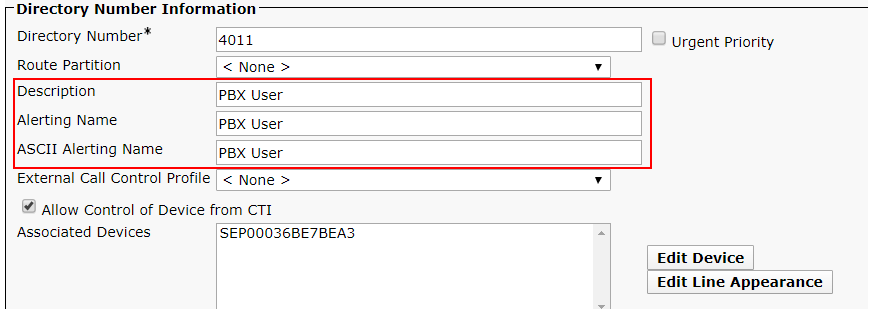
- Upon adding a new DN, or selecting one to modify, ensure the Description, Alerting Name, and ASCII Alerting Name all reflect the new user.
- Navigate to User Management > End User.

- Once you have navigated to Find and List Users, either select Find or *Add New to modify a current user or add a new user.

- If modifying a current user, locate that specific and user and proceed to the next step. If adding a new user, proceed to the next step.
- Under the first section that appears in End User Configuration, provide a User ID, Last Name, First Name, and Display Name in the relevant fields. Please note, these will need to be related to each other.
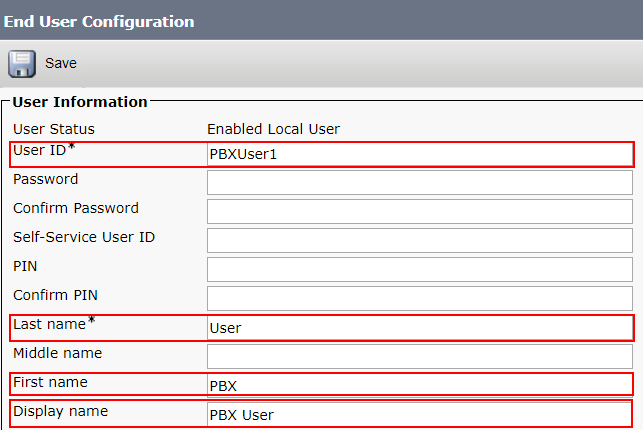
- After you have entered this information, save the configuration so far and proceed to Device Information. Once there, select Device Association.

- After opening User Device Association, select Find and locate the device that user will be utilizing on the PBX. After selecting that device, Save Selected/Changes. Once saved, select Go, which is next to Back to User in the upper right-hand corner.
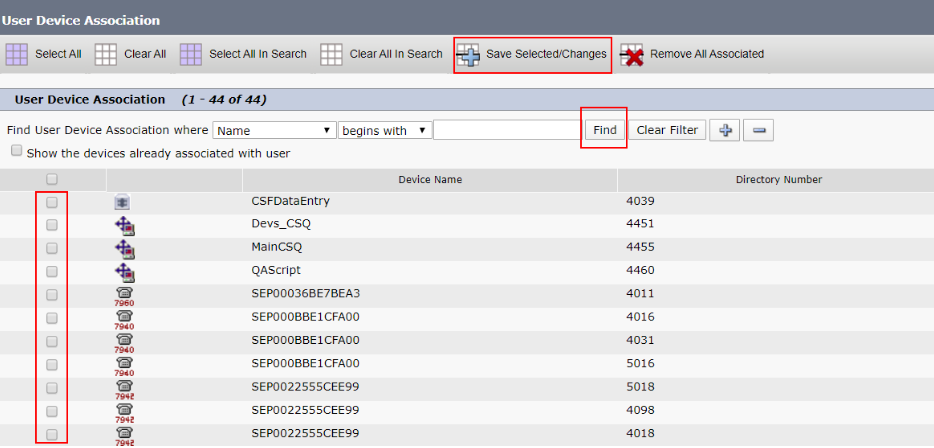
You will now see the selected device added to your controlled devices.

Please note that the first line of the device you select is what will be available as the primary extension of that user. This will also be the primary extension associated to that user.

- Select Save and navigate to Device > Phone.
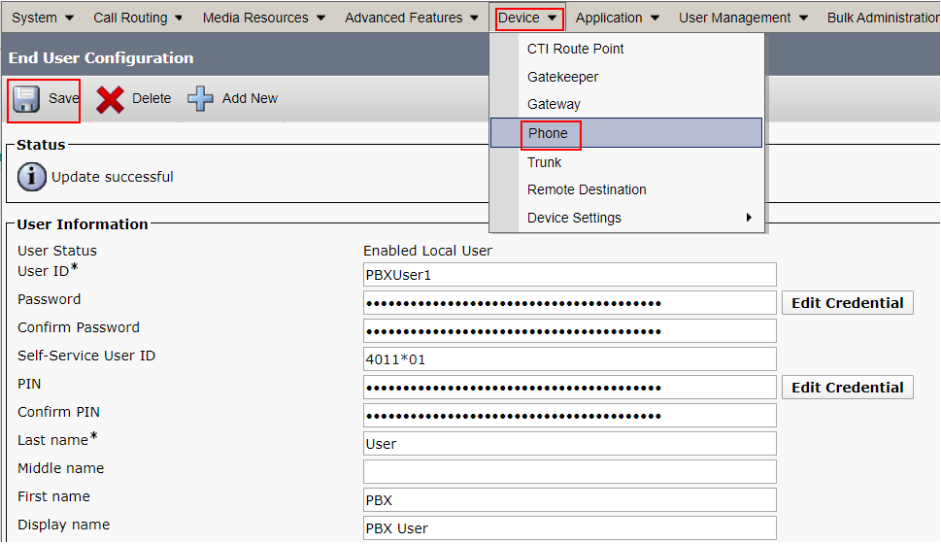
- Once you are on the Find and List Phones page, select Find and select the device you wish to configure.

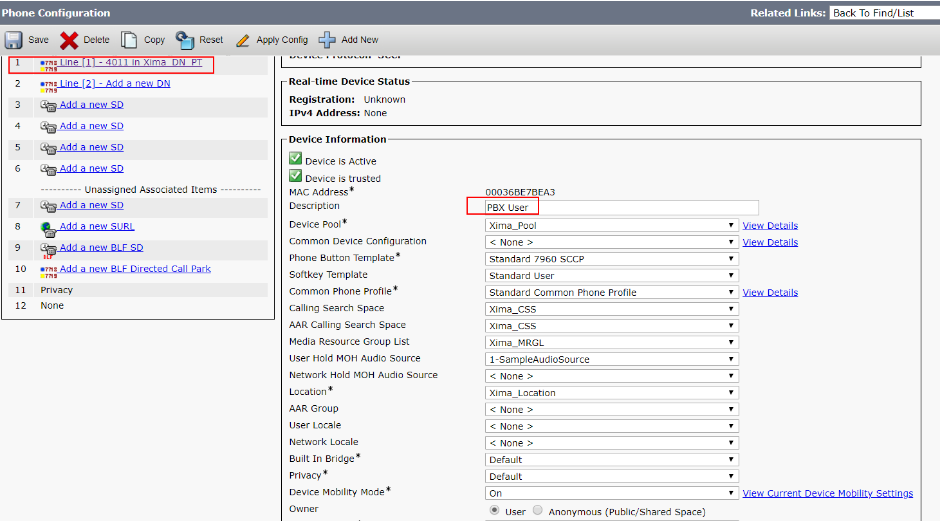
- In the Phone Configuration page, modify the Description, Owner User ID (not pictured), and make sure that Line 1 is the Users' DN (not a Shared Line).
Section 2 - Install Chronicall
2.1 Installation Setup
Default Username is Administrator and default password is password.
Note: This can be changed after the initial setup. (Highly Recommended)
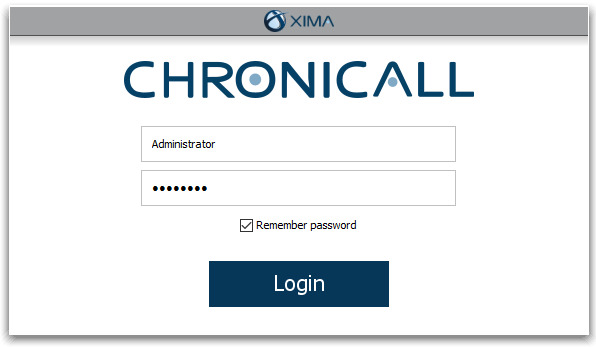
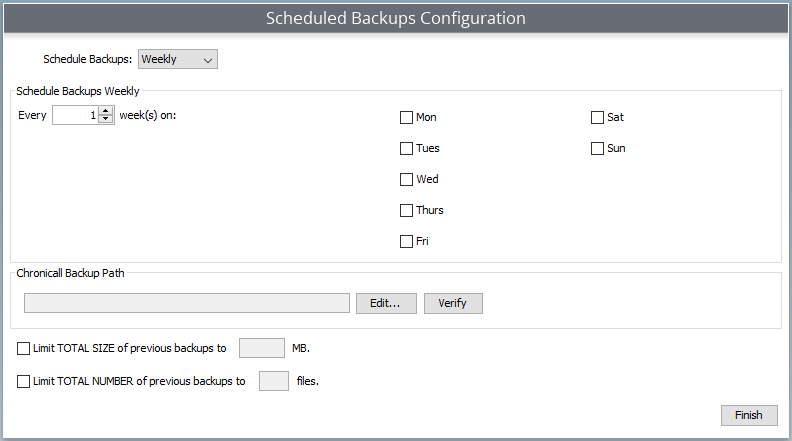
Upon logging in, you may be prompted to configure a scheduled backup. For instructions to do so, please see this article.
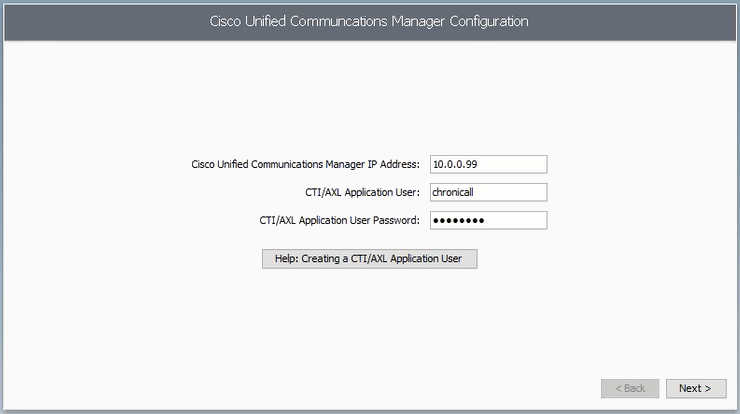
- Enter the IP Address of you Cisco Unified Communications Manager. Enter the username and password you created during Step 1.1. Hit "Next".
Note: If you forgot this step, you can click on the "Help: Creating a CTI/AXL Application User" tab and it will provide you the instructions.
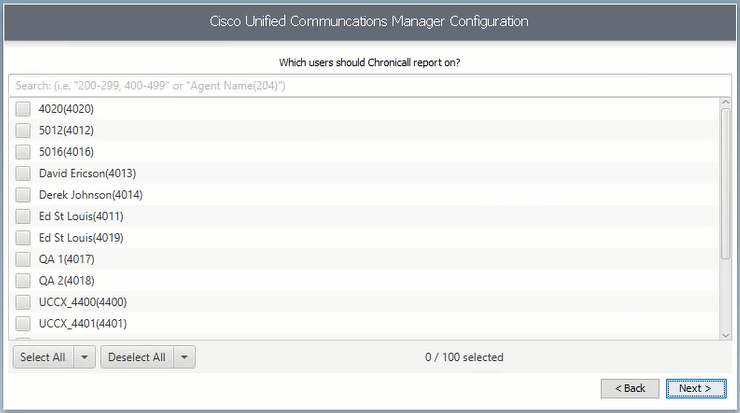
- Select the extensions that you would like Chronicall to report on. Hit "Next".
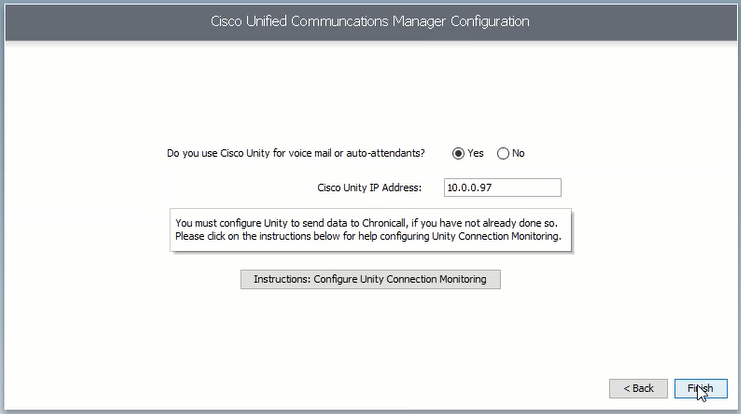
- Enter the IP Address of your Cisco Unity System. You will need to have previously set up Unity Monitoring (outlined in Step 1.2). Hit "Finish".
Note: If you forgot, click on the "Instructions: Configure Unity Connection Monitoring" tab.
- Select the extension(s) you want to monitor in Realtime. Hit "Finish".
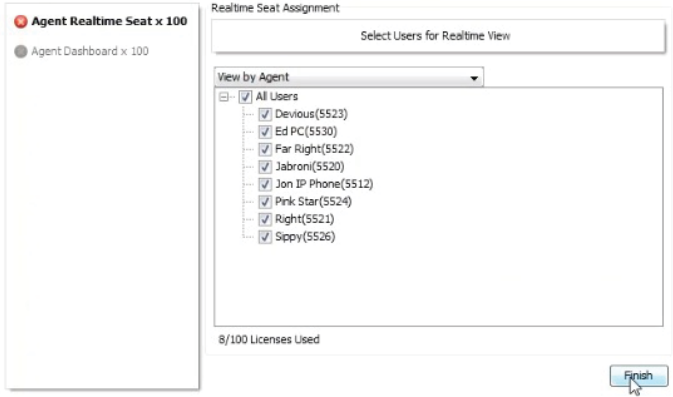
Note: This step requires the Reatime Agent Licenses. If you don't have any Realtime Agent Licenses, you can skip this step.
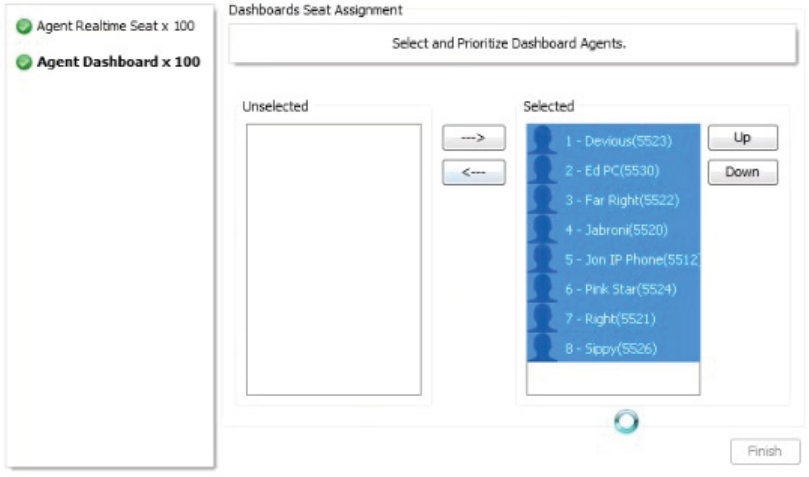
- Select the extension(s) that you would like to assign an Agent Dashboard License.
Note: This requires Realtime Agent Licenses and Agent Dashboard Licenses. If you do not have any Realtime licenses or Agent Dashboard licenses, you can skip this step.
Section 3 - Recording Library Setup
3.1 - Installation Setup
Note: This section requires the Recording Library module. If you have not purchased the Recording Library license, you can skip this section.
- The following setup will help configure Xima's Recording Library. Please assign Recording Library an extension. This will have to fall into the systems extension range and must not be in use by another device. You will also need to select the extensions you wish to record.
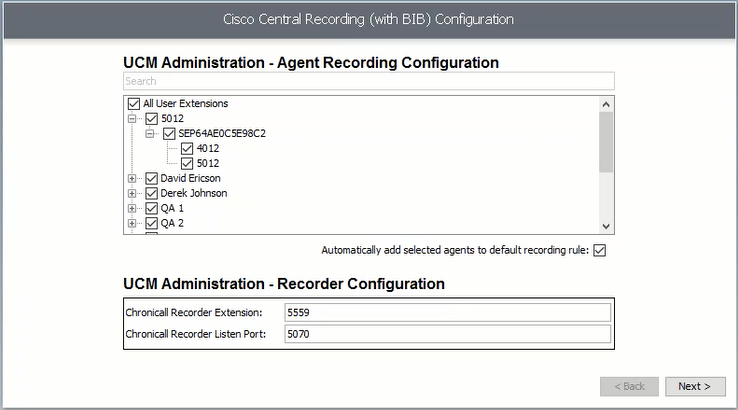
Note: If an extension doesn't appear, it doesn't have a compatible phone/device. See list below for compatible recording devices.
- Select the device pool Chronicall should use.
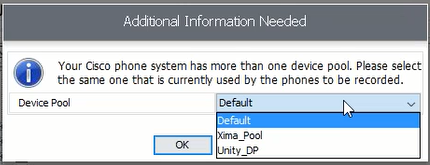
Note: If you don't see this option, you only have one device pool configured, and it will use the default automatically.
- Select the Call Manager Group Chronicall should use.
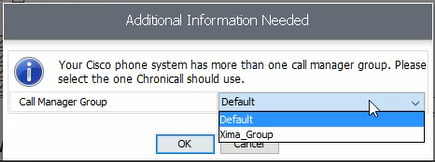
Note: If you don't see this option, you only have one Call Manager configured, and it will use the default automatically.
- Select the appropriate SIP profile that Chronicall should use.
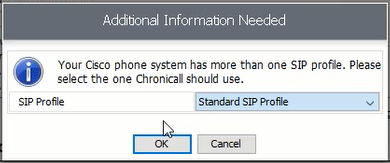
Note: If you are unsure which one to use, select the "Standard SIP Profile".
- Below is a list of commands Chronicall will send to your Cisco system to complete the recording setup.
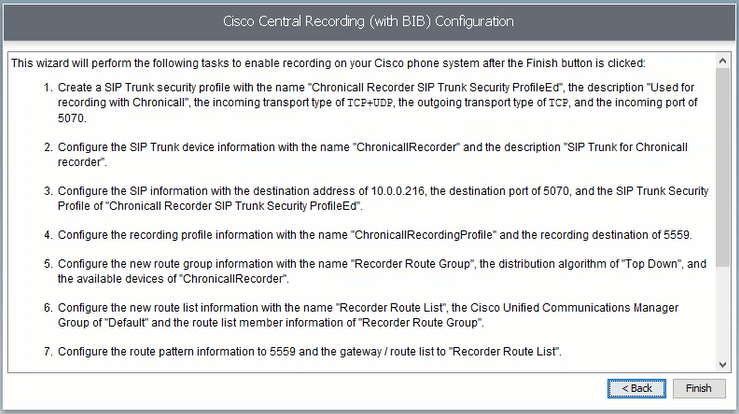
- Hit "Finish."
Note: Part of this will enable Built in Bridge automatically to the phones that will be recorded. Enabling this (if not already enabled) will cause the phones to restart.
For an up-to-date list of supported phonesclick here.
Updated 3 months ago