How to Use WebRTC
This provides information on how to use WebRTC.
To access CCAC using WebRTC, enter in the Avaya Call Reporting DNS URL followed by “:9080/ccagent/login” to go to the main screen. You’ll see a login screen for you to sign into. You can find your name by entering your extension, name, or finding it in the dropdown menu. Your password will usually be your extension unless otherwise specified. There will also be a checkbox with the phrase “Enable WebRTC” next to it. Make sure that box is checked before clicking the “Log In” button.
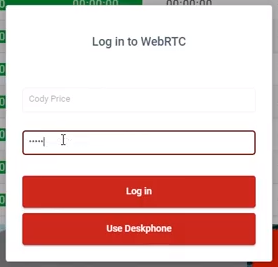
Once you are logged in, you will see a pop up window that will prompt you to enter in a WebRTC password. Your password is the phone password configured within IP Office. Once you enter that password, select “Log In.”
In the left sidebar, you have a few options. First, you can turn on and off Contact Center Do Not Disturb (CC-DND) by moving the toggle next to “Channel States.” When the toggle is gray, you are on CC-DND; when the toggle is red, you are not on CC-DND.
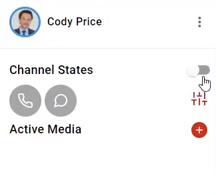
When you go on CC-DND, a window will pop up that allows you to select your reason codes. Reason codes are configured within the Administration of Avaya Call Reporting.
Second, you can turn on your voice channel by clicking on the phone and/or chat icons located below “Channel States.”
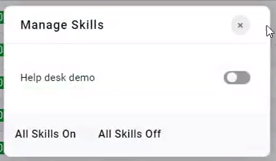
Third, you can log in to your skill groups by clicking the icon directly below your DND toggle. A window will pop up where you can toggle which skills you would like to be logged into. In this window, you can also log in and out of all skills simultaneously by clicking “All Skills On” or “All Skills Off.”
Finally, you can make an outbound or internal call by clicking the plus (+) icon next to “Active Media” and then selecting “New Call.” A window will pop up to help you start a new call.
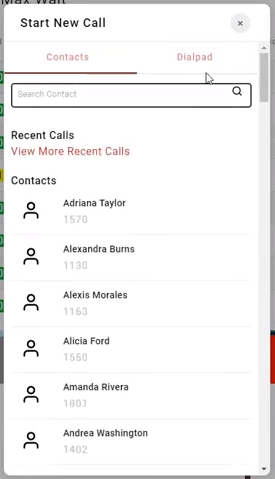
In the WebRTC mode, your new call will run in a softphone mode. You can either select other extensions to dial from your Contacts tab, or you can tab over to the Dialpad tab and enter the number you would like to dial. To call, click the blue phone icon that will appear at the bottom of this window. A new window will then pop up asking which skill groups you would like to be associated with the call, if any.
If you would like certain skill groups to be associated with the call, select those skill groups, or if you do not want any skill groups associated, click the “Close” button.
Now your call will begin. Once your call is connected to a line, you have a few options. You can mute the call by selecting the microphone icon, you can place the call on hold by selecting the pause icon, and you can transfer the call to another user by selecting the plus icon. When selecting this final icon, a window will pop up where you can select which user you would like the call to be transferred to, or enter an external number.
In the top right-hand corner of your call, you will have a few more options. You can record the call by clicking the red dot record button. This will give you the option to record the phone call from the beginning, or to record the call from the current time you clicked the record button. To record from the beginning, this must be enabled under the Recording Library. The option to record is only available if you are using Avaya Call Reporting call recording. If calls are set to be recorded, it will record automatically and the agents will have the ability to pause the recording.
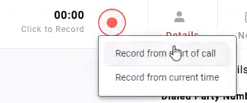
In the right sidebar, you’ll see your last set of options.

In the Details tab, you can see the customer details such as wait time, call direction, dialed party number, and more. In the Notes tab, you can add notes to the call if there is something you want to keep track of. In the Codes tab, you can post account codes to your call by clicking open the options bar near the bottom of the page.
Once you are done with your call, simply click the end call button.
After Call Work Timer
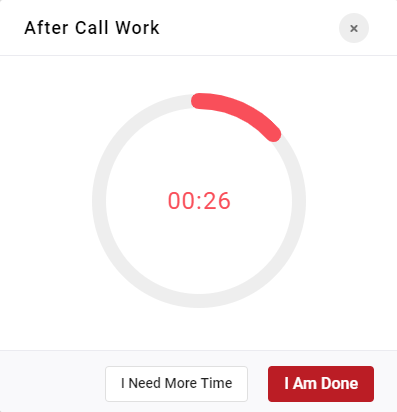
Following a Contact Center call, an agent may receive an after call work timer. This allows the agent to finish any notes or other activities before they will be presented another call. They can request more time. These time settings are set by an Administrator.
Missed Call Work Timer
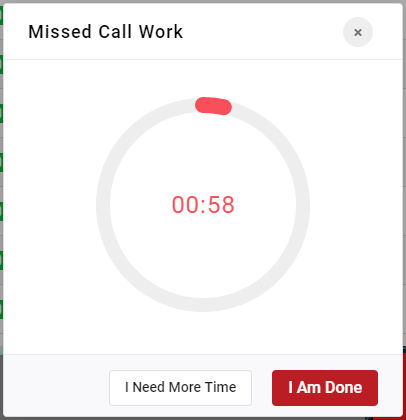
This works similar to After Call Work but will pop up if an agent misses a Contact Center call. This is also set by an Administrator. Agents can request more time or make themselves ready by selecting “I Am Done.”
Assigning a Wallboard for Agents using Contact Center Agent Client (CCAC)
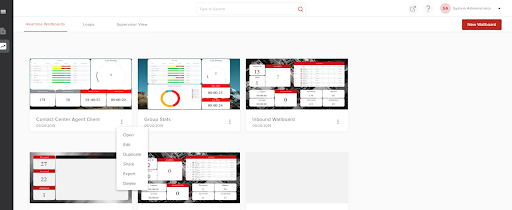
You will configure the Agent Wallboards within the Web Interface of Avaya Call Reporting. To access the web interface, enter in the Avaya Call Reporting IP Address or DNS URL followed by “:9080/web” to log in. Select Realtime > Wallboards. You can configure a custom wallboard or use a template. Once you have configured your wallboard, you will then share that wallboard with a role. Roles are a grouping of users and in this case, you should create a role with the agents you wish to share this wallboard with. You create roles within the Avaya Call Reporting Administration. You can share multiple wallboards with the agents and they can toggle between the different wallboards.
Contact Center Agent Client (CCAC) Menu Options
View Wallboard: Allows the agent to go back to their wallboard at any point while on an active media (phone call or web chat)
View History: View and select previous calls and chats
Language: Update CCAC to be displayed in a different language. Please note, this will not update the wallboard. To update the wallboard language, you should update the language pack within the Web Interface of Avaya Call Reporting.
Notifications: Turn on the different pops within CCAC
Help: Online help menu
Change Password: Changes the initial agent password. This will not change the WebRTC password. That should be changed within IP Office.
Logout: Logs the agent out of CCAC
Using Contact Center Agent Client (CCAC) in a Desktop Mode
To access CCAC, enter in the Avaya Call Reporting IP address or DNS URL followed by “:9080/ccagent/login” to go to the main screen. You’ll see a login screen for you to sign into. You can find your name by entering your extension, name, or finding it in the dropdown menu. Your password will usually be your extension unless otherwise specified. There will also be a checkbox with the phrase “Enable WebRTC” next to it. Do not check that box. This will log you into CCAC. All the same features are available with the exception of controlling the audio (making and receiving calls) through the client. In this mode, it will interact with your desk phone. You may use CC-DND to put yourself into a busy state for Contact Center calls, or you may use DND to put yourself into a busy state for all calls.
Updated 3 months ago