Event Sequence Call List
The Event Sequence Call List report allows you to find calls by specifying a particular sequence of events.
For example, by entering a talking event followed by a hold event, you would be able to find calls that were answered and then placed on hold at some point afterward.
The report columns list general information about each call, including the internal and external parties involved, the first agent and Hunt group to participate in the call, and the call's start time and total duration.
The Event Sequence Call List report is a Detailed report. This means that every line of the report represents one phone call. Furthermore, as a Detailed report, each line on the report will represent one individual call and will provide details for each call. Each line provides a Call ID. The Call ID is a number that is associated with the call in the Chronicall database. It is a useful number because once the report is run, you can copy the Call ID for any call found on the report, take it to Cradle to Grave for the same time frame, paste it in the Quick Search tool (look for the magnifying glass icon in the top left-hand corner of Cradle to Grave), and it will take you directly to the call. This will then allow you to see the detailed events of the call.
Screenshot
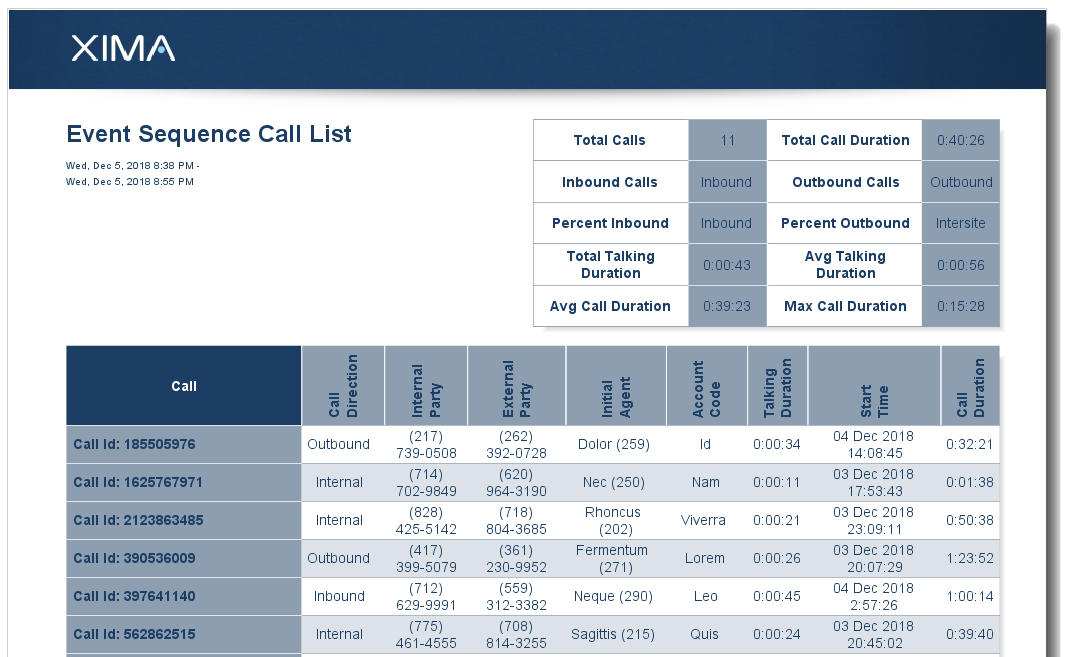
Column Descriptions
Call
Displays the call's Call ID. A Call ID is an ID number that corresponds to the calls within the database.
Call Direction
Shows whether the given call was an inbound, outbound, internal, or intersite call.
- Inbound - When an external party calls you. The call originates outside of your system and comes into your phone system.
- Outbound - When you call an external party. The call originates inside your system but goes outside of your system.
- Internal - When you dial another person by their extension in the organization. The call originates in your system but stays in your system (extension to extension).
- Intersite - This is very uncommon and is there forLegacy Versions prior to Chronicall release 3.6. Intersite calls occur when a call starts in one of your phone systems and connects to another system on the same network. You will only see intersite calls if you have set up Chronicall to record data from multiple locations.
Internal Party
Shows the phone number of the internal party associated with this call.
- For inbound calls, this shows the number the caller dialed.
- For outbound calls, this shows the number that the agent dialed.
- For internal calls, this field is blank.
External Party
Shows the phone number of the external party associated with the given phone call.
- For inbound calls, this is the number of the person calling in.
- For outbound calls, this is the number that the agent dialed.
- For internal calls, this field is blank.
Initial Agent
Shows the first agent that participated in the given call.
Account Code
Shows the account code that is associated with the given call. For more information on how to configure account codes see Account Codes.
Account Code RequirementsAccount codes are generally associated with the Agent Dashboards module and requires the associated module license. This means that if the Agent Dashboards license has been purchased and account codes have been configured, then the column will display the account code information. If the Agent Dashboards license has not been purchased, then the report can still be used; however, the Account Code column will be left blank.
Talking Duration
Shows the total duration of all talking events in the given call.
Start Time
Shows the date and time that the given call started.
Call Duration
This shows the entire amount of time between when the call started and ended. This is how long the call lasted.
Event Sequence Editor
The Event Sequence filter uses an event sequence editor to allow you to create your desired sequence of events. This allows you to specify event sequences in great detail. This editor can be opened by pressing the button to the far right of the filter.

To create your sequence of events, you will first need to create a list of events to choose from. To add to the list of events, select "Add" on the open window.
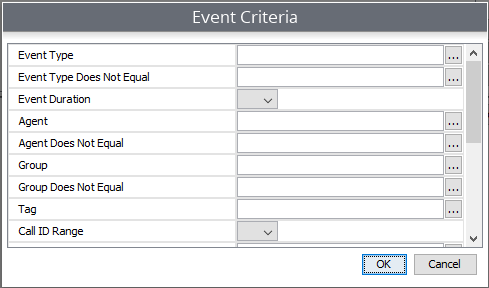
An "Event Criteria" window will now open. From here, you can select your "Event Type" as well as any other criteria that you would like to add to the event. (i.e., event durations, specific agents/groups, etc.).
As you add your list of events, they will display in the event section of the window. From there, you can start to build your sequence.
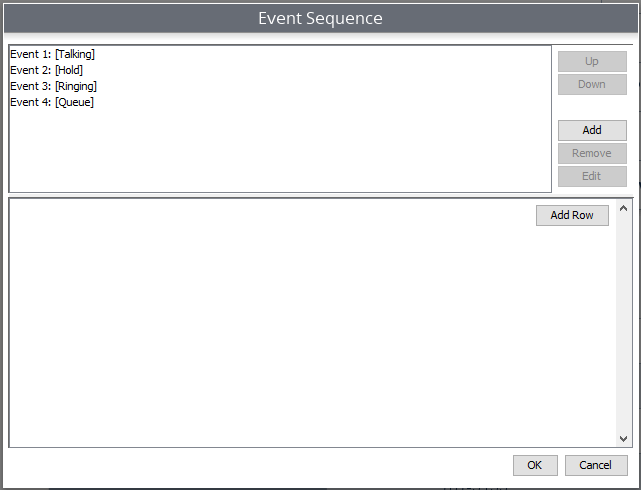
Building the event sequence
Once you have defined your events, you can now build your sequence. Start by selecting "Add Row" on the right-hand side.
- From the first drop-down, select the first desired event.
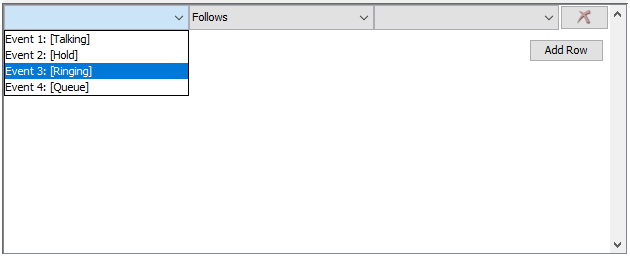
- From the second drop-down, select the desired sequence action.
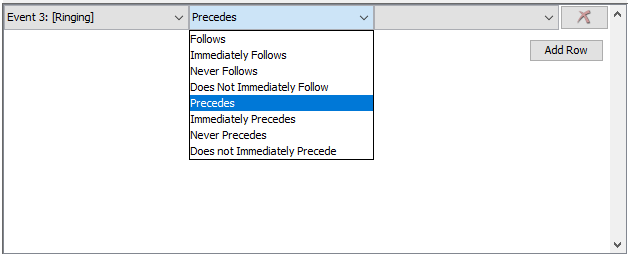
- From the third drop-down, select the second desired event.
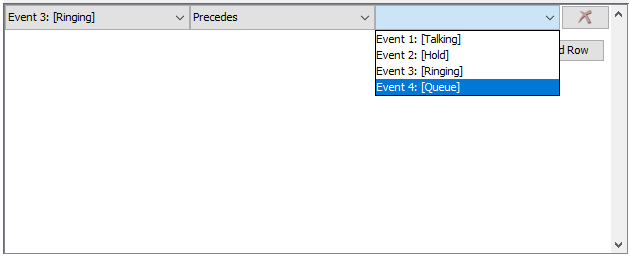
Once you've added your first sequence, you can either hit "OK" to finish, or hit "Add Row" again to add the next portion of the sequence.
You can add as many steps to the sequence necessary.
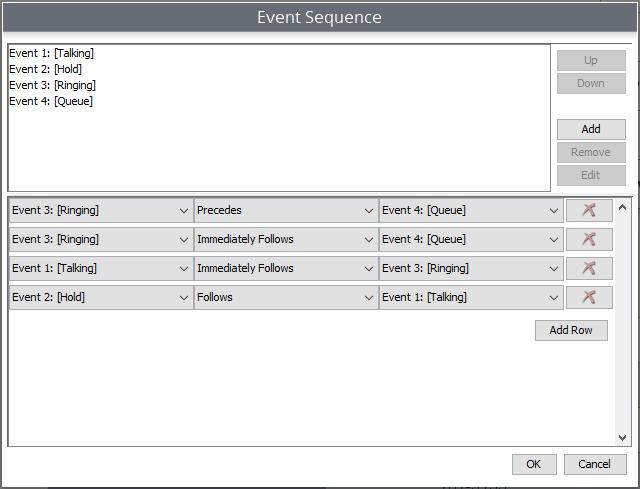
Once your sequence is finished, hit "OK" and run the report as normal. Using the Event Sequence tool will ensure that the report will only display calls that fit the exact sequence established in the Event Sequence window.
Updated 3 months ago