VRTX Configuration
The VRTX is a small line side recording device that is simple to configure and makes it easy to access any call recording. It works with PRI/T1, SIP, and E1 trunks.
After following three short set-up steps, your VRTX recording solution will be installed and ready to record and report your calls. Once installed, VRTX takes those recorded calls and makes them available to listen from the Cradle to Grave interface, making retrieving those recordings simple.
Once the VRTX device has been installed, configuration within Chronicall is quick and easy.
Note: We recommend installing your device during a period of low call volume, such as after hours, to avoid missing calls and call data.
VRTX Anatomy
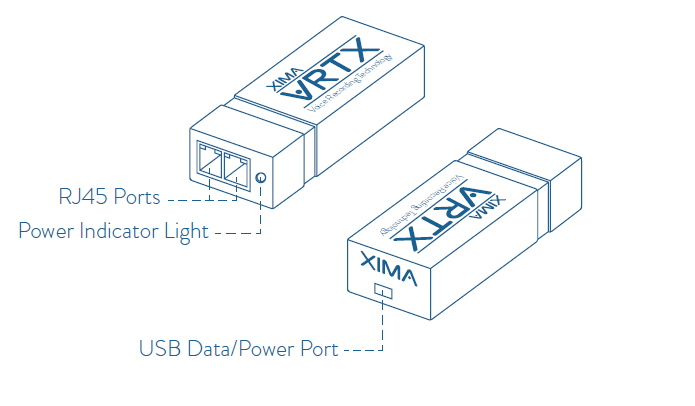
The VRTX box is small and discrete, roughly the size of a whiteboard eraser.
On one end of the box you will see three features:
- Two RJ45 Ports
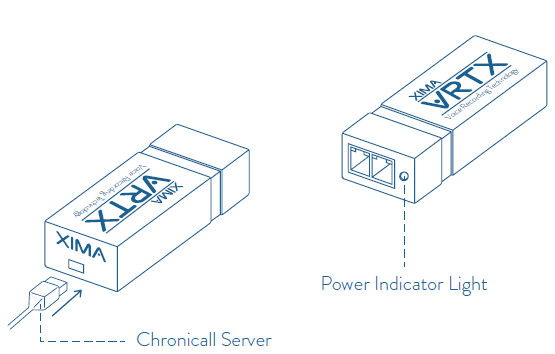
- One Power indicator light. (This signifies that the VRTX is connected and is ready to record calls)
The other end will provide a port for a USB 2.0. This provides two functions:
- Connects directly with the Chronicall server
- Provides power to the VRTX box
Note: *The VRTX box is a passive device. This means that if the power gets disconnected, the recording will stop, however, there will be no interruption to your call flow.
VRTX PRI/T1 Device Setup
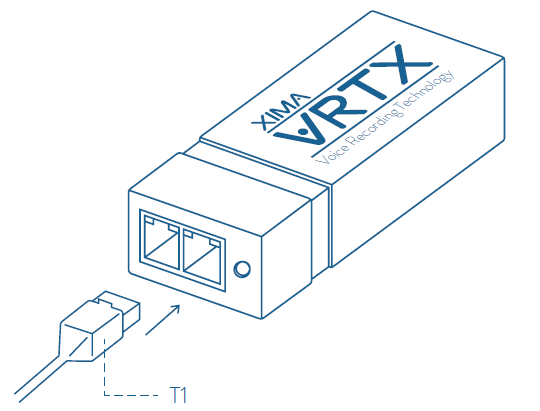
Step One:
Connect your phone line (PRI/T1) to either of the RJ45 ports.
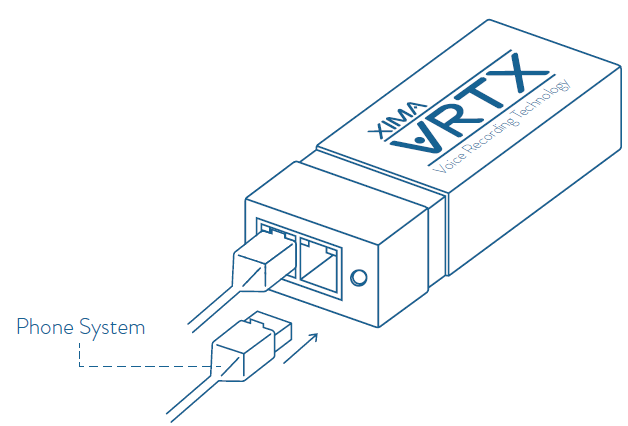
Step Two:
Connect your phone system (NIU) to the other RJ45 port.
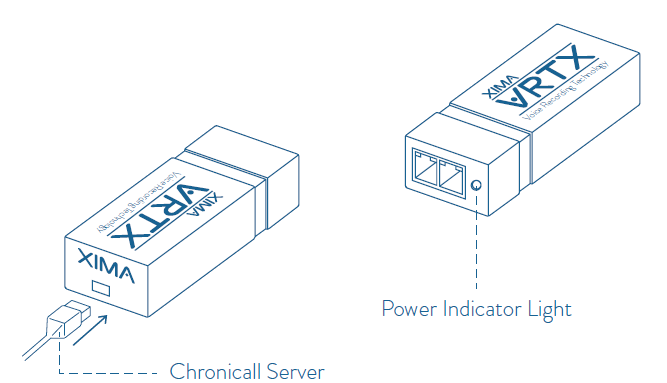
Step three:
Connect to your Chronicall server with a USB 2.0 cable. Ensure that the Power Indicator Light has turned on.
VRTX SIP Device Setup
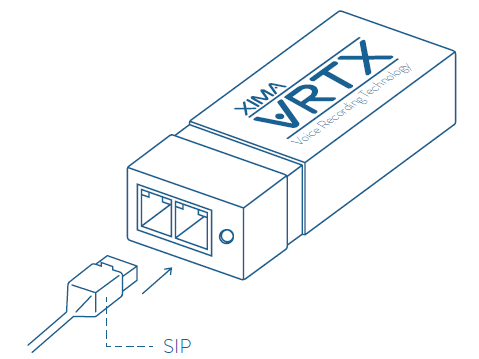
Step One:
Connect your phone line (SIP) to either of the RJ45 ports.
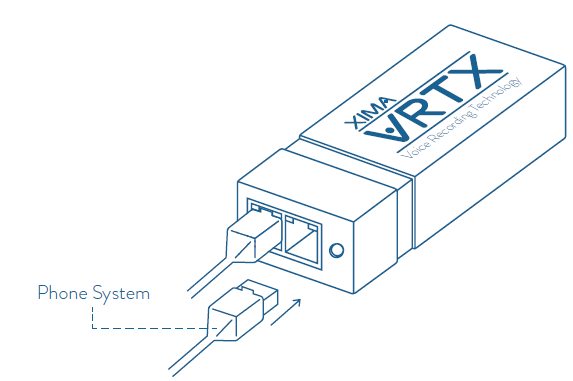
Step two:
Connect your phone system (NIU) to the other RJ45 port.
Step three:
Connect to your Chronicall server with a USB 2.0 cable. Ensure that the Power Indicator Light has turned on.
Configuration within Chronicall
Once the VRTX box has successfully been installed, it will need to be configured within the Chronicall System Settings.
Install the VRTX Driver
Part of the installation will require you to download the VRTX drivers. You can download the VRTX from our Downloads page here.
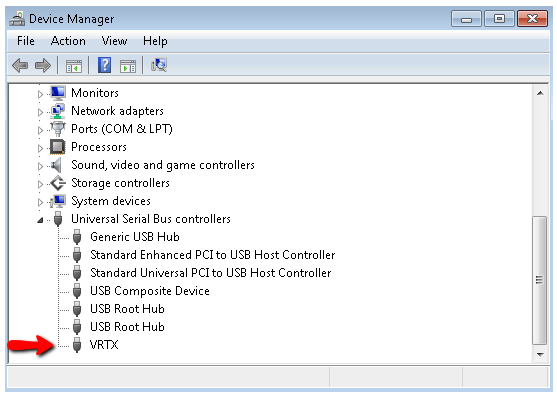
Once downloaded, run the installer and follow the installation wizard. This should only take a minute or two. Once the installer is complete, open up Device Manager and confirm that the VRTX shows up in the USB section.
Install Recording Library
Scenario A: Chronicall and the Recording Library will share the same server.
If Chronicall and the Recording Library will share the same server, then the Recording Library may already have been installed. You can verify this by opening the server's local services and verifying that the Chronicall Recording Library service exists. If the Chronicall Recording Library service is not on the server, then you can install it by downloading and running the Chronicall Apps Setup. You will be given several options for different apps to install, you will need to install the Recording Library.
Note: Downloading the Apps Setup file will require your Chronicall Serial Key.
Scenario B: Chronicall and the Recording Library willnot share the same server.
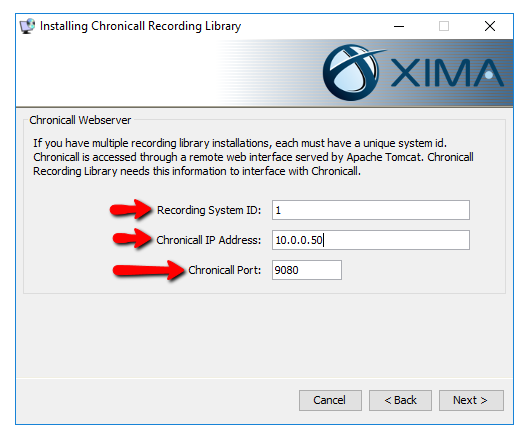
It is possible to install Recording Library on a server where Chronicall is not installed. This requires a separate setup file called "Apps Setup" to be installed on the server. The setup file is available from the Chronicall Downloads page. During the install, be sure to enter the Chronicall Server IP Address and change the other settings if necessary.
Configure the Recording Library
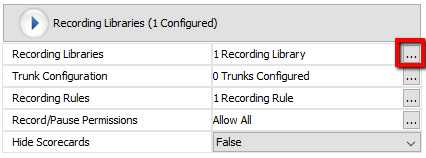
Once Recording Library is installed, open Chronicall and go into System Settings > Recording Libraries. Then click on the ellipses button ("...").
Click "Add."
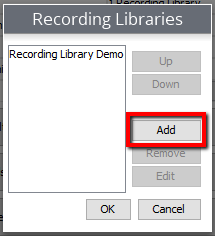
Note: As seen in the example above, a Recording Library may have already been created by default, however, it can be edited. To edit the existing default Recording Library, select it, then hit "Edit."
Select the Recording Library Type that applies, either "Xima VRTX Only" or "VM Pro or VRTX."
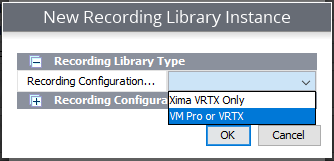
Once the Recording Library Type has been selected, hit "OK."
The New Recording Library Instance properties will now appear. You will now need to edit the following fields:
- Recording Library IP Address: Enter the IP Address of the server where the Recording Library was installed.
- Chronicall Server IP Address: Enter the IP Address of the server where Chronicall was installed.
- Recording Storage Location (optional): Configure where the Recordings will be stored. This defaults to be in the Recording Library directory.
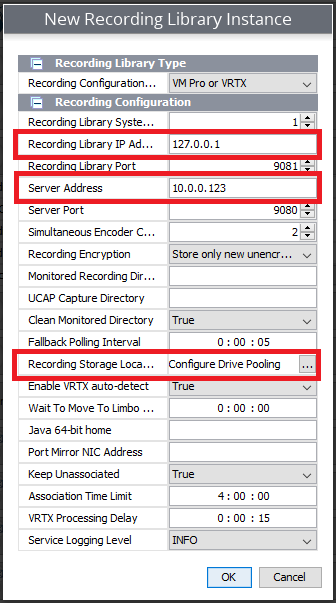
Once configured, hit "OK" and make sure to hit "Save" to save the changes.
Note: For more information on Storage Pools, seethis article.
Furthermore, if your hard drive is not very large then you should configure a storage pool that stores recordings onto another drive or another server. To see recommended storage seethis article.
Configure the Trunk
Now we need to tell Chronicall what trunk the VRTX is plugged into. Do this by going into System Settings > Recording Libraries > Trunk Configuration ellipses ("...") button.
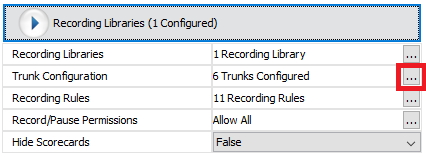
Find the Trunk that the VRTX is plugged into, then select it and press "Edit."
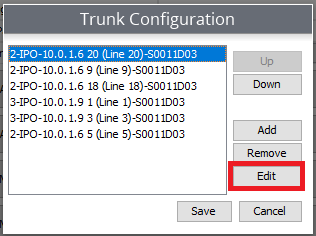
Note: If the Trunk does not appear, seethis article.
Update the Trunk Configuration page to have the correct information. A description of each field is below.
- Trunk Title: Used to rename the trunk.
- Device ID: Select the PBX that manages the specified trunk.
- Line ID: This number should match the trunk number.
- Channel Range: This specifies the channel range on the trunk. You can press "Detect" to determine what the range should be.
- VRTX Serial: This is where you enter the serial number on the VRTX. Often you can click in the field and the VRTX Serial will appear as an option.
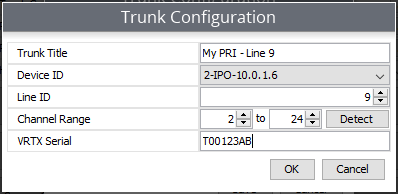
Once completed, press "OK." Then, "Save" the Trunk Configuration, then Save System Settings.
Create a Recording Rule
Our final step is to create a Recording Rule. This will determine which calls should be recorded.
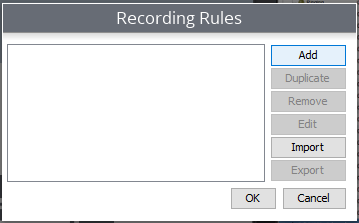
To access Recording Rules, go to the Recording section on the Chronicall main menu. Select "Manage Recording Rules."
Once the Recording Rules appear, select "Add."
You will now be shown a window with a list of Recording Rule options.
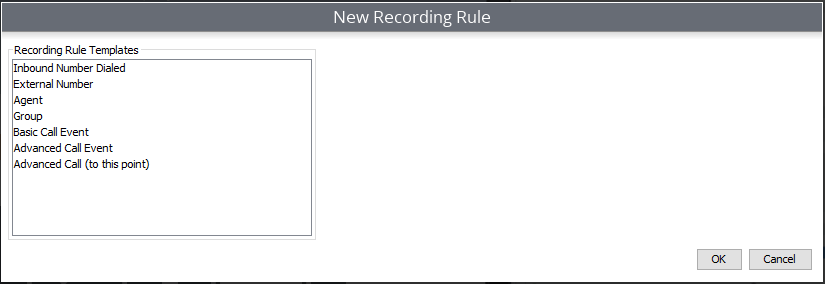
Inbound Number Dialed: Records the number that a client will dial to get into your phone system
External Number: Records numbers that are not a part of your phone system (Inbound and Outbound Calls)
Agent: Records the desired agents/extensions (Inbound and Outbound Calls)
Group: Records the desired Hunt/Work groups (Inbound and Outbound Calls)
Basic Call Event: Allows you to select Groups/Agents but also allows you to select call direction
Advanced Call Event: Allows for very specific recording of calls with defined events (Similar to setting Cradle to Grave filters)
Advanced Call (To this point): Allows for very specific recording of calls with events up to a certain point. (i.e., record this agent until they transfer the call)
Recording Rule Example 1 - Recording Agents/Extensions
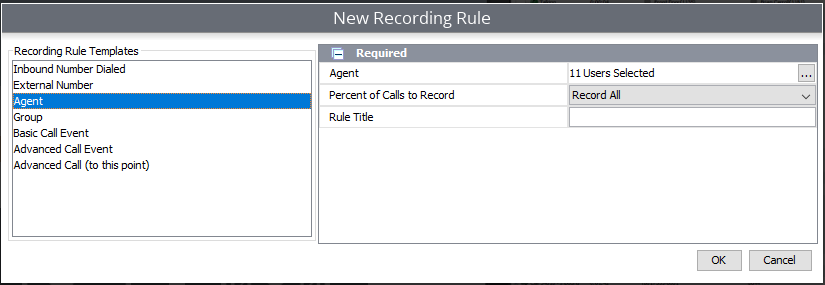
- To the right, select the ellipses, then select the Agents/Extensions that you would like to record.
- From the drop-down, select the percent of calls that you would like recorded.
Note: You can also select "Record None" which means that the selected extensions will never be recorded.
In situations where one extension is set to record and the call is transferred to an extension that is set to never record, the extension that is set to record will be recorded, however, the extension set to never record will not be recorded.
- Name your Rule, then hit "OK."
Once completed, press "OK" to save the new rule, "OK" to save the collection of rules, and then Save the System Settings.
Updated 3 months ago